Static IP Configuration
This guide explains about static IP configuration, which allows you to fix your device's IP address.
It is useful as the user does not have to re-enter the terminal IP address each time the IP address changes.
By default, device uses dynamic IP address which is assigned by the network router and therefore the IP address changes over time.
To configure a static IP address, on the iPad, go to Settings as shown in the image below.
![]()
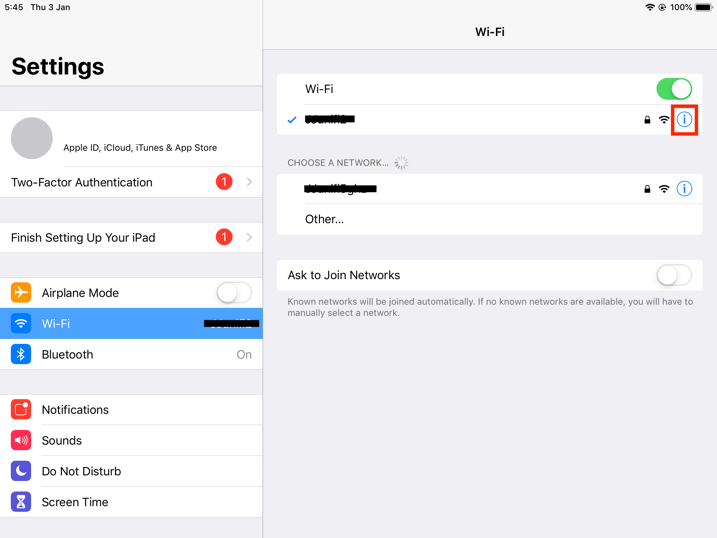
In the Settings homepage, tap on "Wi-Fi".
Upon tapping on "Wi-Fi", the screen will show the network that the iPad is connected to.
Tap on the info icon on the right.

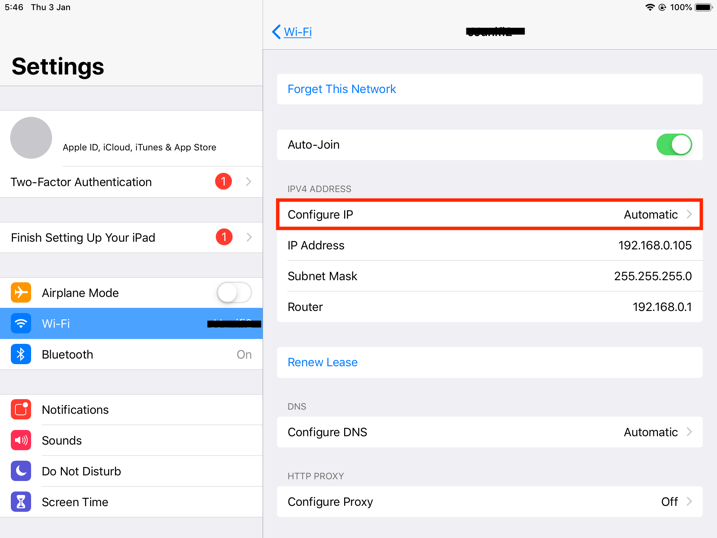
Upon tapping on the info icon, the screen will show the details of the connected Wi-Fi as the image below.
Then, tap on "Configure IP".

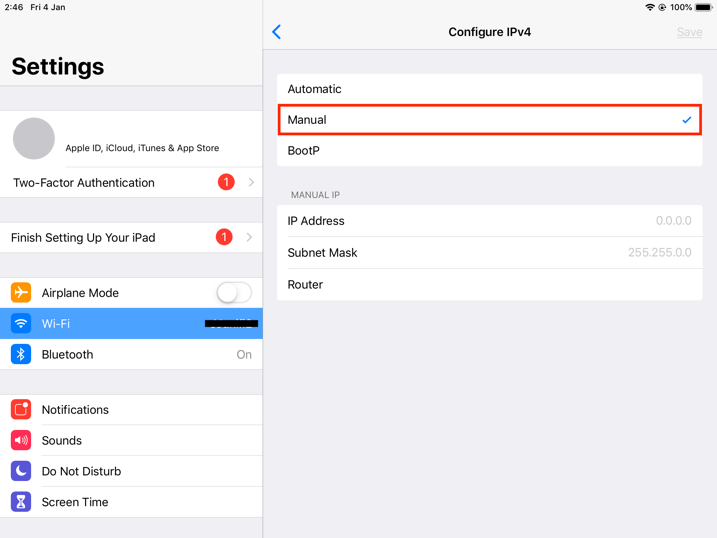
Proceed to tap on "Manual".
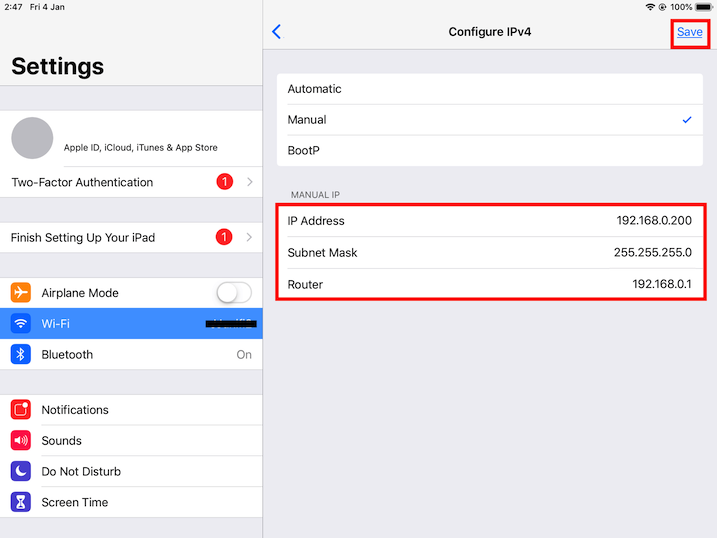
Upon tapping on the manual, users will need to insert the IP Address, Subnet Mask and Router info as shown in the image below.

The image shown below is the example of static IP configuration details.

Before entering the manual IP address, first, you have to find out what the router IP address is.
You can find that in the 3rd image in this guide, and in this example it is '192.168.0.1'.
Based on that, our first 3 sections of the IP address is fixed to "192.168.0" as devices from different subnet cannot communicate with each other.
Only the last digit can be altered between 2 - 254 as the router is already using 1.
In this case, we use "192.168.0.200" to avoid any other devices that are connected to the router having the same address.
Typically, the router will automatically assign connected devices to an IP address starting from 100, hence using 200 would be a safer option.
For the subnet mask, just key in "255.255.255.0".
The router IP address will be "192.168.0.1" for this example.
Lastly, click on Save then you may test out the connection.