Payment Types
General
MobiPOS integrates up to 20 payment types.
If the payment type is deleted or modified, it will affect past report reading.
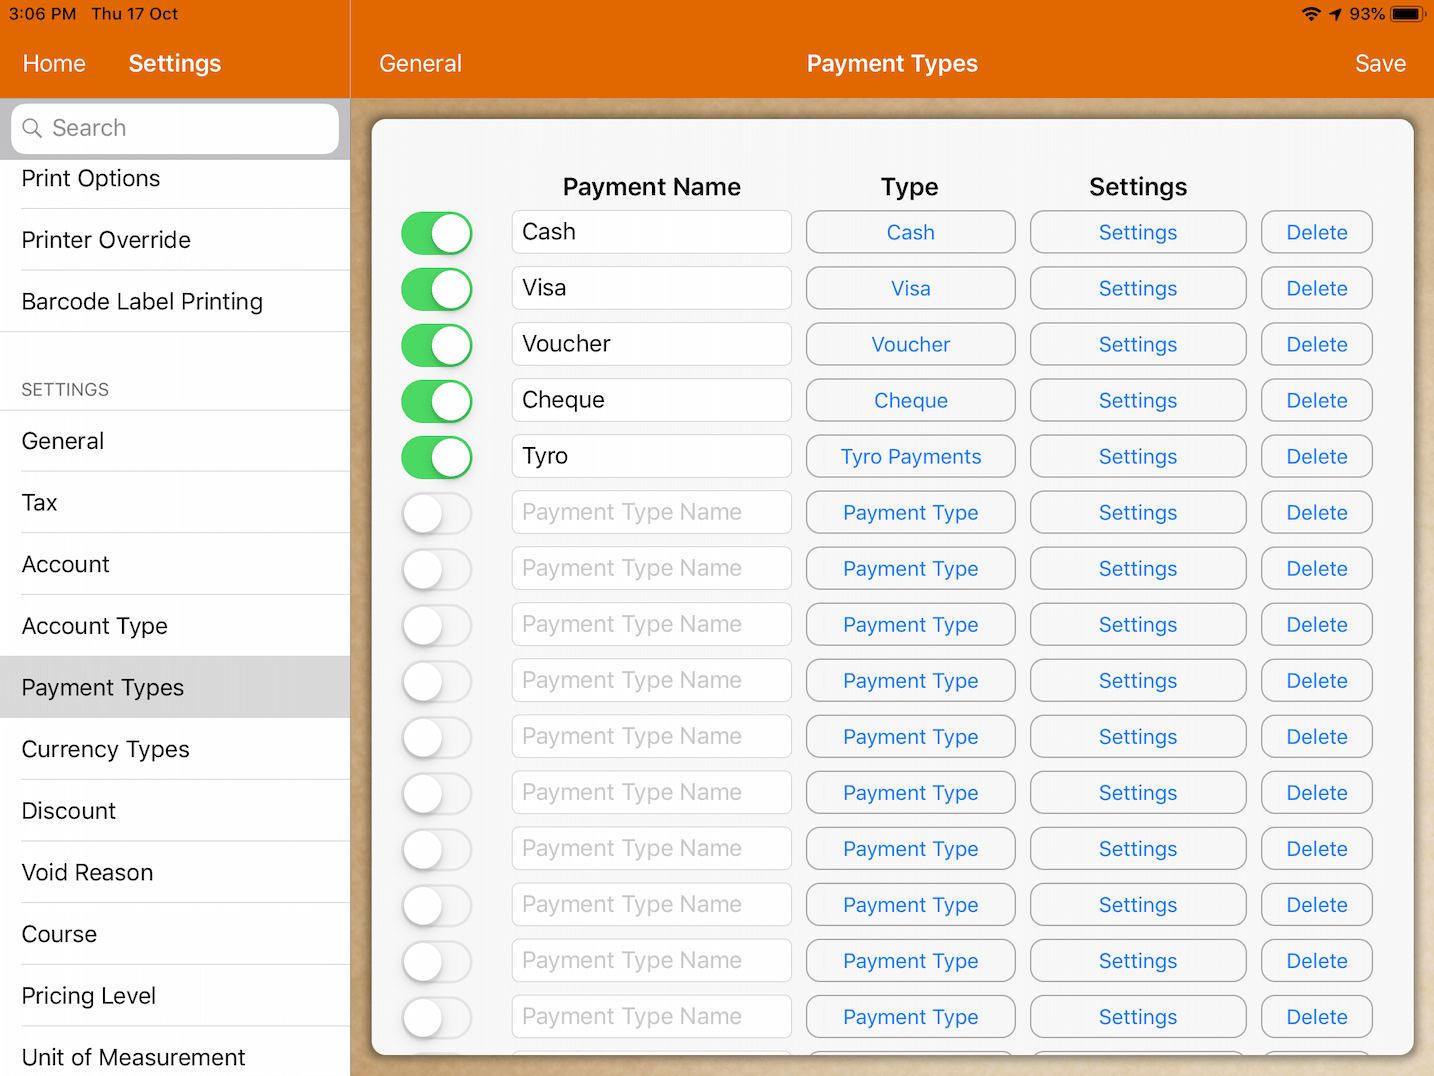
Types
Cash
If the payment is set as cash, payment closed with this payment will affect the till balance.
Visa / Master
If payment is done using credit cards, the payment type can be set to either visa or master.
However, using either type will not affect the functions of payment as the categorisation is merely for reporting purposes.
Cheque
Cheque functions are currently unavailable.
Voucher
Voucher as a payment type must be set up according to the application of the voucher.
The configuration of two voucher payment types are stated as below:
Non-Refundable Voucher For a non-refundable voucher whereby the sum of a transaction is not repayable or returnable in any circumstances, user should configure "Payment Type" in settings to "Voucher".
Hence, any balance from the voucher used upon check-out will be forfeited.
Changing the setting is important as it will be reflected in daily reporting.
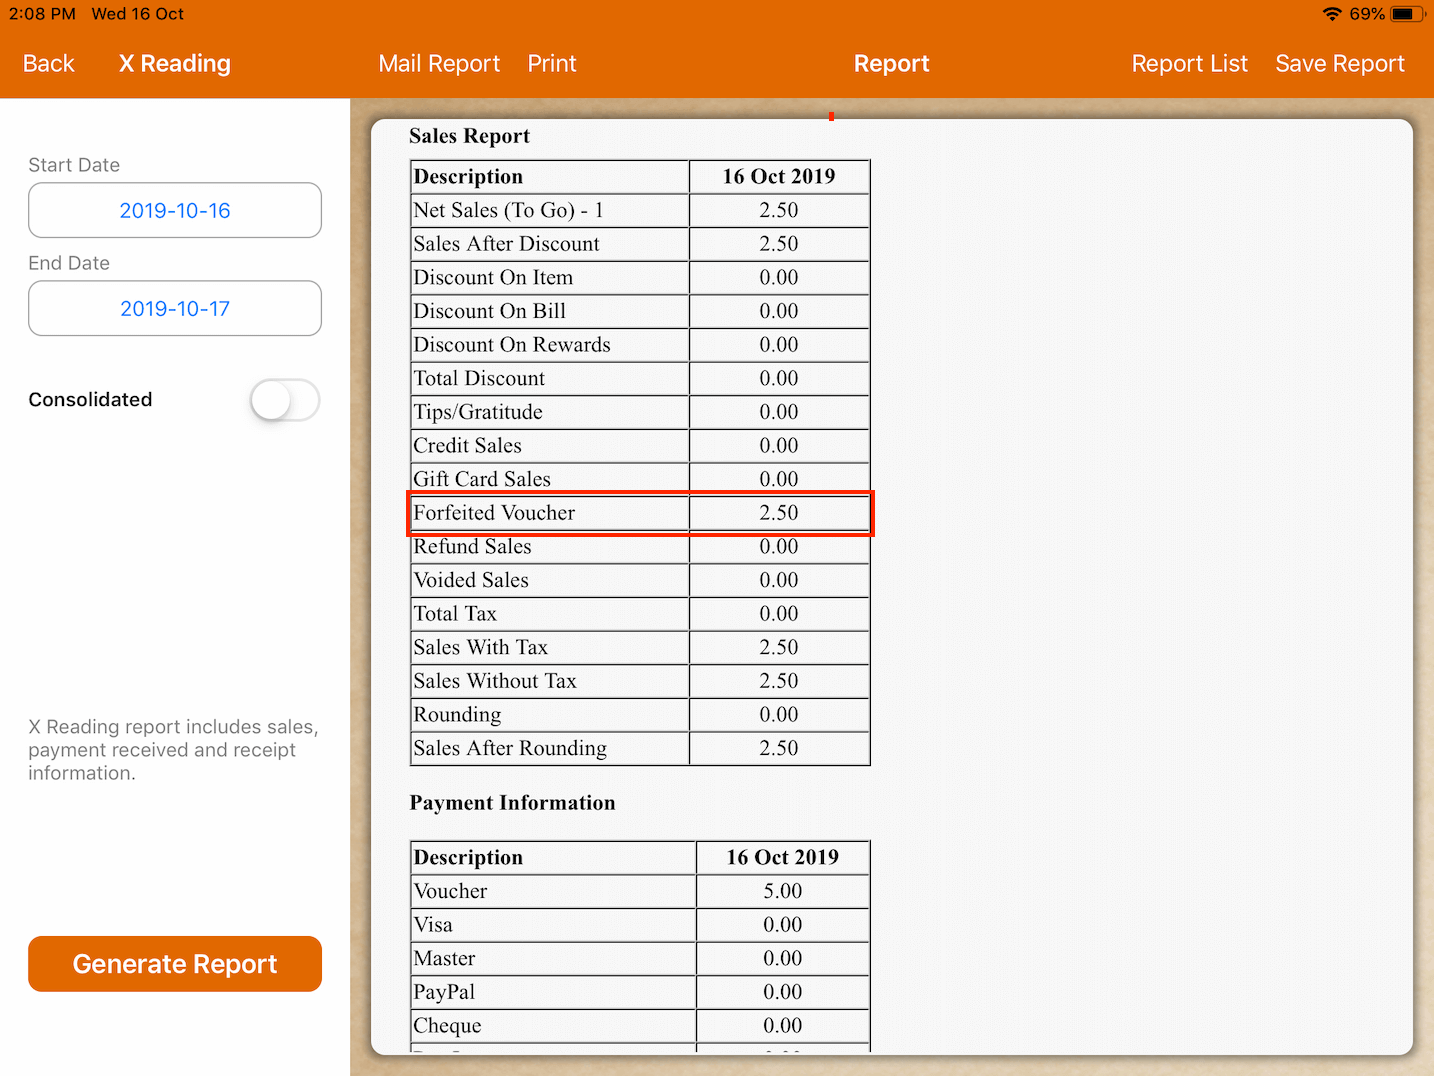
The amount will be stated under "Forfeited Voucher" in your daily sales report as portrayed below.
The image shows payment for a $2.50 item using a $5.00 voucher.
There is a supposed balance of $2.50 to be returned to the customer.
But due to the configuration of voucher as the payment type, the balance is automatically forfeited and no balance is returned to the customer.
Refundable Voucher
A refundable voucher is used similarly to cash therefore, "Payment Type" should be set to "Cash" instead.
When customer applies voucher upon checkout, the supposed balance will be returned and daily report will reflect sales amount according to the transaction.
- For utilization and setup of MobiPOS integrated payment systems, navigate through the tabs above.
Settings
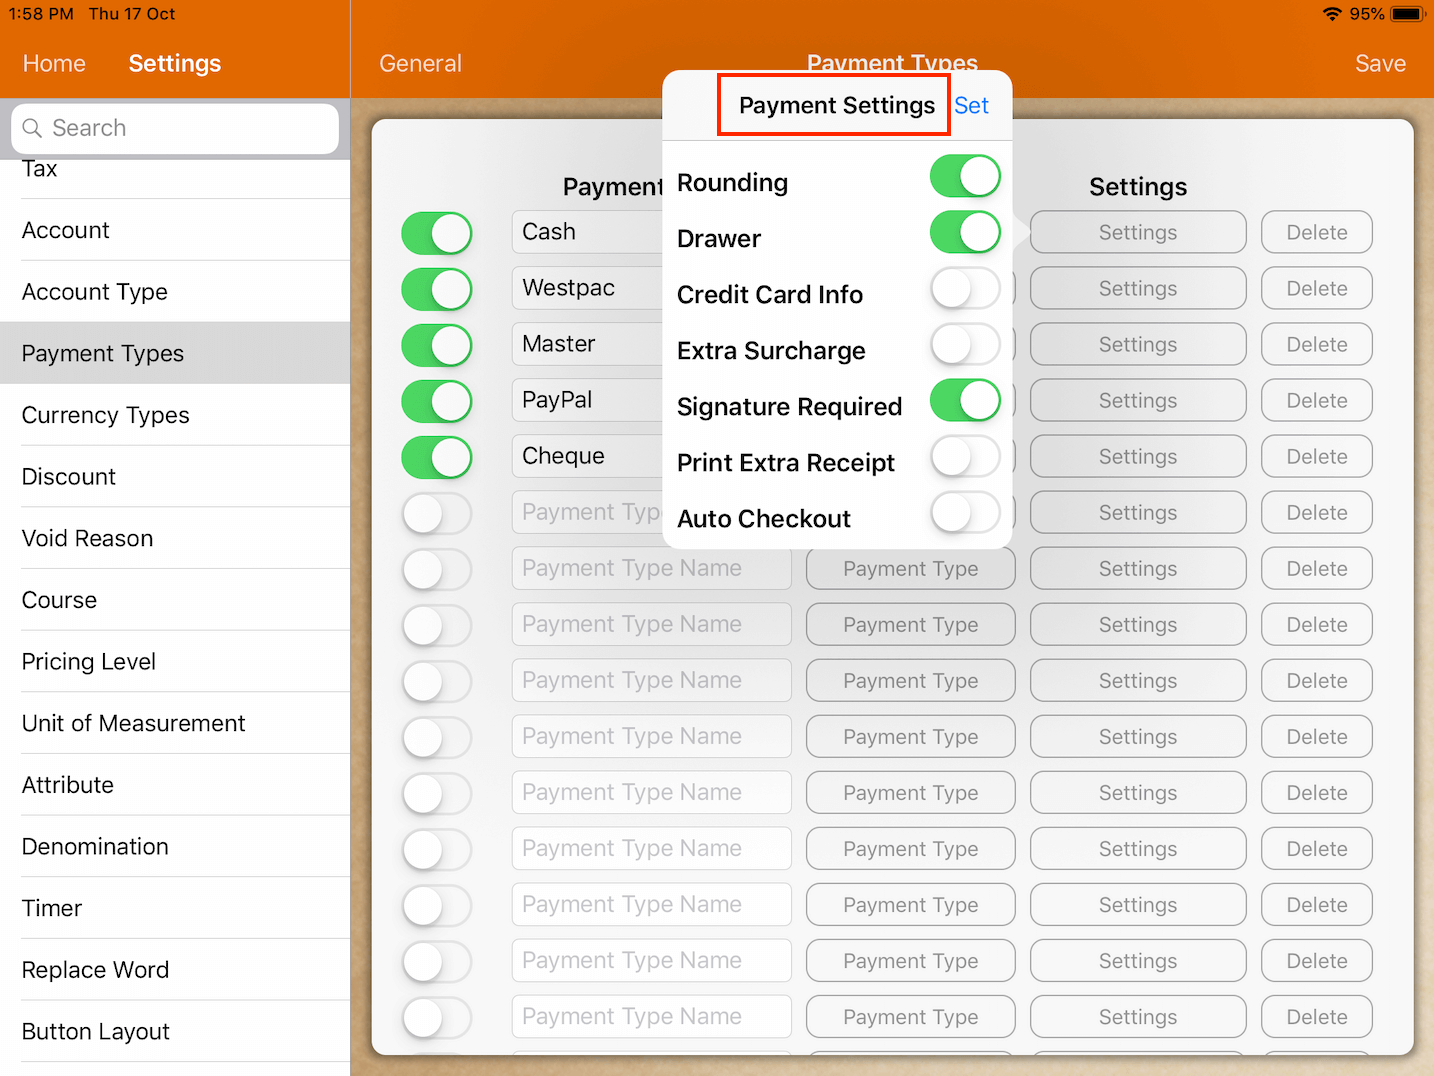
Payment settings can be modified for each payment type by tapping on the switch.
Be sure to tap on "Set" each time after toggling the settings switch.
The function of each payment setting is explained below.
Rounding
Rounding can be switched on or off for each individual payment.
If rounding is switched on, it will follow the rounding setting under restaurant setting.
Drawer
Drawer will pop depending on which payment type is used to close the bill.
Switch on to pop the drawer.
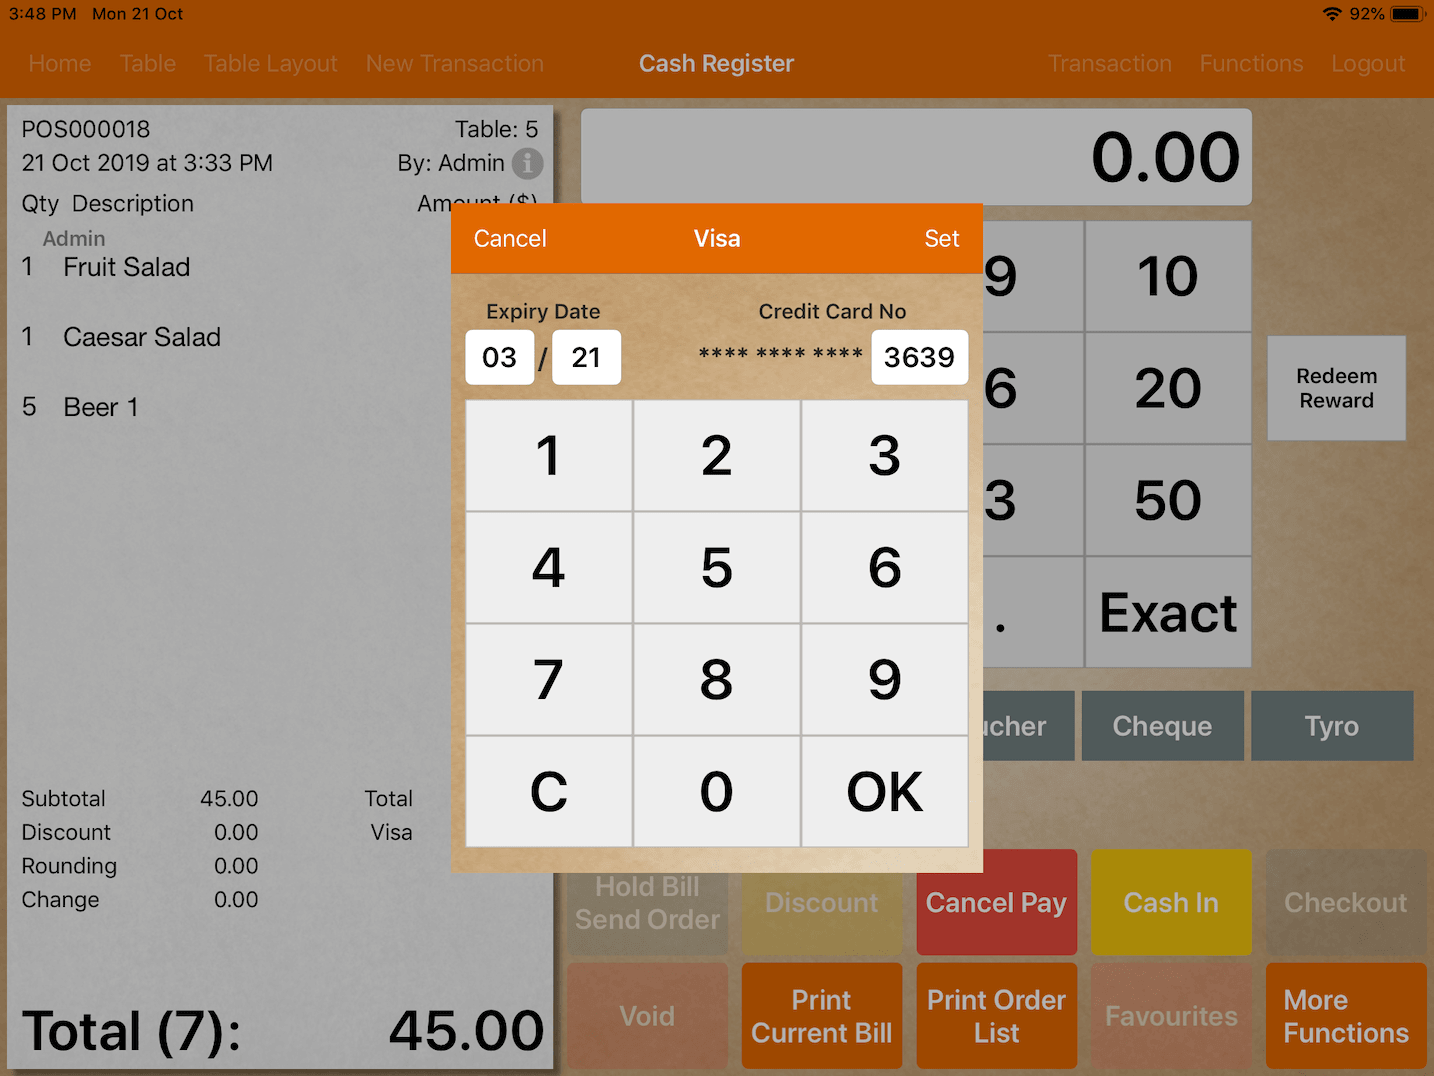
Credit Card Info
If credit card info is switched on, it will prompt you to enter credit card information before payment.
Information entered will be printed out on receipt.
This is solely for recording purpose as it does not process the information.
Extra Surcharge
Payment selected will add an extra surcharge to bill if it's turned on.
Before turning it on, a tax with the type of payment surcharge has to be setup.
Please refer to Tax Settings -> Tax For section for more information.
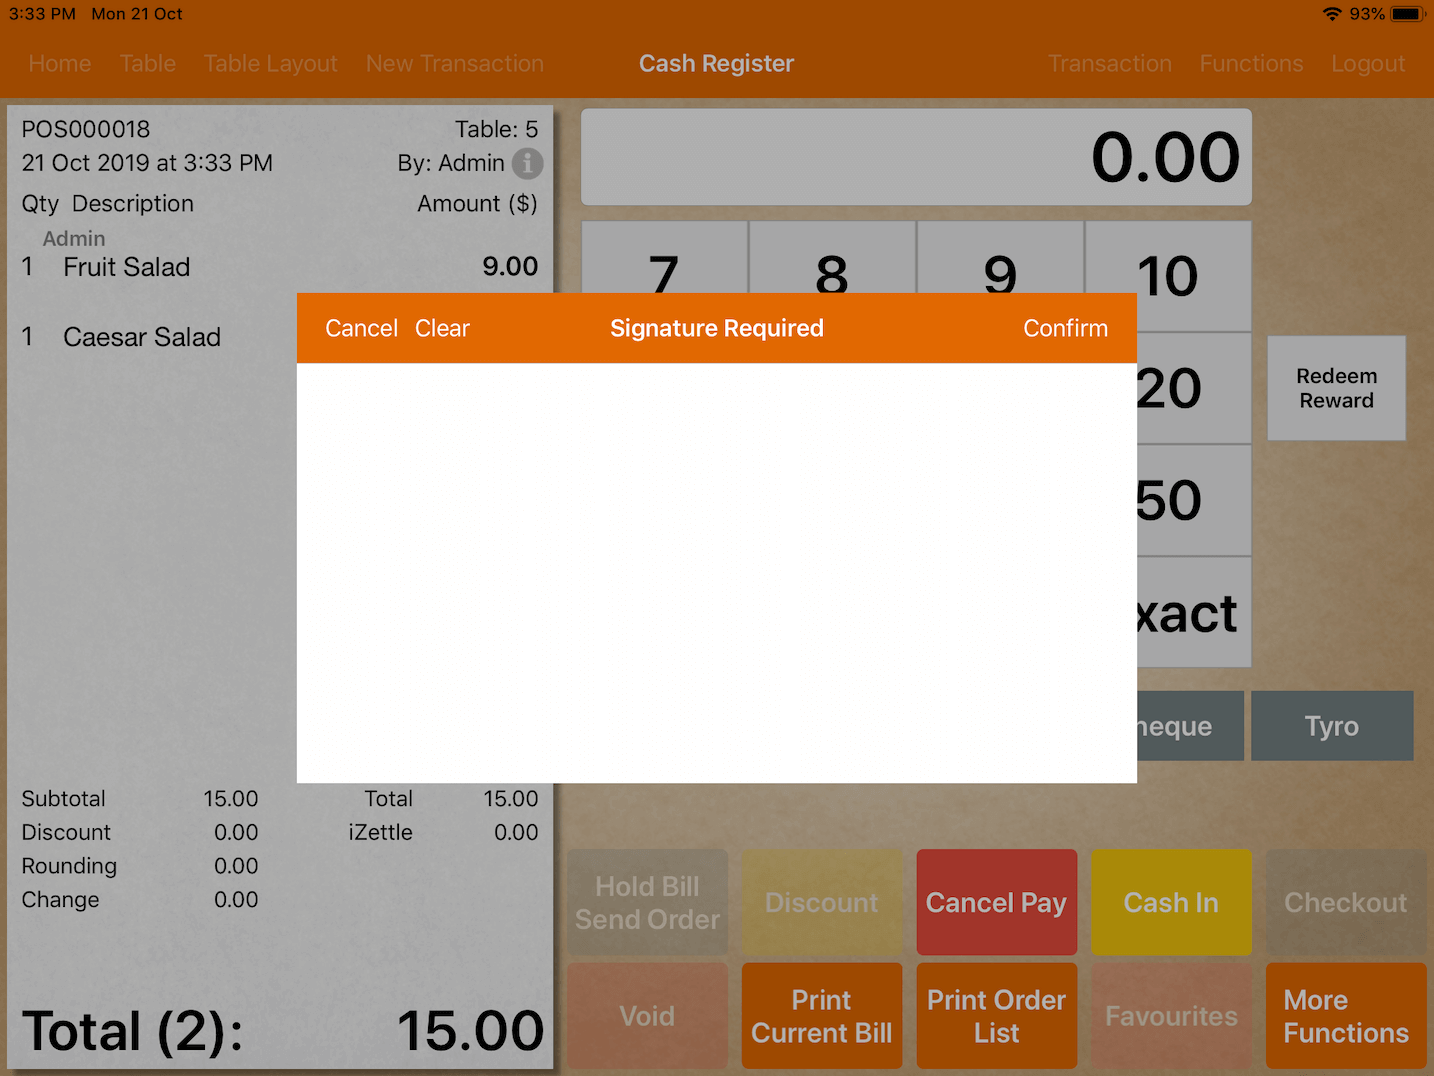
Signature Required
Signature Required is an additional verification step.
When switched on, a window will appear for user to enter signature upon payment.
The payment process will be: Pay -> Select Payment Type -> Signature -> Enter Amount -> Cash In -> Checkout
Print Extra Receipt
The system will automatically initiate printing of an additional receipt when this setting is switched on.
This function rids the hassle of manually printing a receipt twice.
Merchants can immediately obtain another copy of receipt if it is necessary for reporting purposes.
Auto Checkout
Auto Checkout is switched on to speed up the completion of payment.
It eliminates the extra step of tapping on "Checkout" after cashing in the amount to be paid.
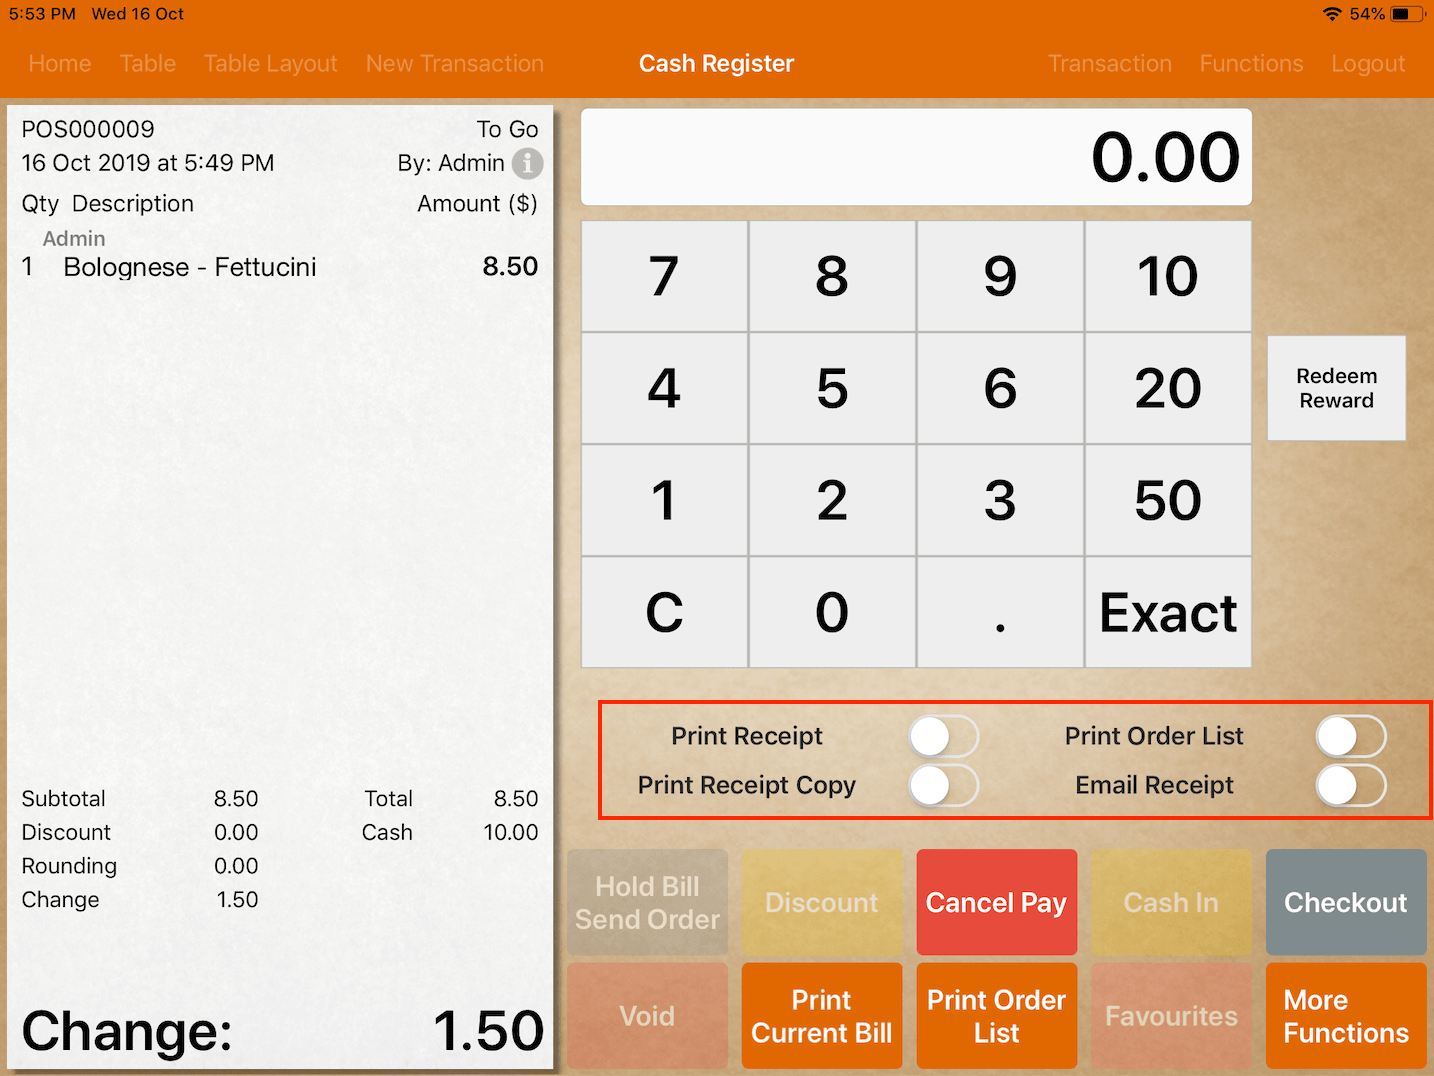
Note that upon switching on this function, user will no longer be able to choose mode of receipt delivery to customers.
The system will automatically checkout after cash in hence, user can start a new transaction immediately.
The picture below shows the disabled functions when this setting is switched on.
iZettle by Paypal
Under Settings -> Payment Types -> Type, tap on iZettle to set it as a payment type.
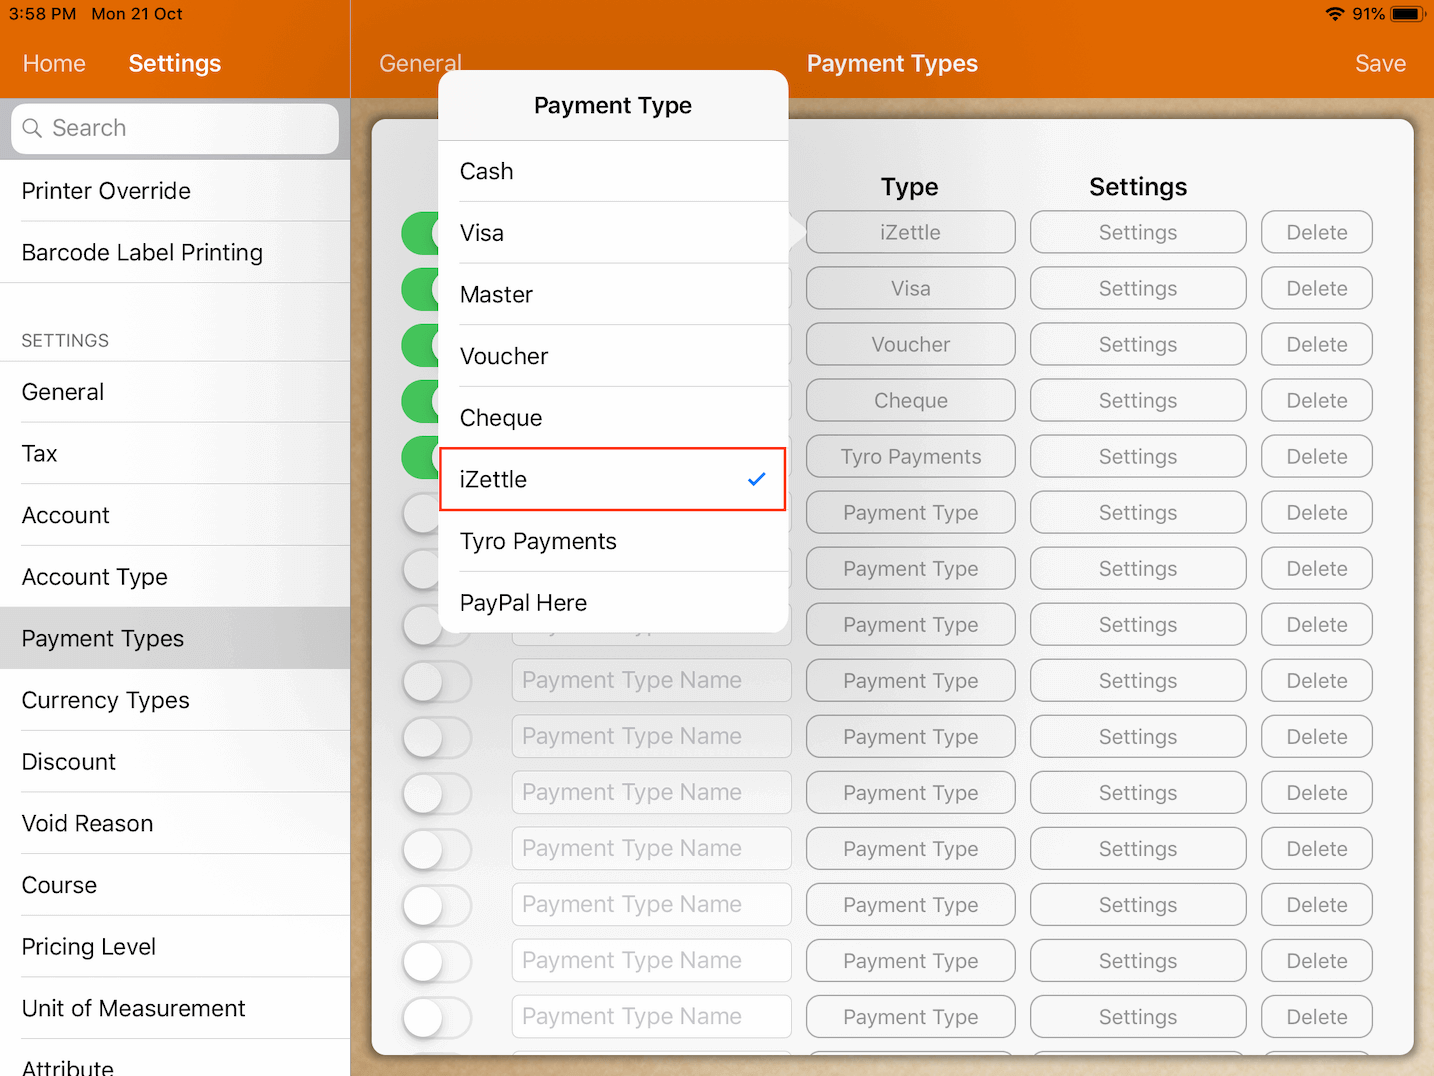
Once iZettle by Paypal is set as a payment type, the function will be available upon checkout/payment.
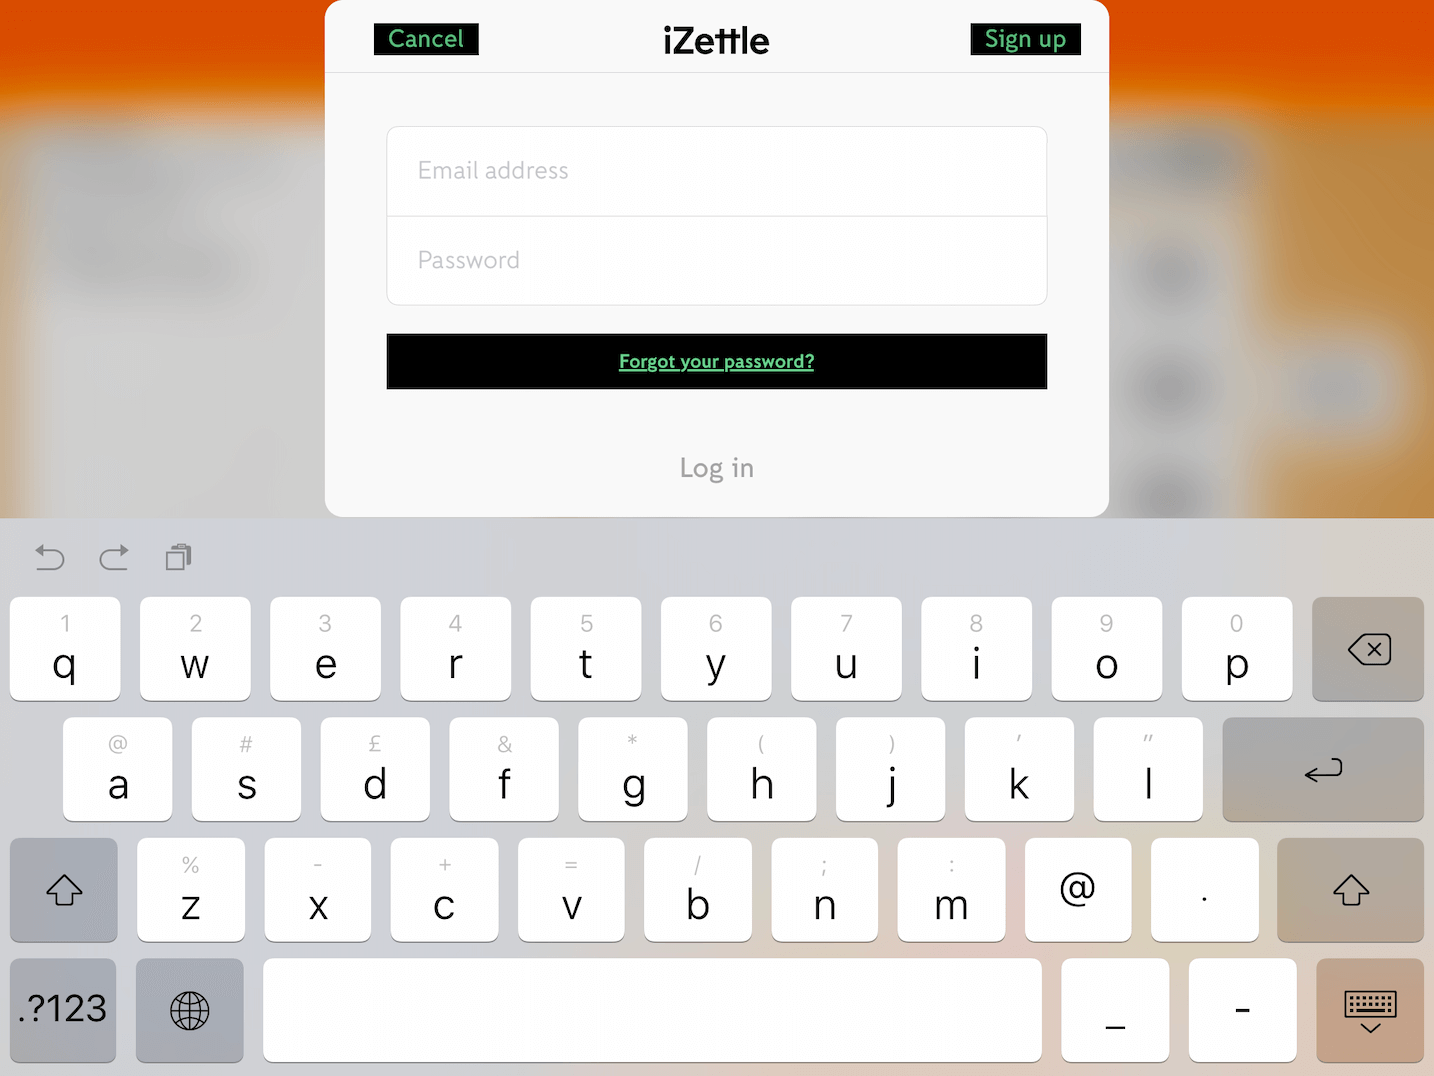
Tapping on iZettle will prompt a window for users to enter log in details.
Tyro Payments
Under Settings -> Payment Types -> Type, tap on Tyro Payments to set it as a payment type.
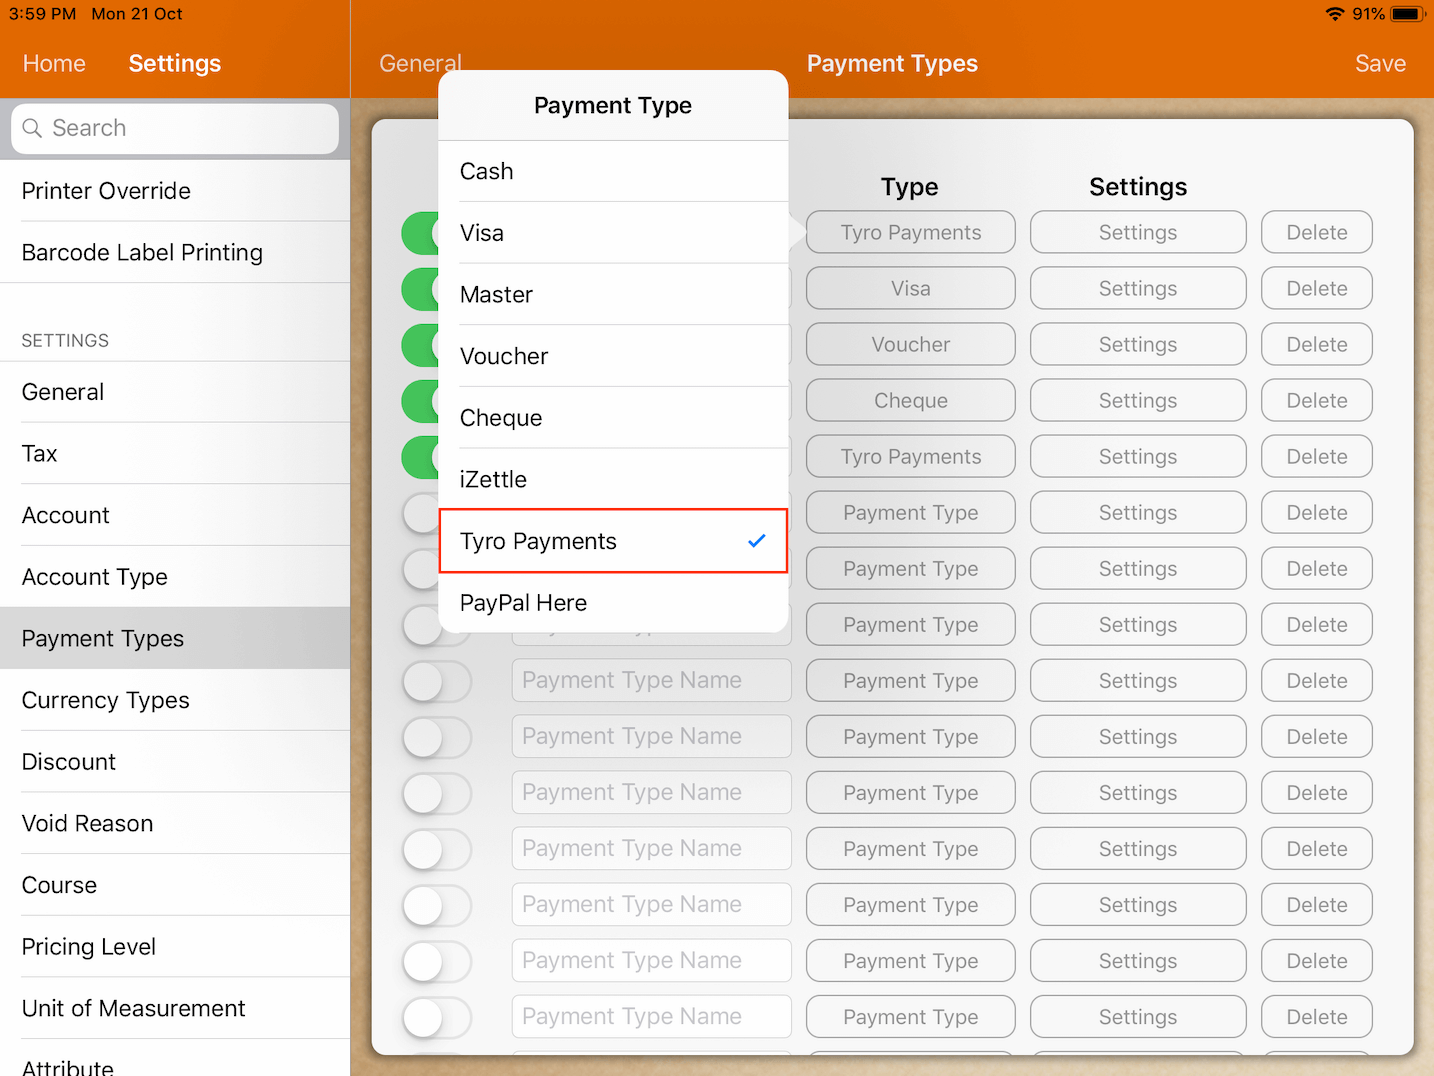
For a successful transaction using Tyro Payments, performing the proper set-up is necessary.
Refer to the guide below for Tyro Setup.
Tyro Setup
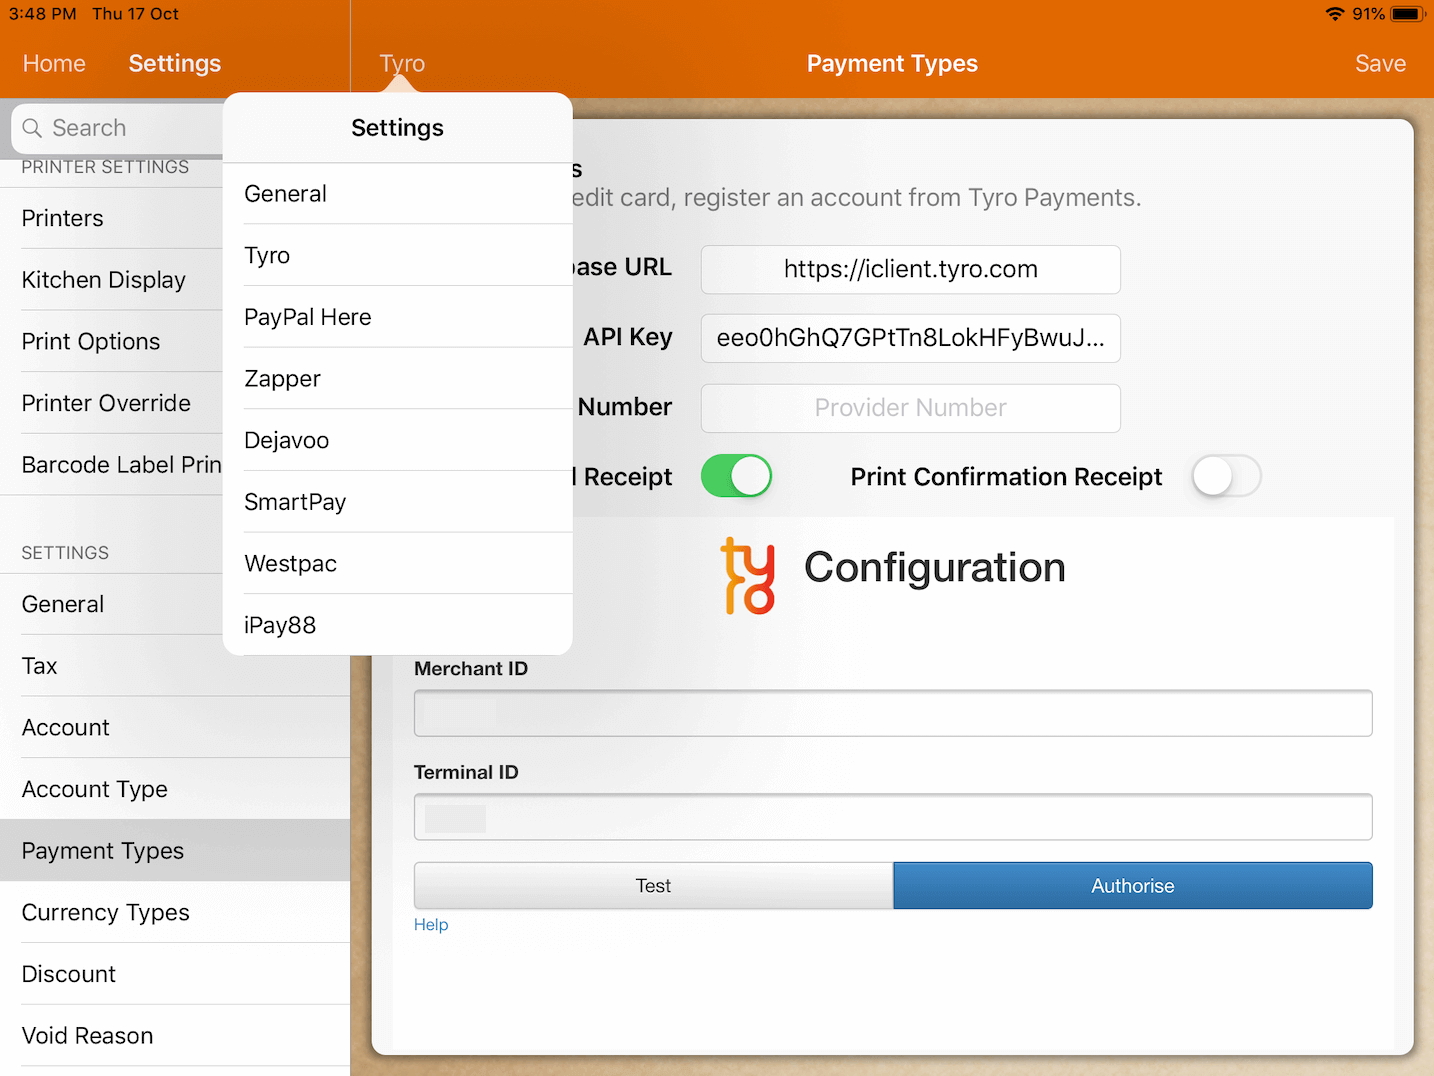
To link the connection of your Tyro terminal with MobiPOS, it requires Merchant ID and Terminal ID.
This information can be found on the terminal device itself or you could contact Tyro to seek help.
Tap on "Help" to begin configuration.
Choose your device type that is displayed at the bottom, follow the instructions to authorize the link.
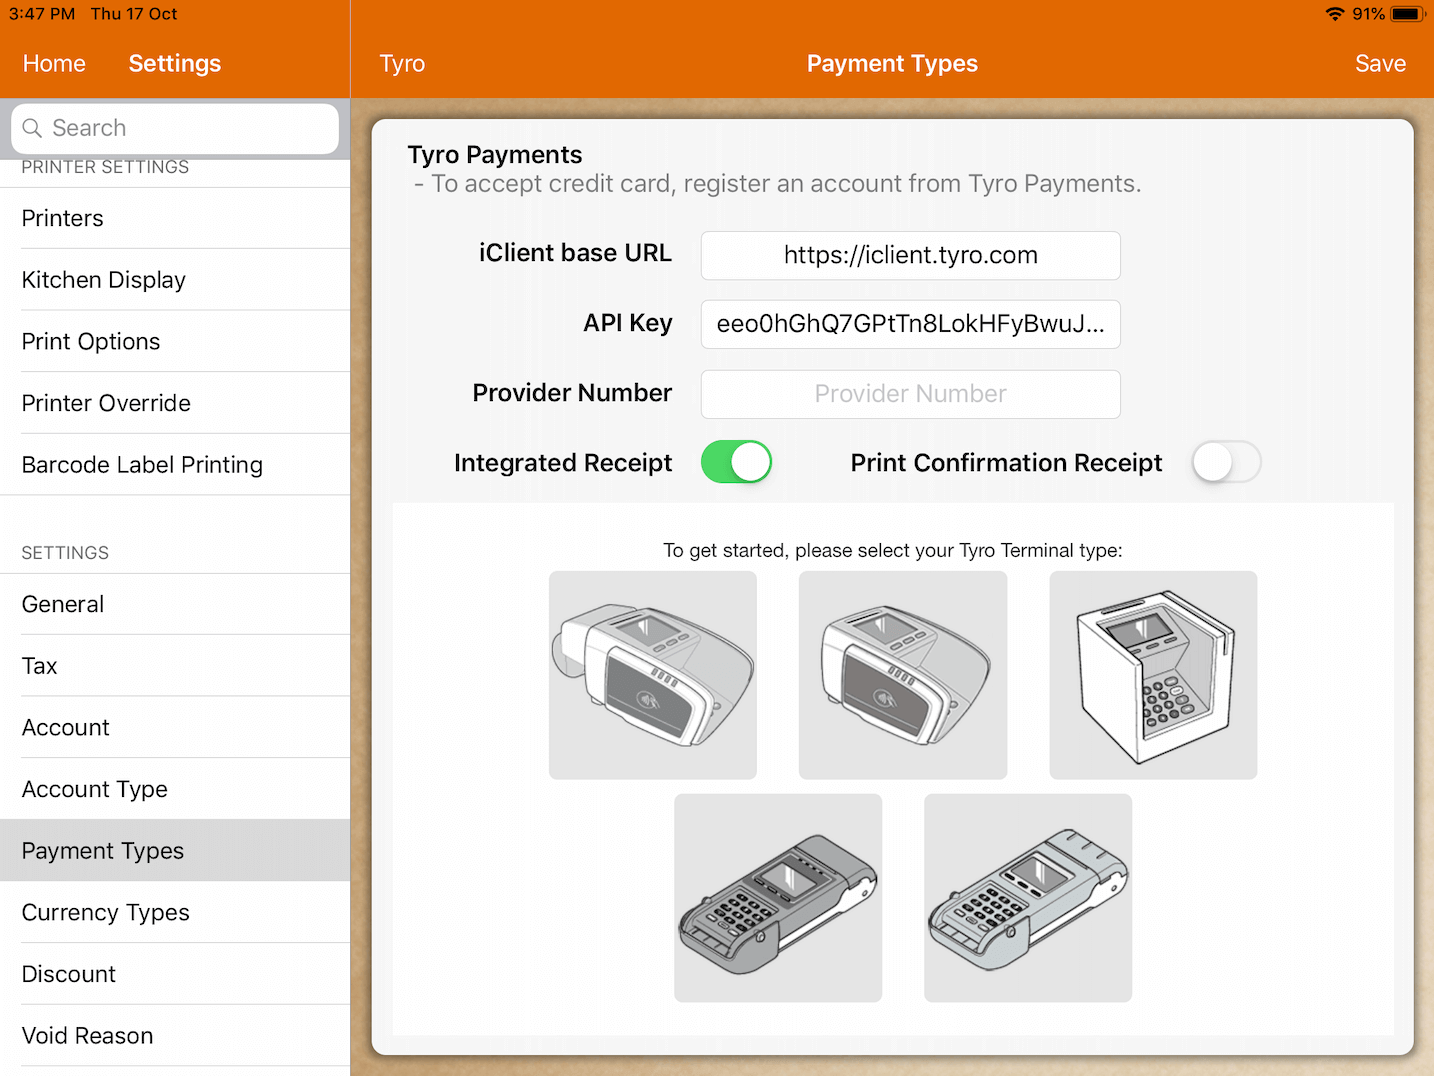
Upon setting up the link, create a new payment with Tyro Paymentsas the payment type.
Closing bill with this payment will initiate the terminal to process credit card.
Integrated Receipt
If integrated receipt is turned on, receipt from Tyro will be printed in MobiPOS instead of Tyro terminal device.
Westpac
Westpac is another method that offers fast and secure payment processing.
MobiPOS integrates with Westpac to include functions of both Westpac and Westpac MOTO.
Westpac MOTO is a payment method for "card not present" transactions.
It is utilized for Mail Order / Telephone Order or manual entry transactions.
It can only be processed on credit and charge cards, when the cardholder is not present during the time of payment.
The guide below shows the set up process which is identical for both Westpac and Westpac MOTO.
Under Settings -> Payment Type -> Westpac will lead you to a page to fill up the necessary credentials.
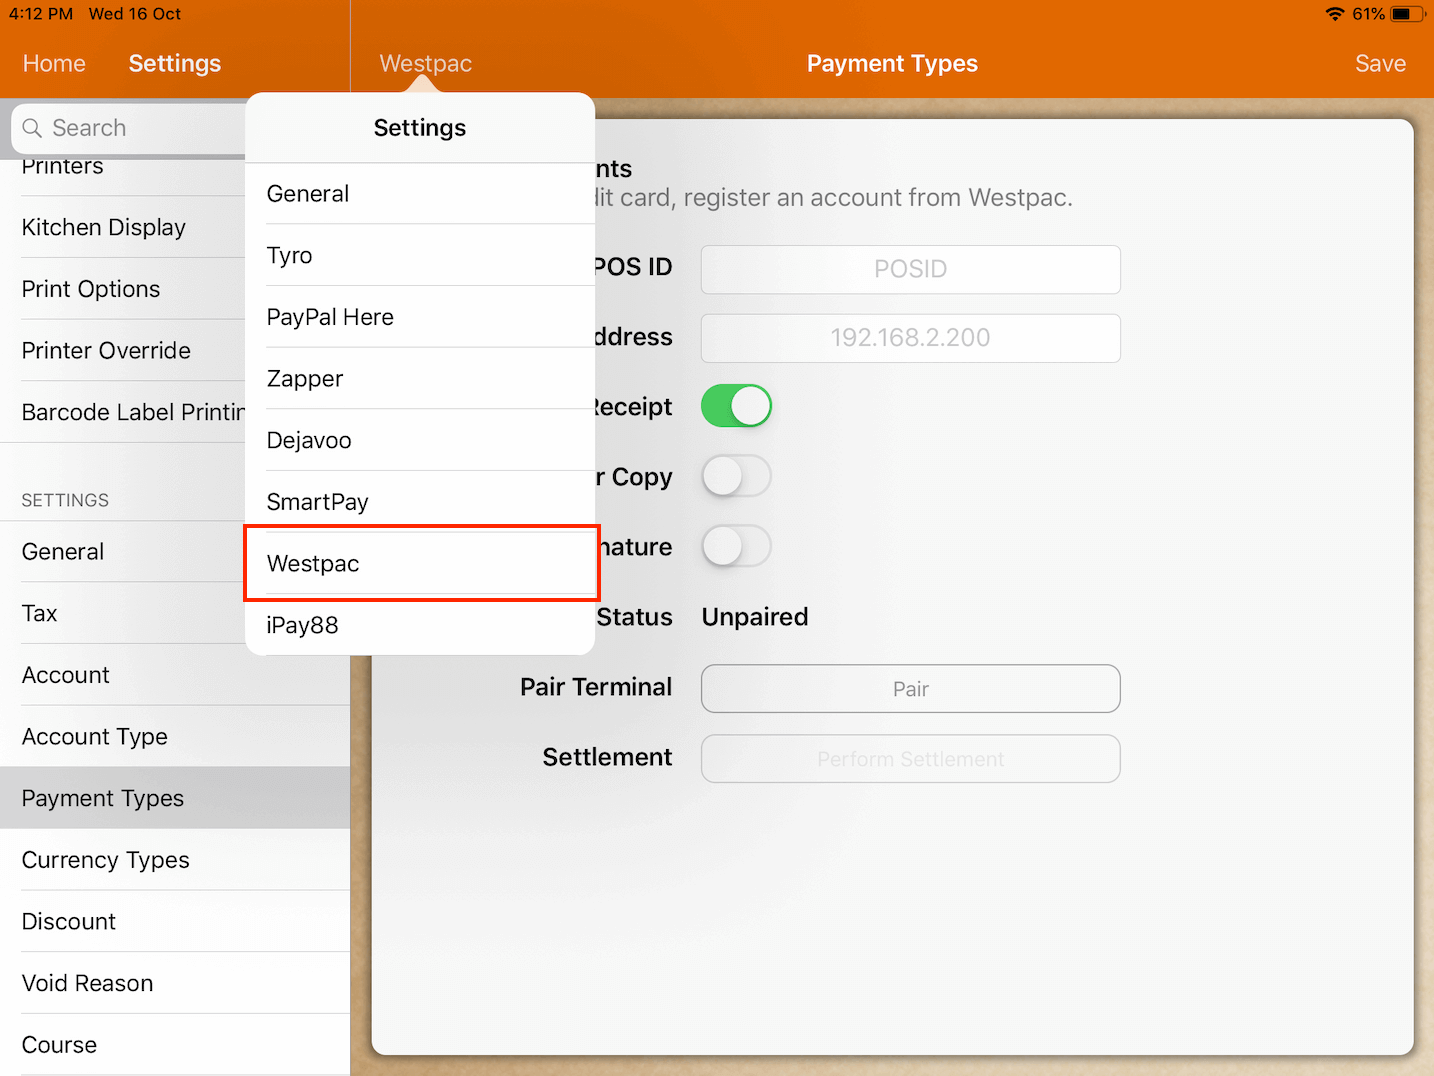
To begin integrating the systems, first connect the EFTPOS terminal to the same Wi-Fi used by the POS system.
(For this example, we are using Verifone 355 EFTPOS terminal device)
Press "O" and "1" at the same time on the EFTPOS terminal to configure Wi-Fi settings.
After EFTPOS is successfully connected to Wi-Fi, the IP Address will be displayed.
The IP Address shown is keyed in as a credential on the MobiPOS App.
Note that it is mandatory to enter POS ID and IP Address.
On the EFTPOS device, press "#" to enter pairing mode.
Ensure that your EFTPOS Terminal has been unpaired with any existing pairings.
Proceed to pair your EFTPOS terminal device with MobiPOS.
Press "Pair" on both MobiPOS app and the EFTPOS terminal.
A pop up will prompt code confirmation for both the EFTPOS Terminal and MobiPOS App.
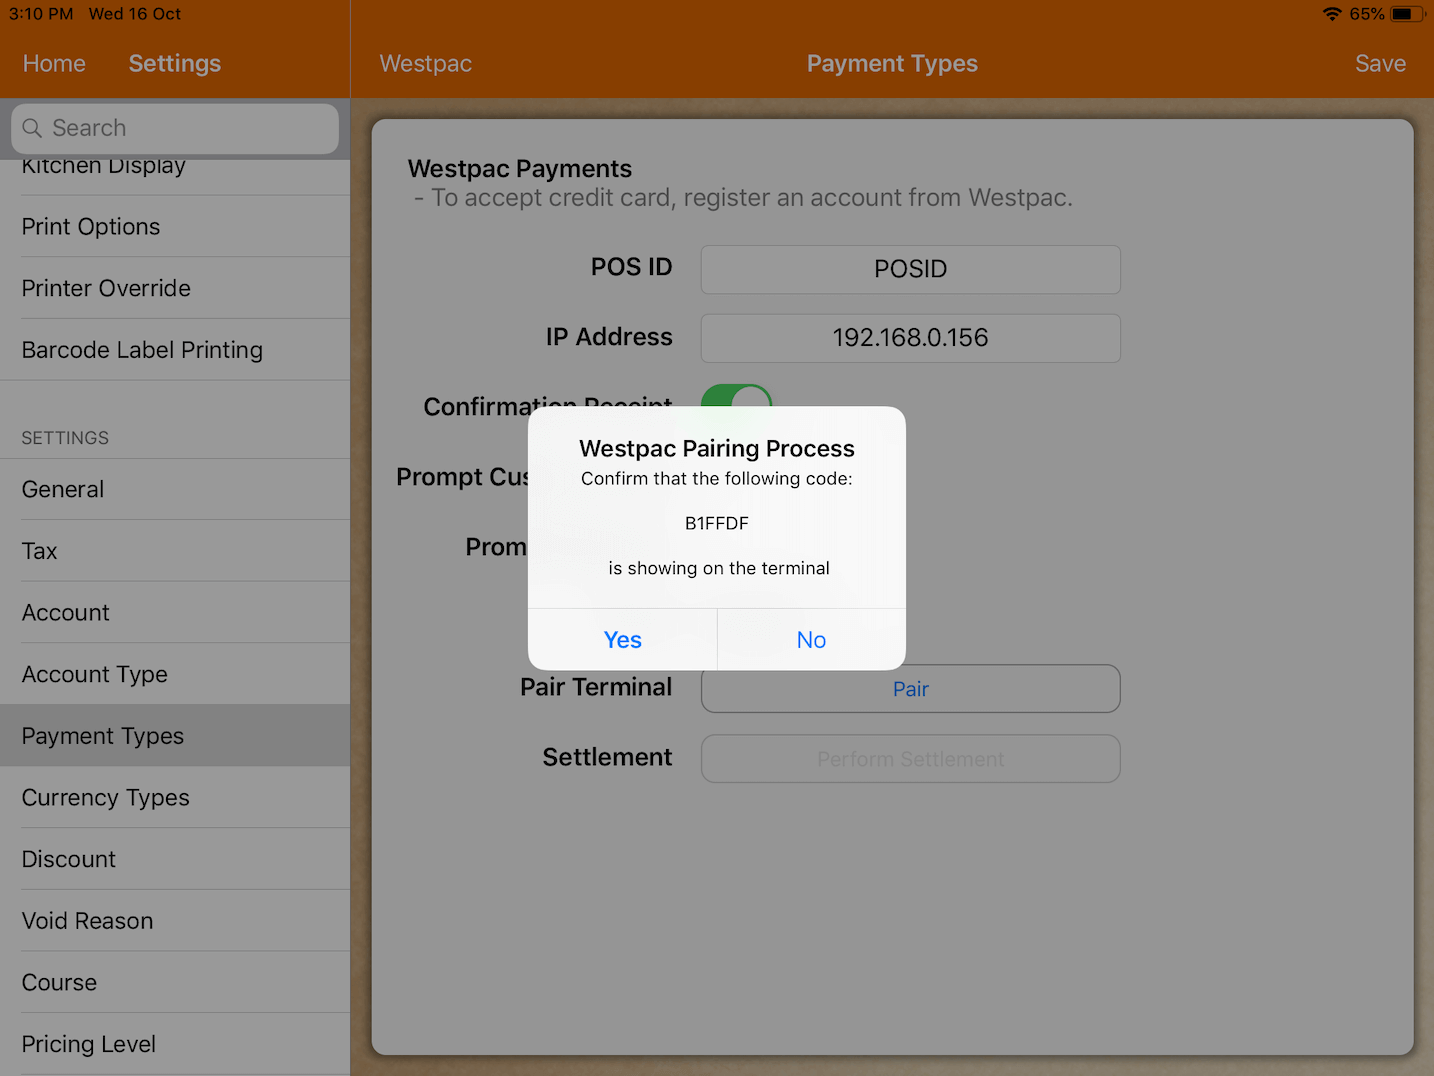
Tap "Yes" to confirm and complete pairing process.
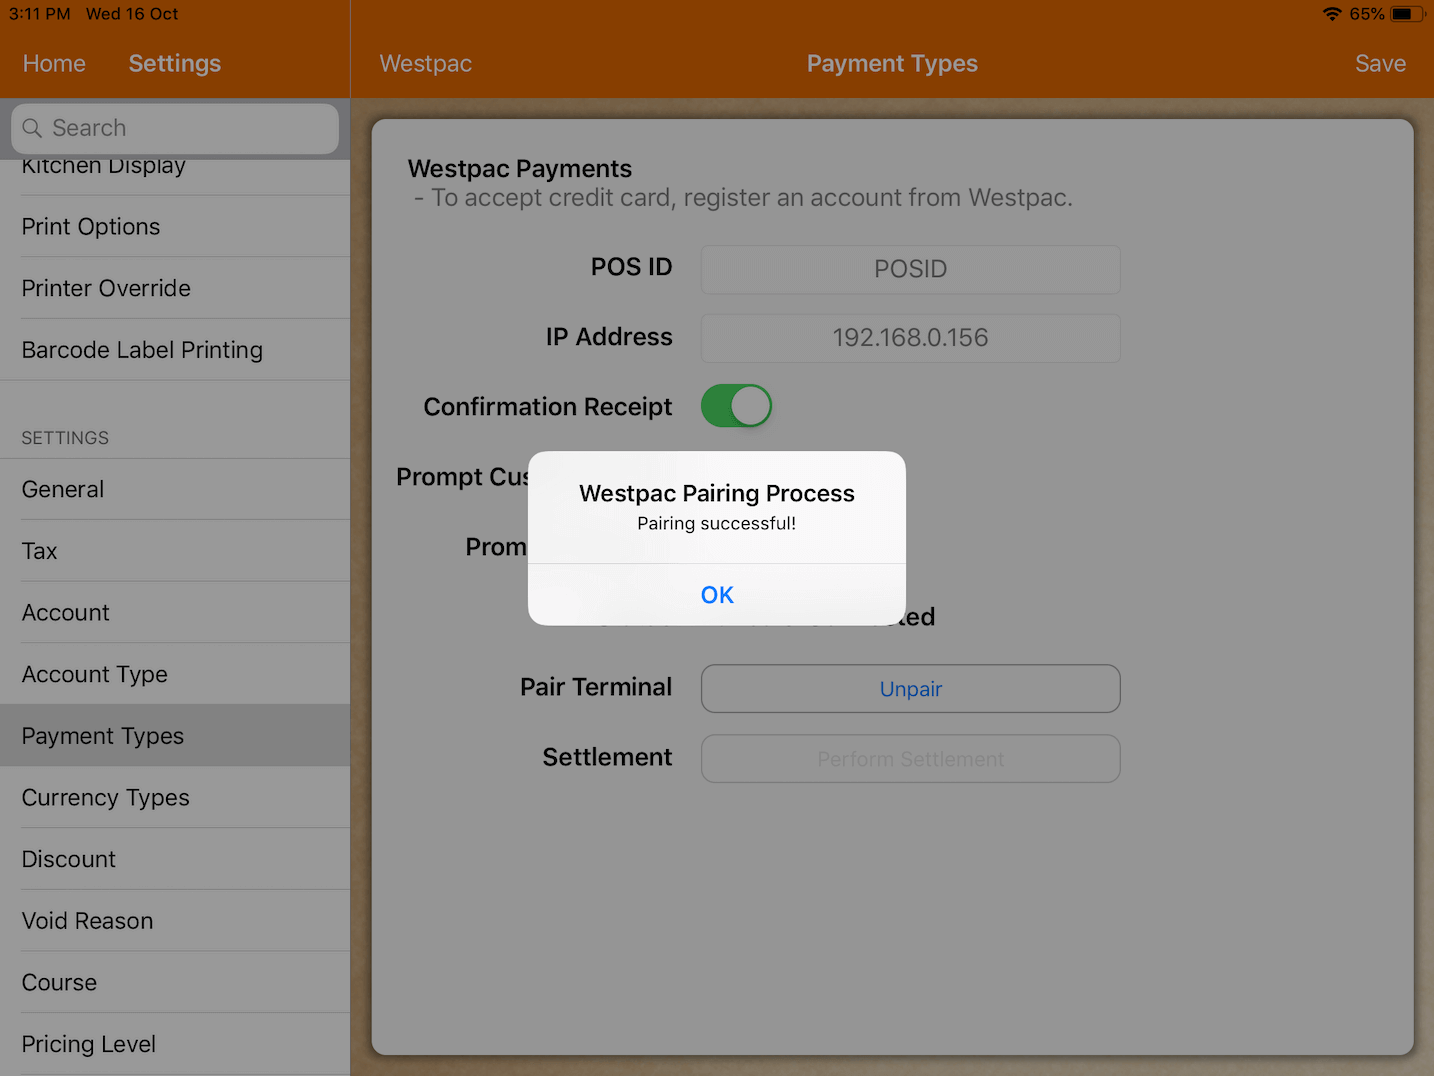
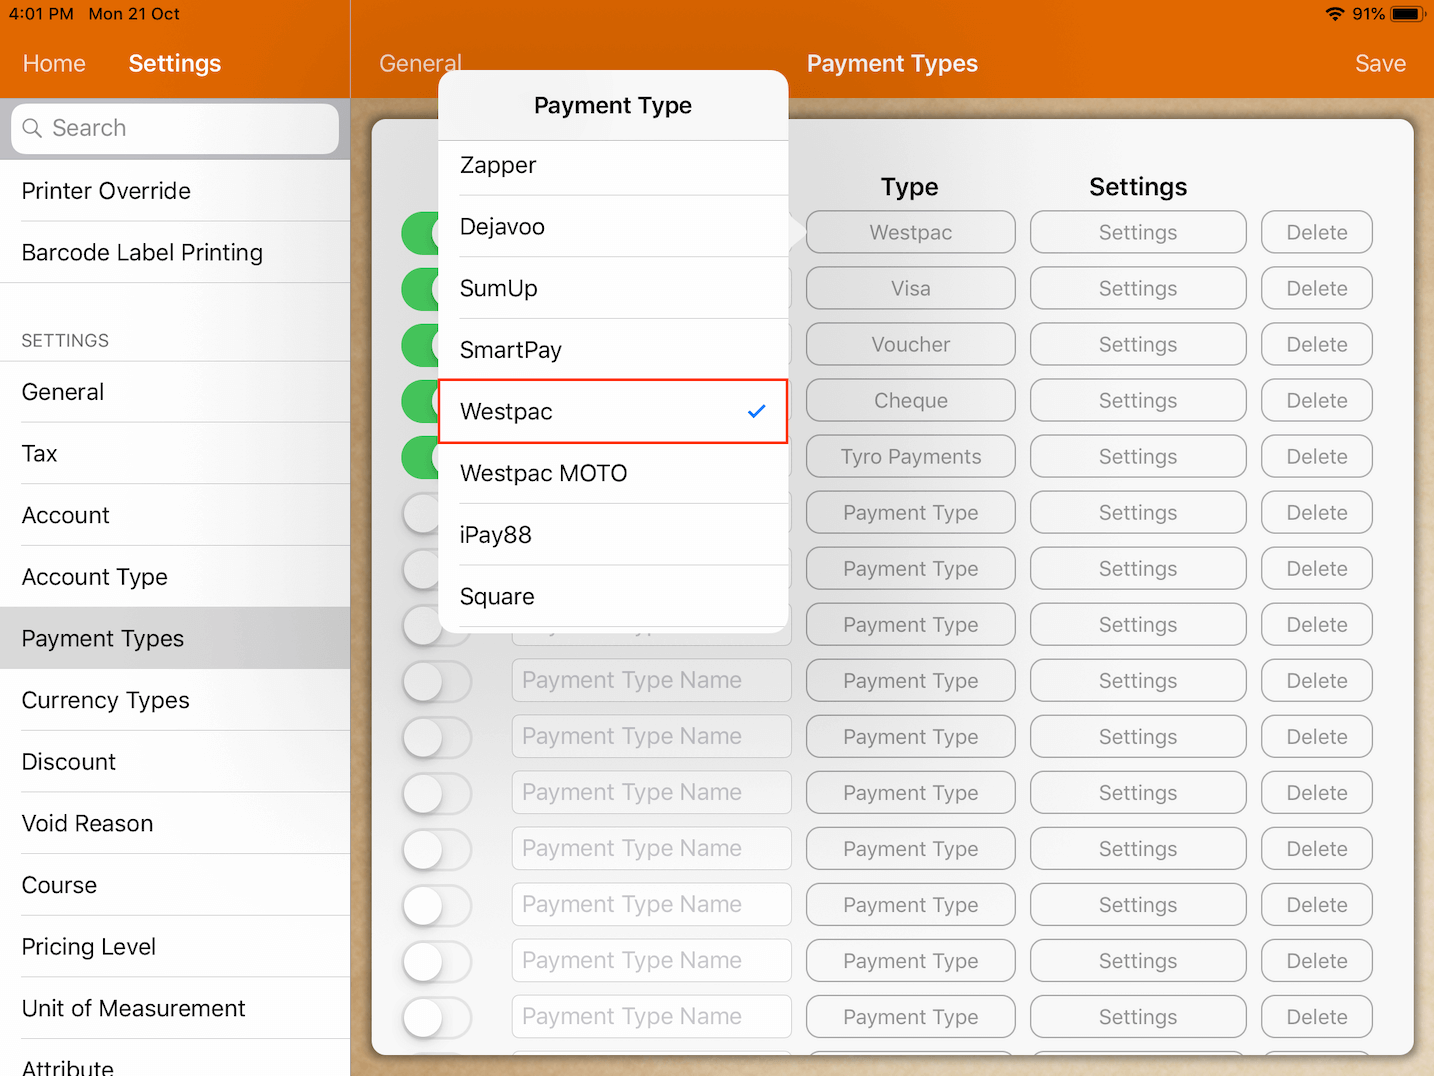
After setup is completed, Westpac can now be added as a "Payment Type" in your system.
Under Settings -> Payment Types -> Type, tap on Westpac to set it as a payment type.
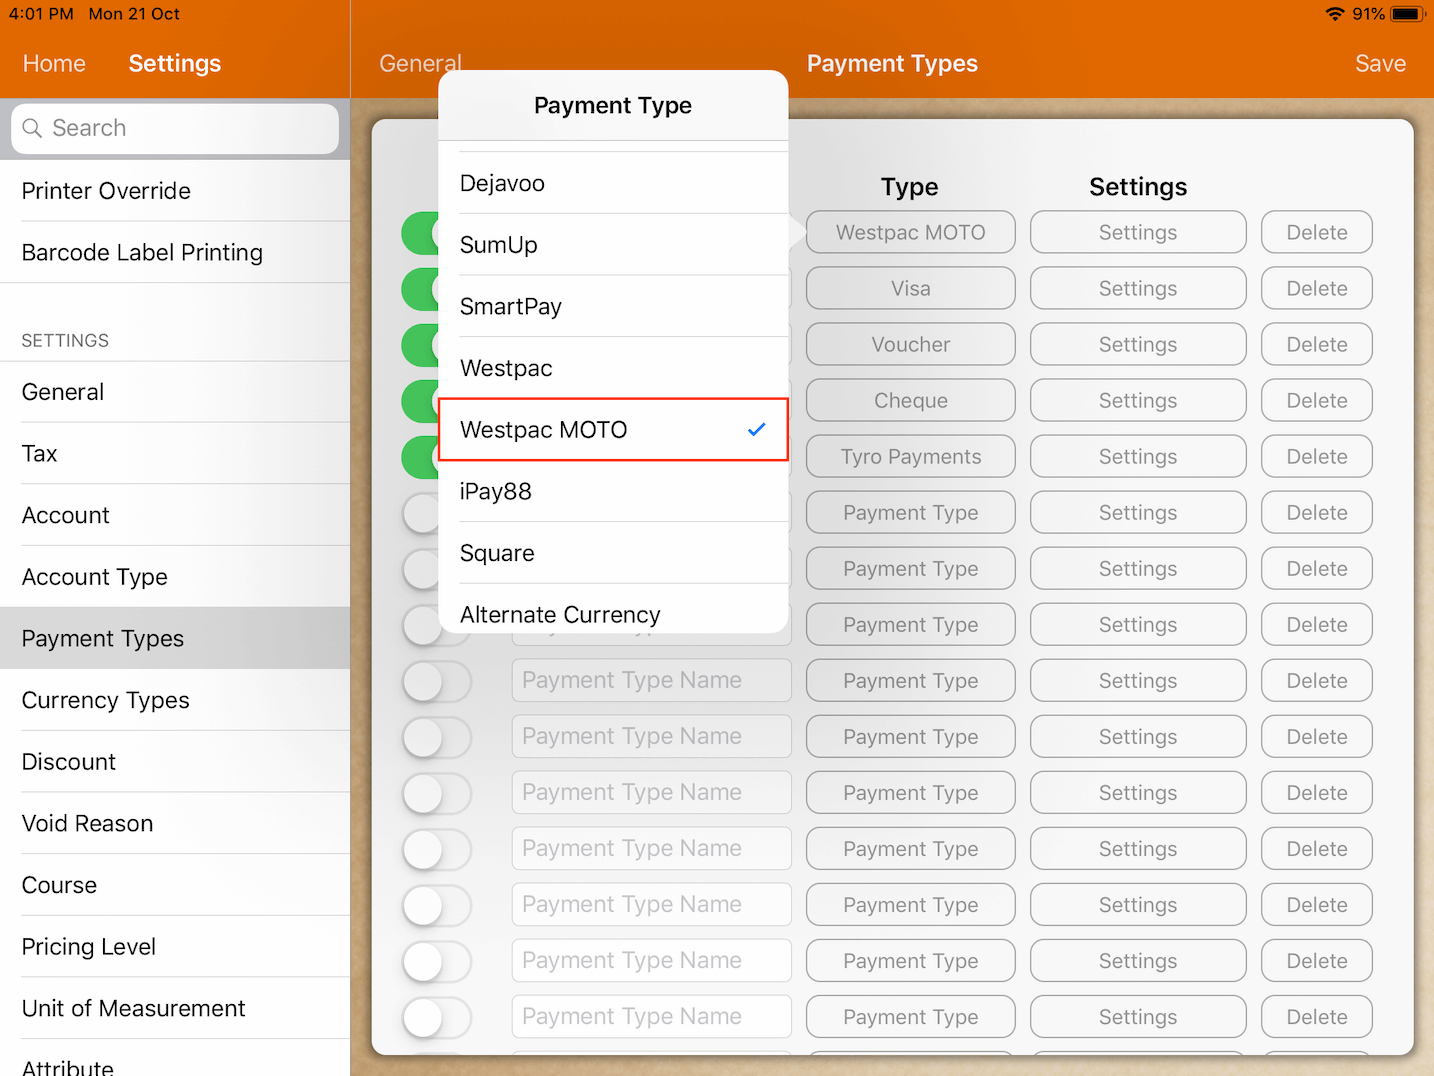
Alternatively, Westpac MOTO can also be added as a "Payment Type" in your system.
Under Settings -> Payment Types -> Type, tap on Westpac MOTO to set it as a payment type.
During payment, selecting Westpac as payment type will initiate payment confirmation on the terminal.
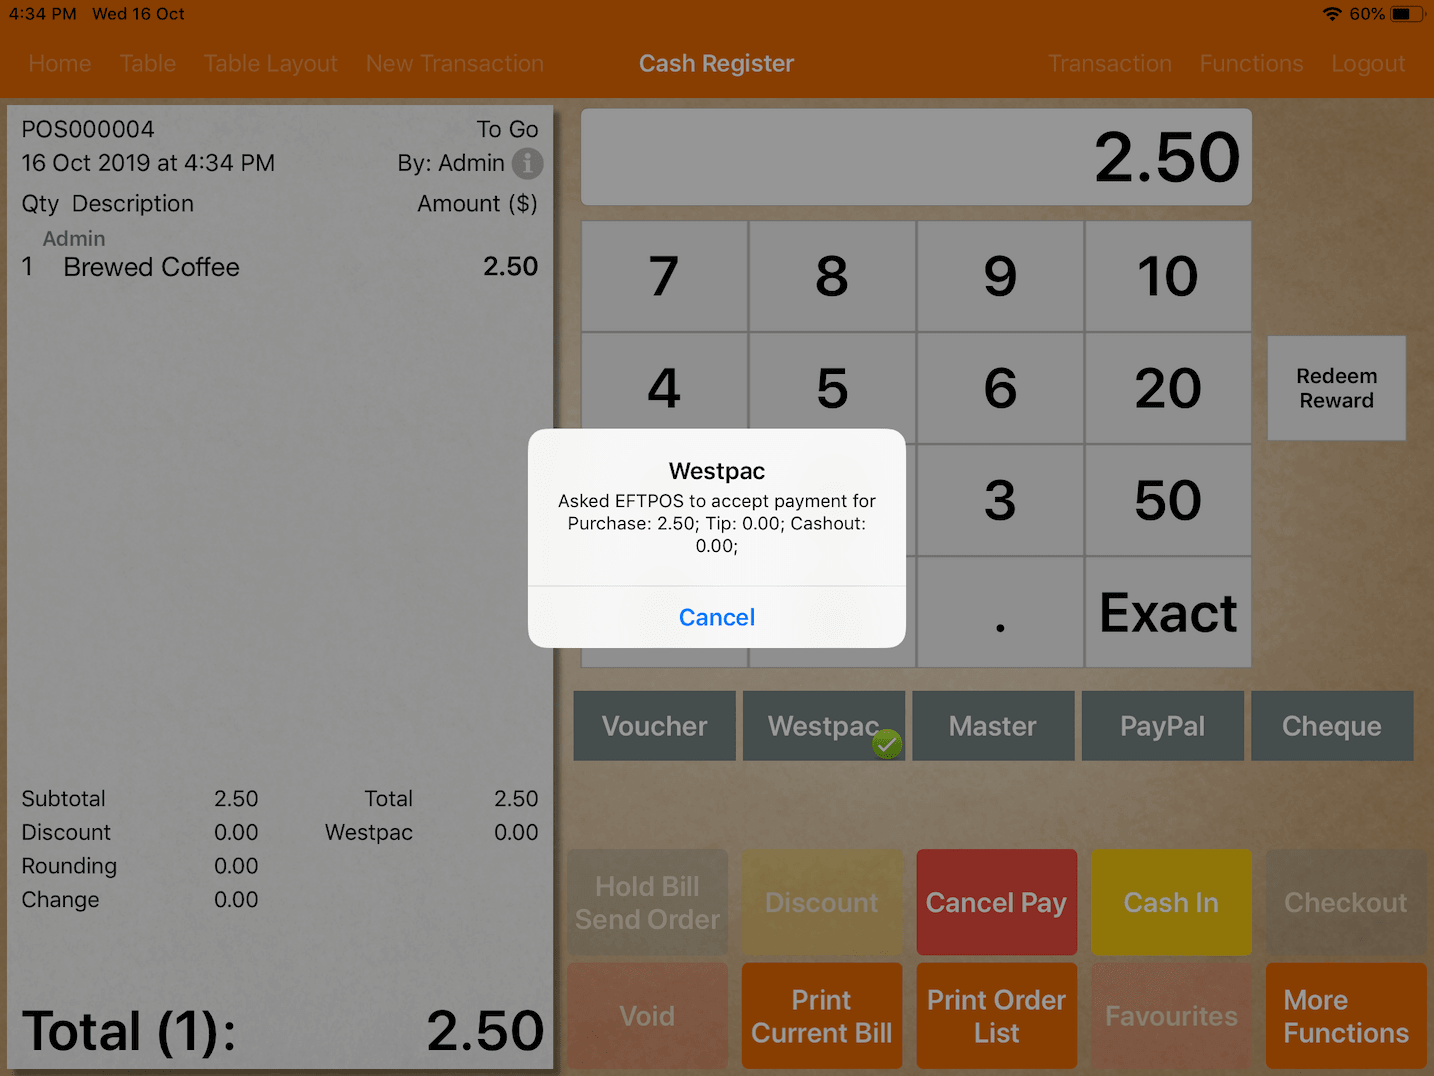
Verification on the terminal will complete a successful transaction.
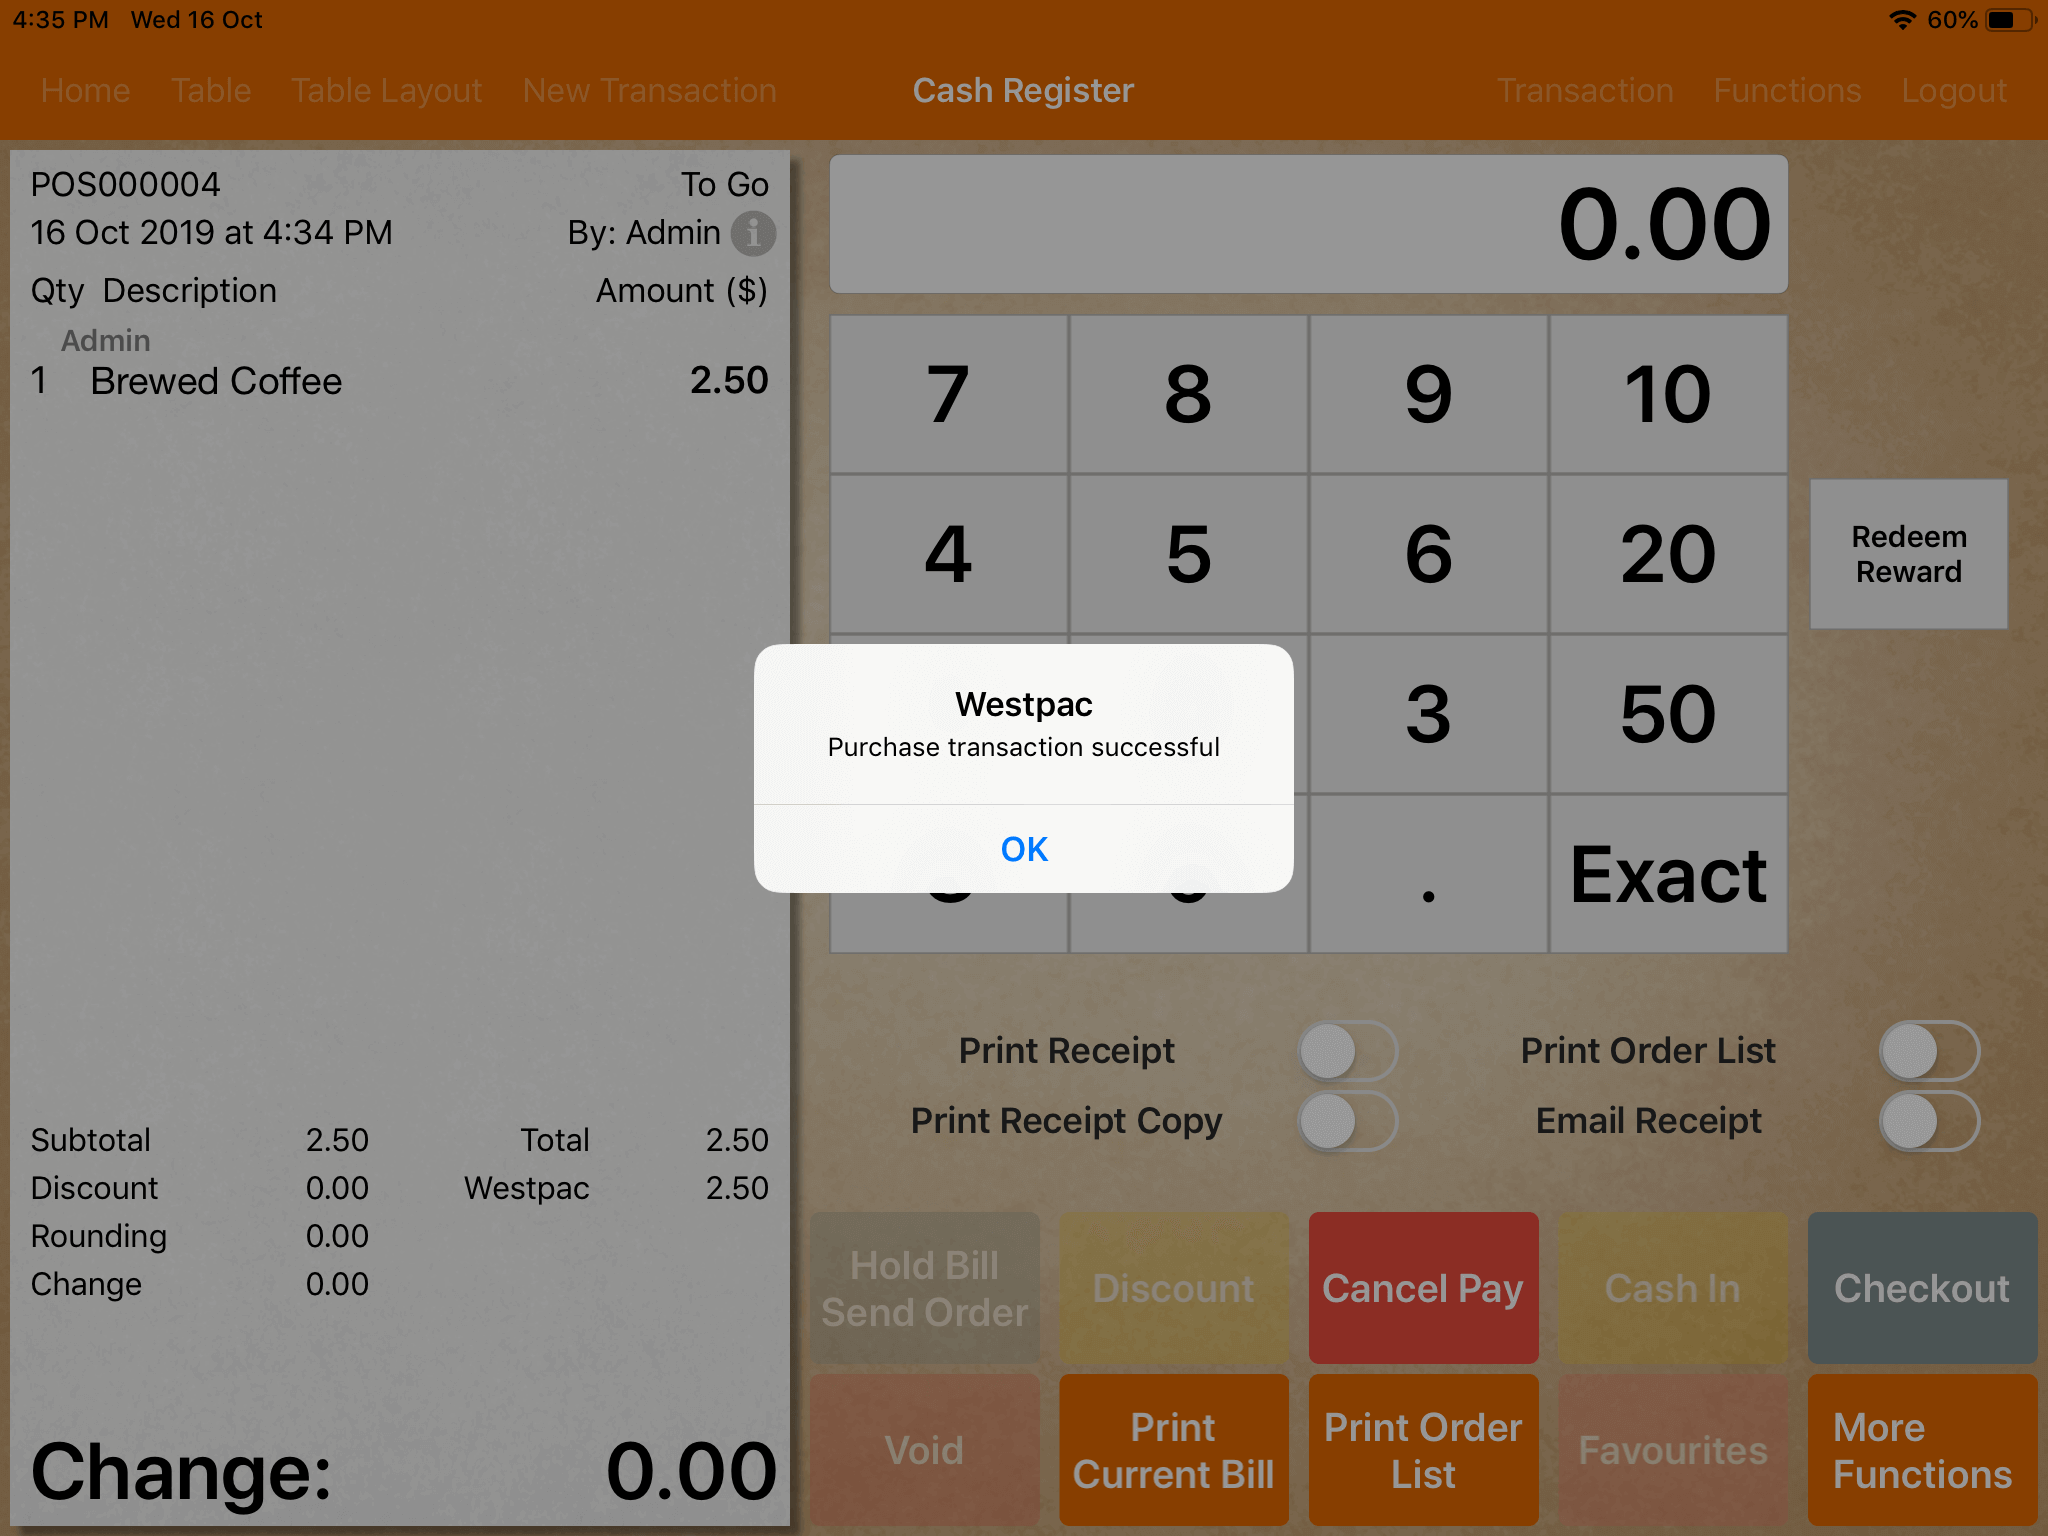
You can now proceed to checkout.
- Westpac and Westpac MOTO can only be configured as payment types in your system after set up is completed.