Customer Group
This function will allow you to assign a customer group to the customers, this will provide valuable data on their spending habits based on their respective groups through reports generated.
At the main page, click on Settings, scroll down, and click on Customer Group.
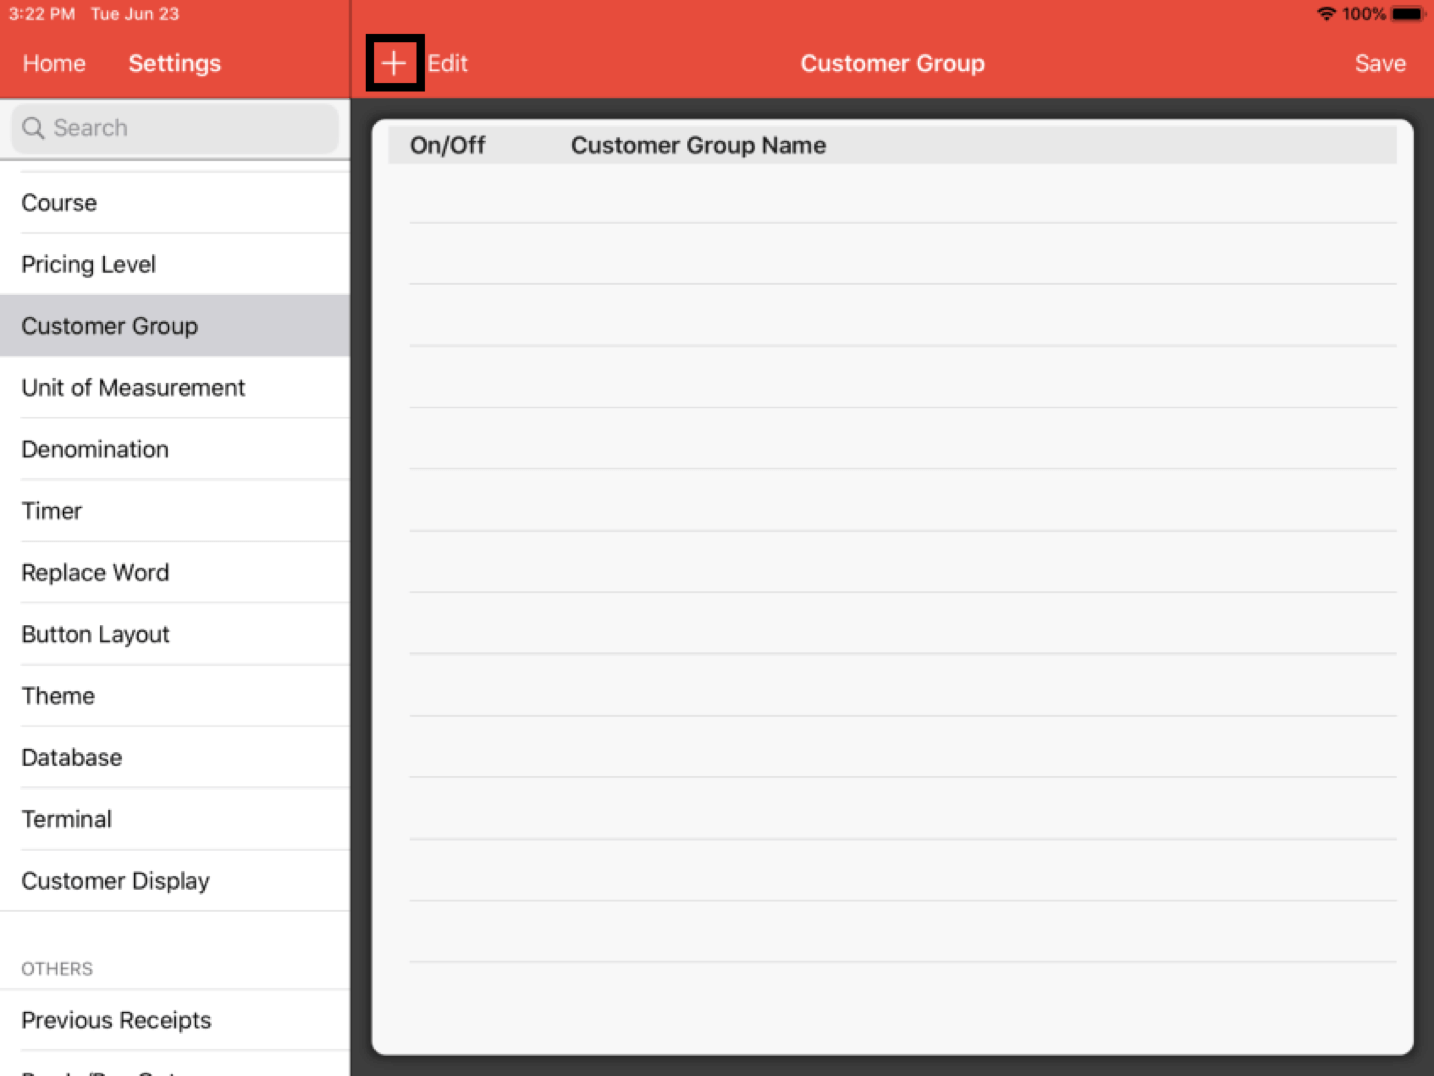
Click on the + button at the top, and proceed to add a designated Customer Group name.
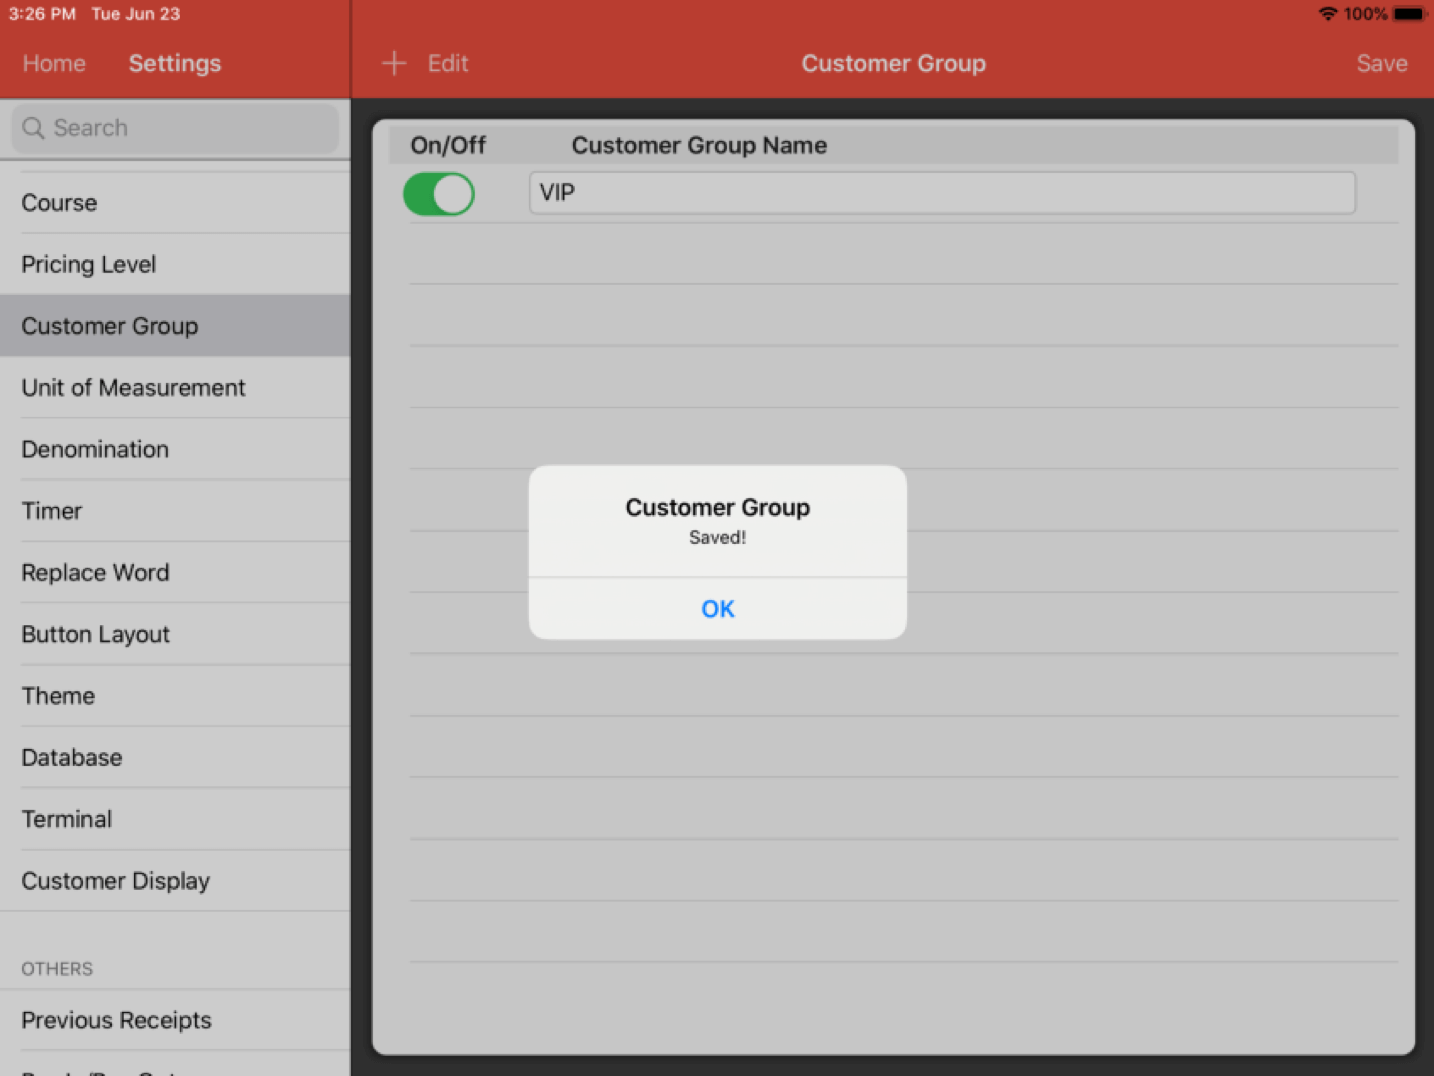
Click on Save, a pop-up will show that you have successfully saved the Customer Group information.
Once this is done, you are then able to assign the customers to their respective groups.
To do this, on the main page, click on Customer, then create new or select an existing customer.
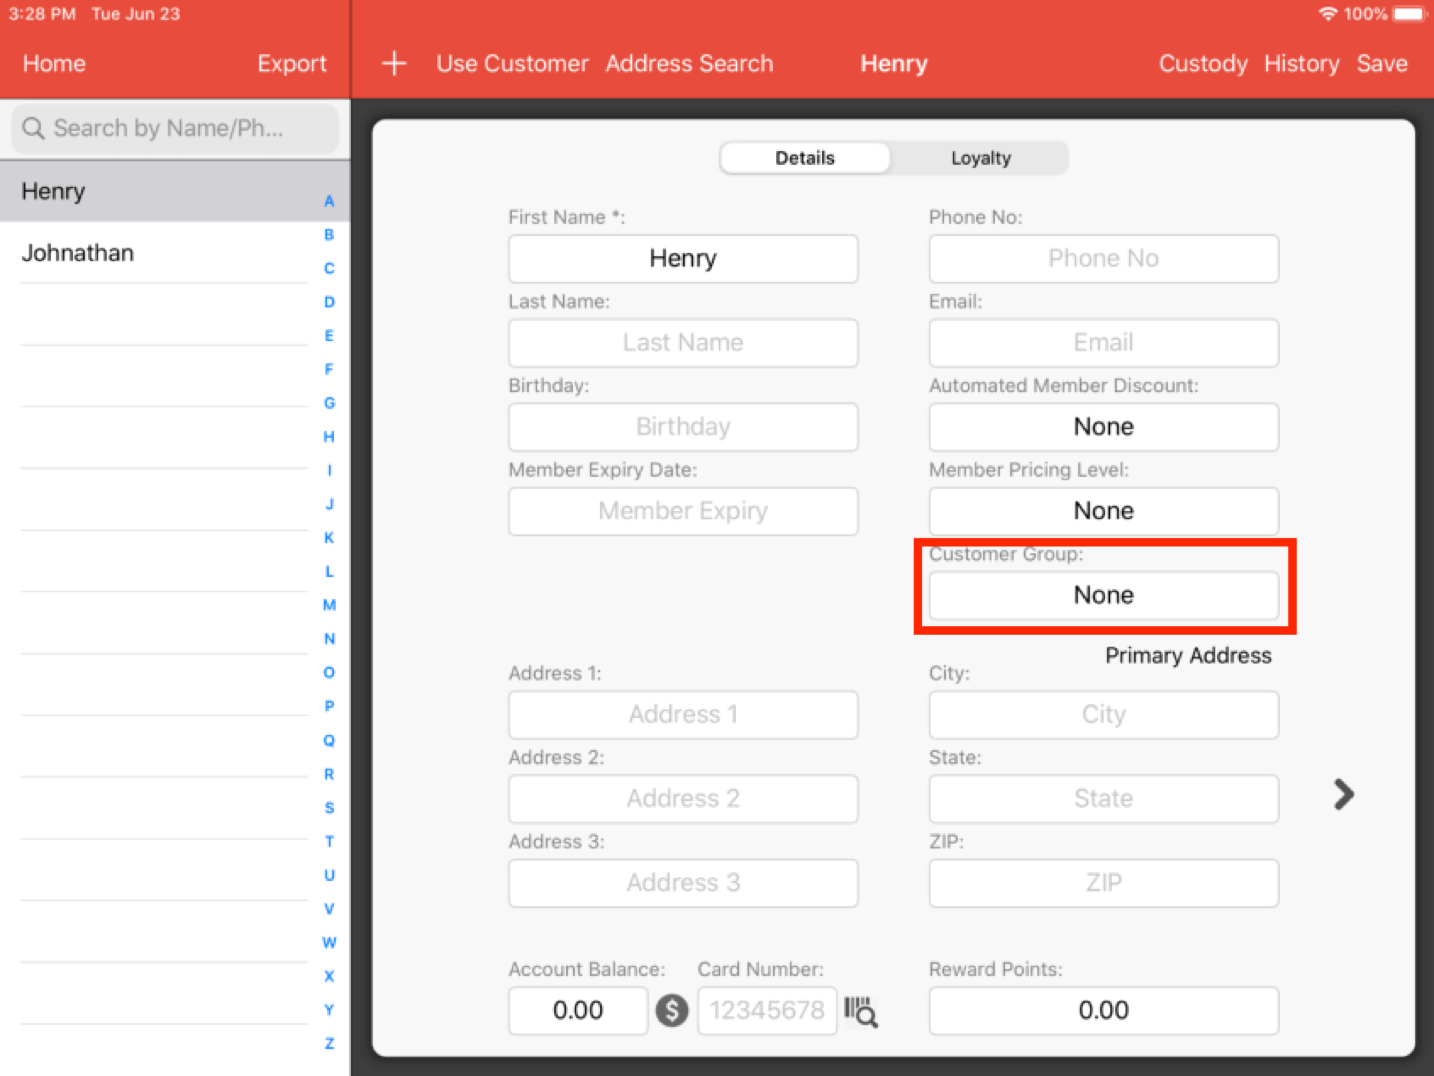
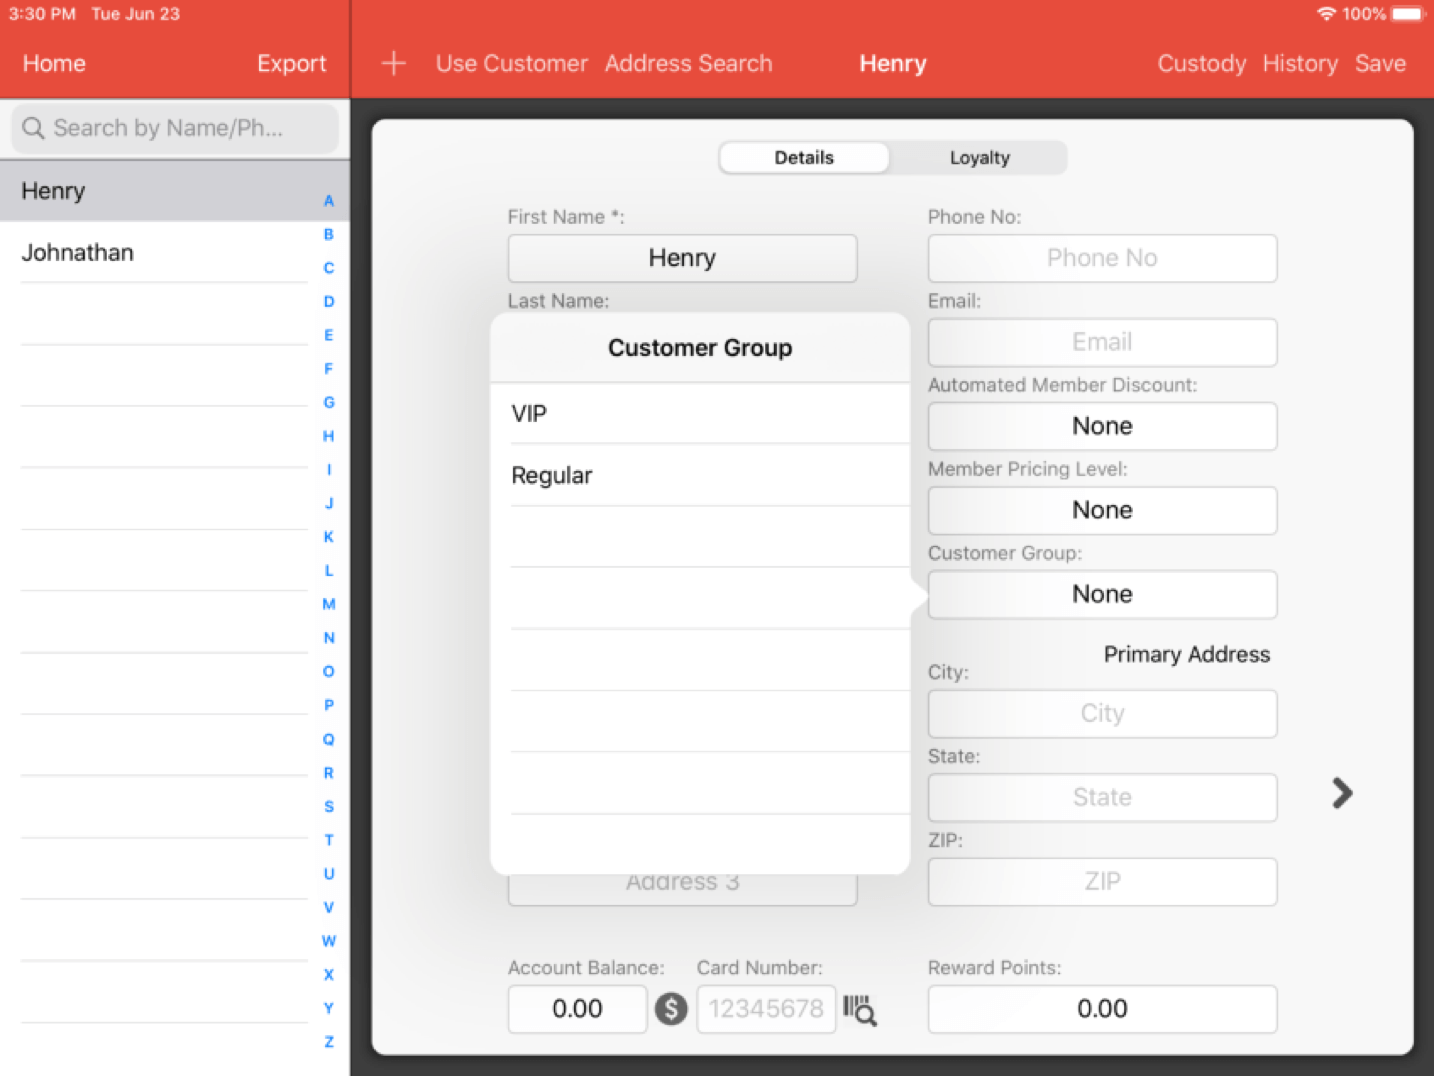
Click on Customer Group and pick a desired customer group for the customer.
Now that you have customers within customer groups, you are now able to complete transactions with those customers and have those details recorded for future use.
We will now proceed to assign the customer to a transaction.
From the main menu, click on the Cash Register button.
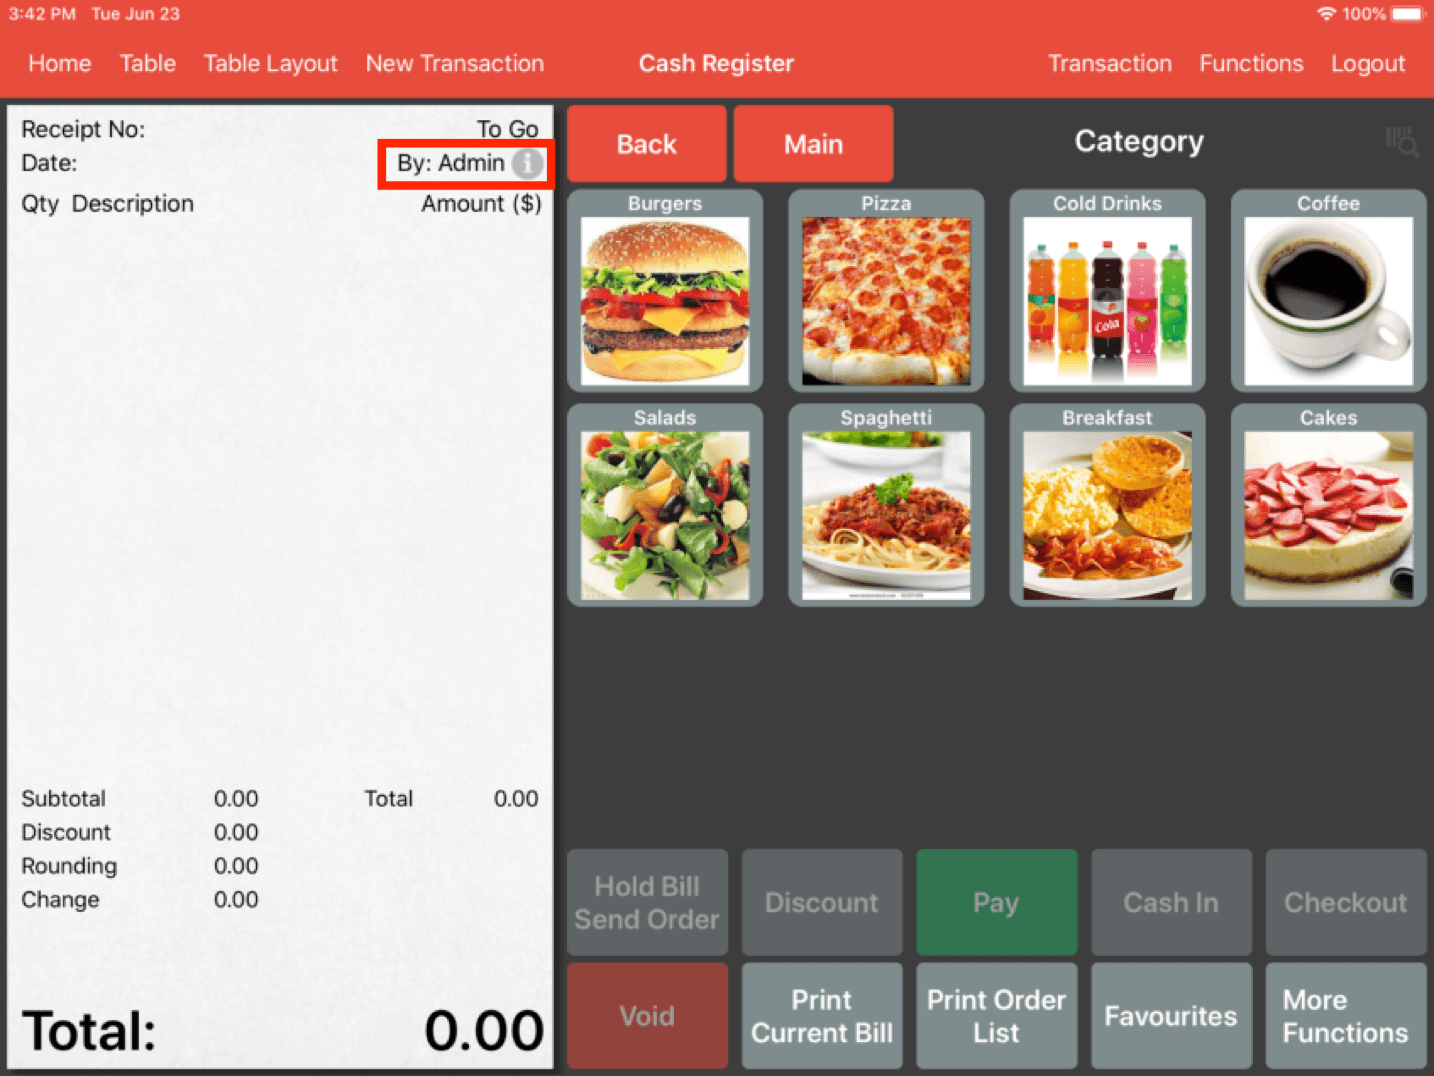
Click on info button located at the right top of the bill.
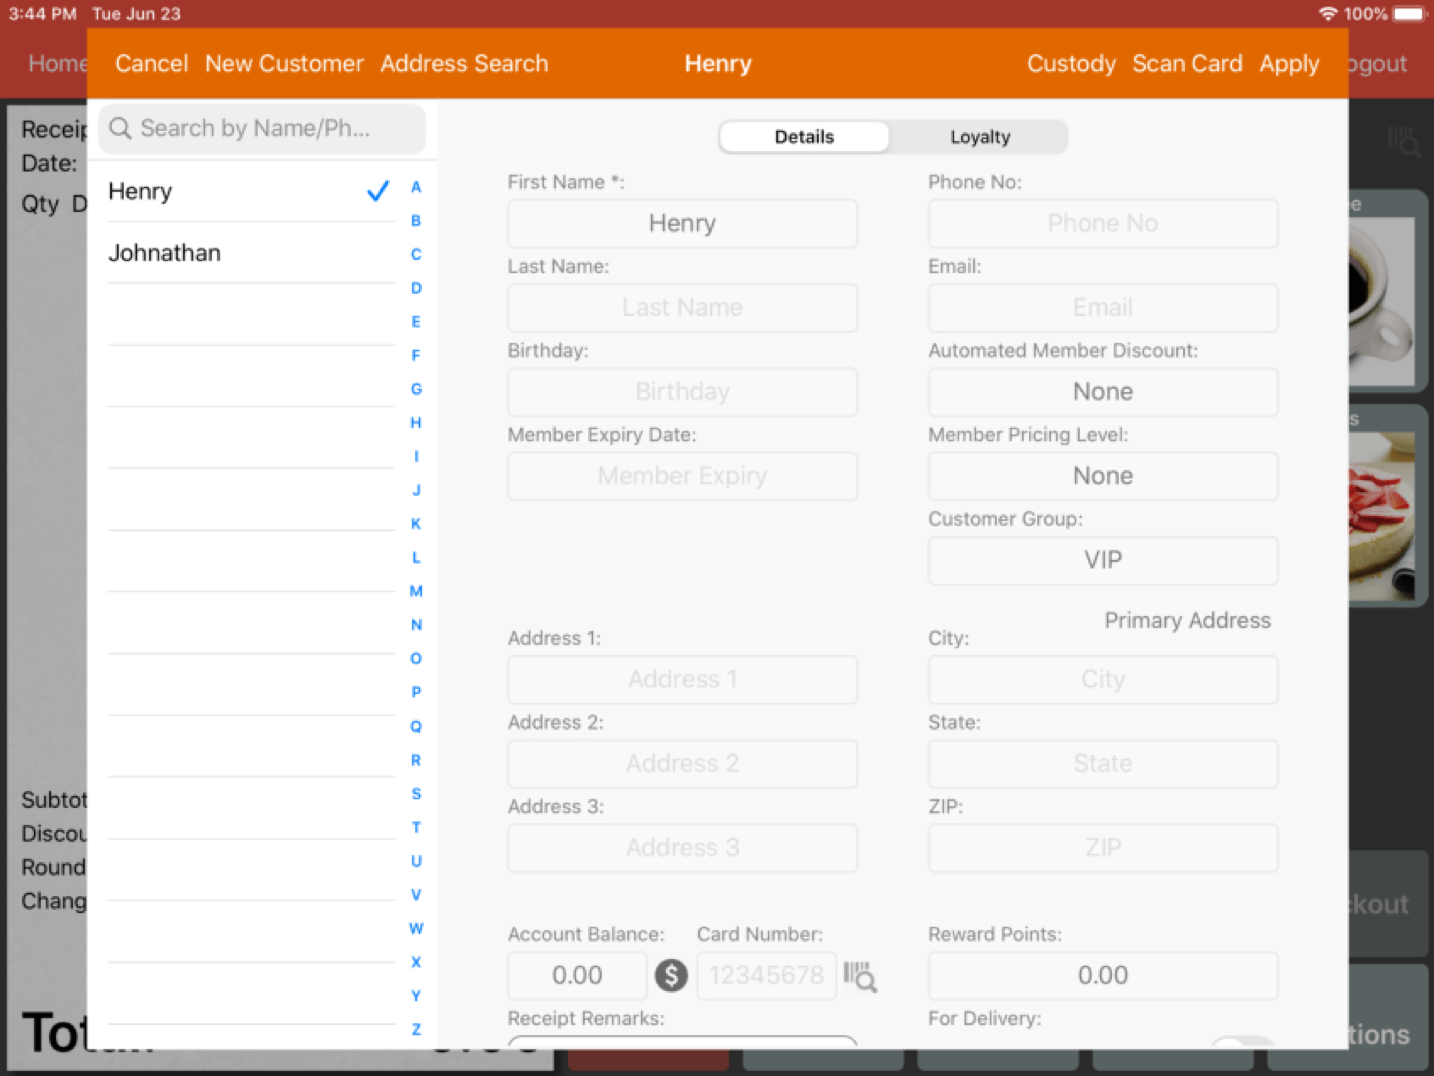
Choose a customer that already has a customer group assigned and click Apply. Now proceed with the transaction and checkout.
Now that you have customers in customer groups with transactions, you are able to generate data based on these specific customer groups.
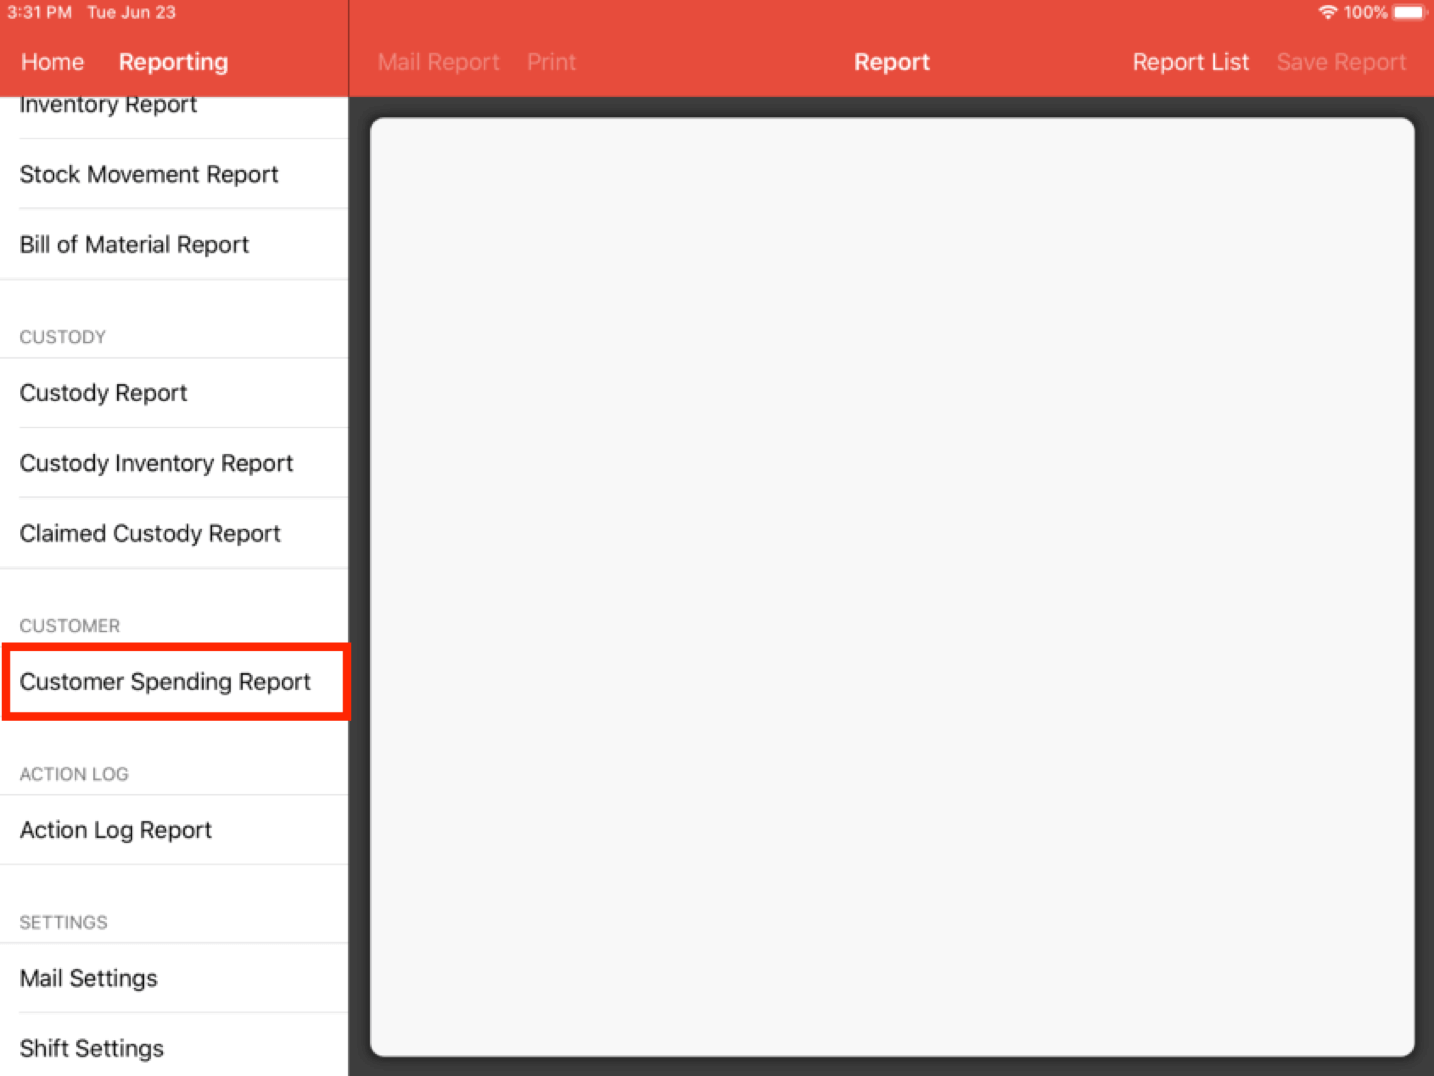
To do this, on the main page, click on the Report, scroll all the way down and click on the Customer Spending Report.
It now shows you the corresponding customer groups that have been created, to filter by groups, just click on Customer Group and select any customer groups that you would like to see, you may also select more than one option.
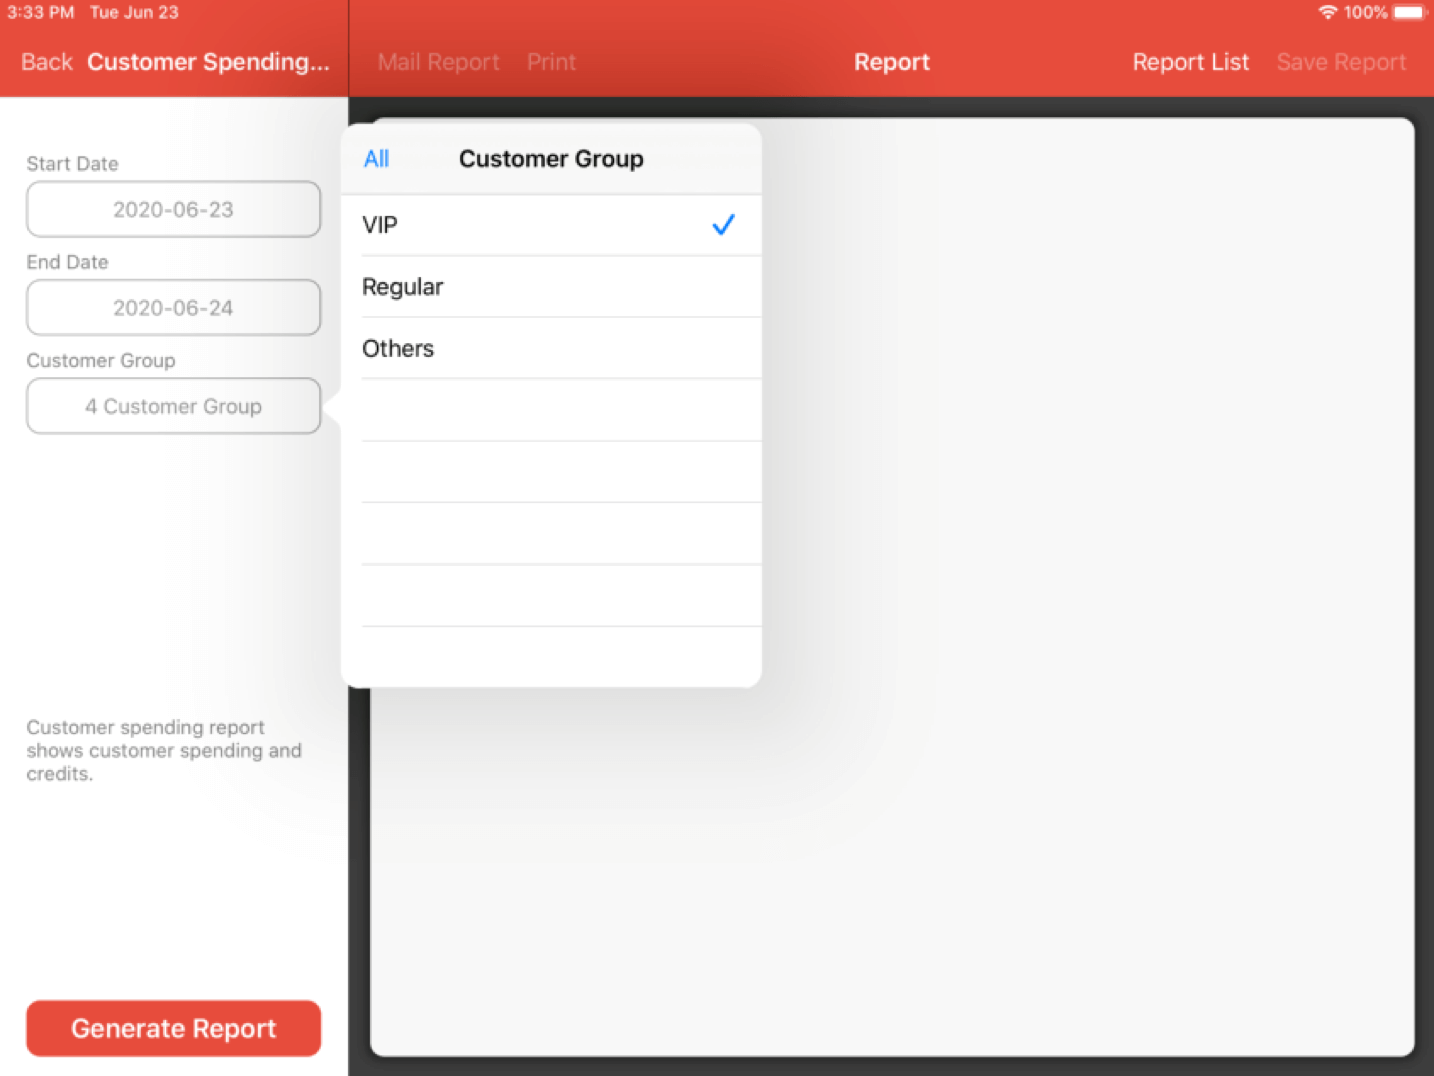
Next, click on the Generate Report button at the bottom.
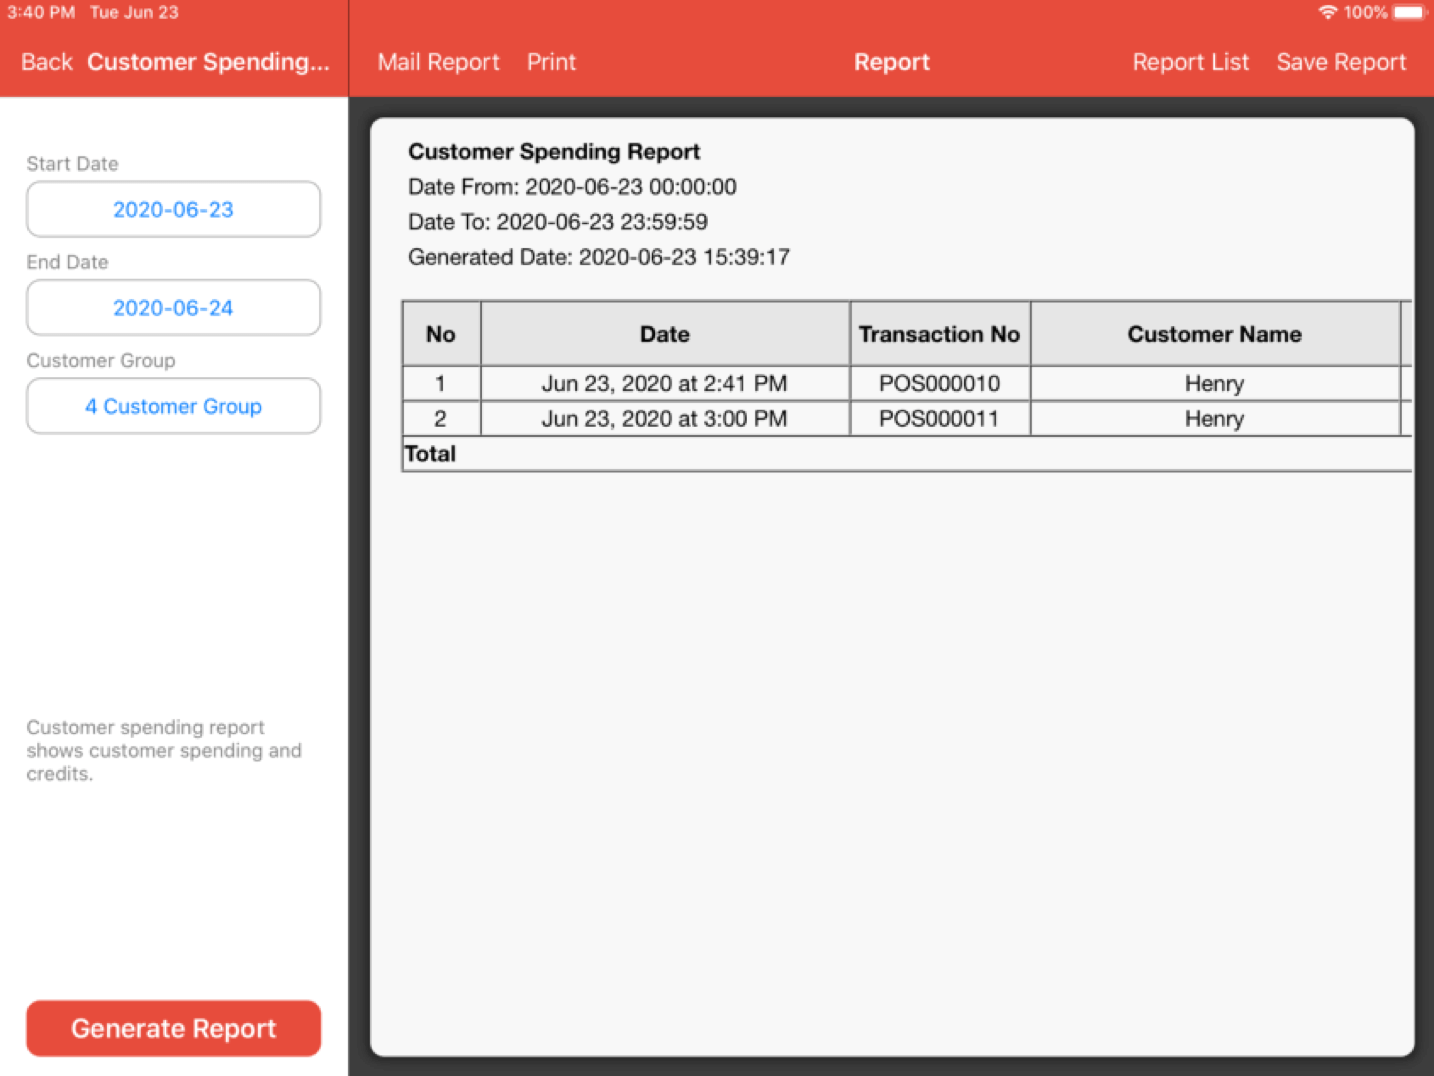
You are now able to see the customer spending report corresponding to the customer groups selected.