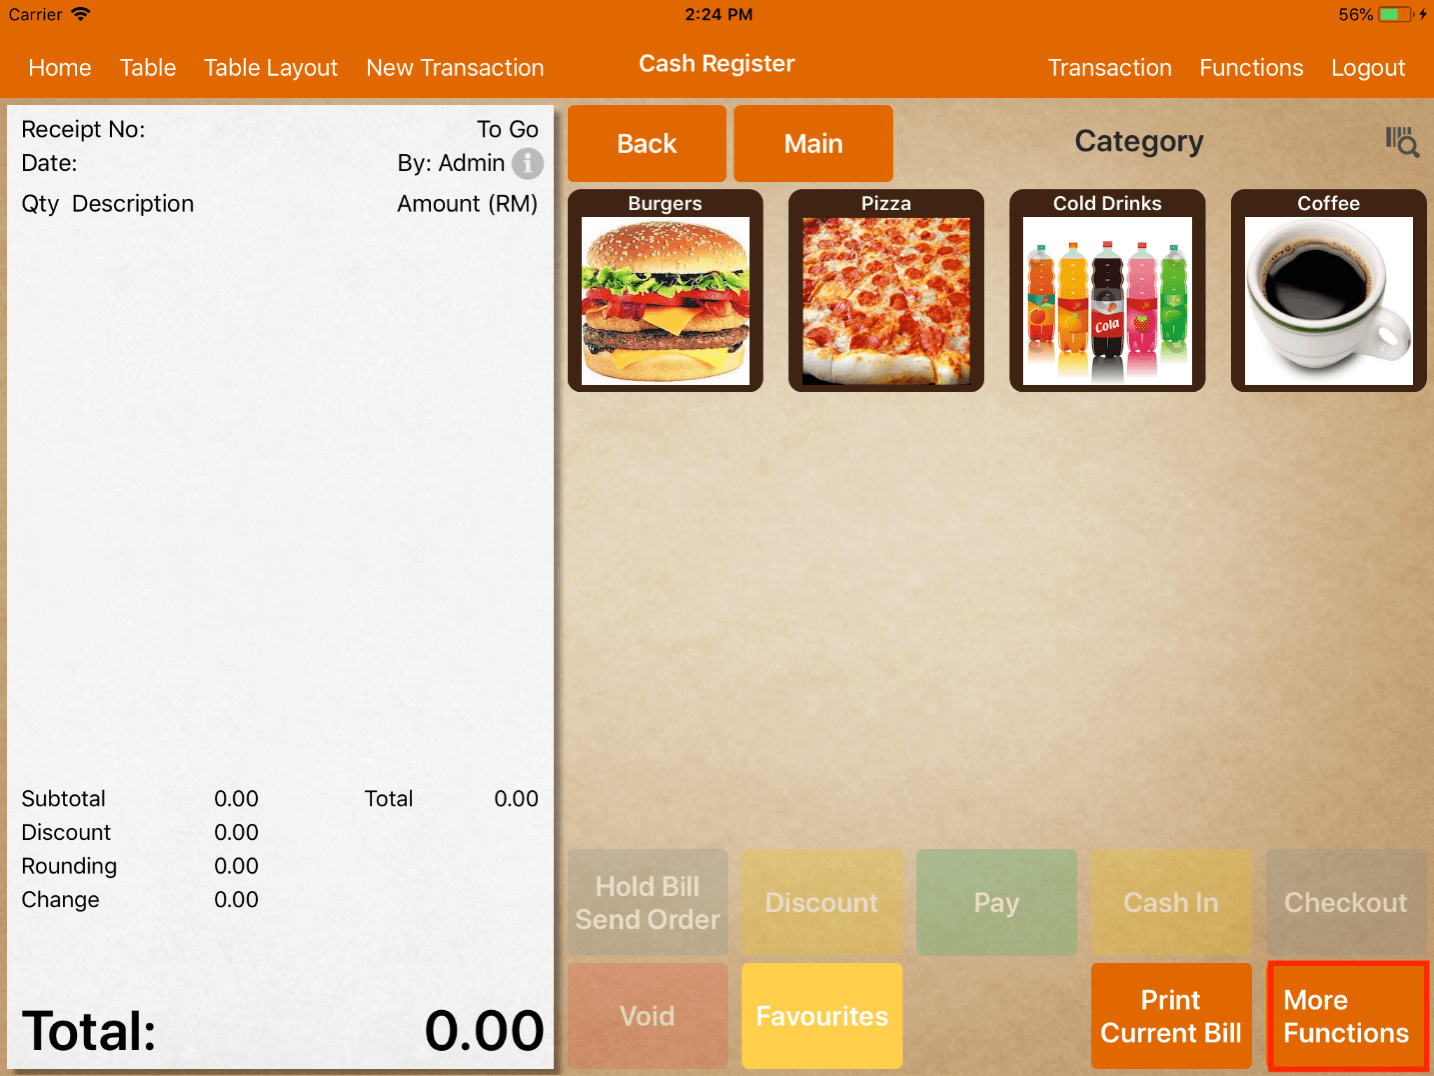
Button Layout
Button layout feature allows users to customize the layout of the button for each terminal device.
The display size and the button layout may vary on terminals with different screen sizes.
Do note that all changes should be made at the main terminal.
To customize the button layout, go to Settings -> Button Layout.
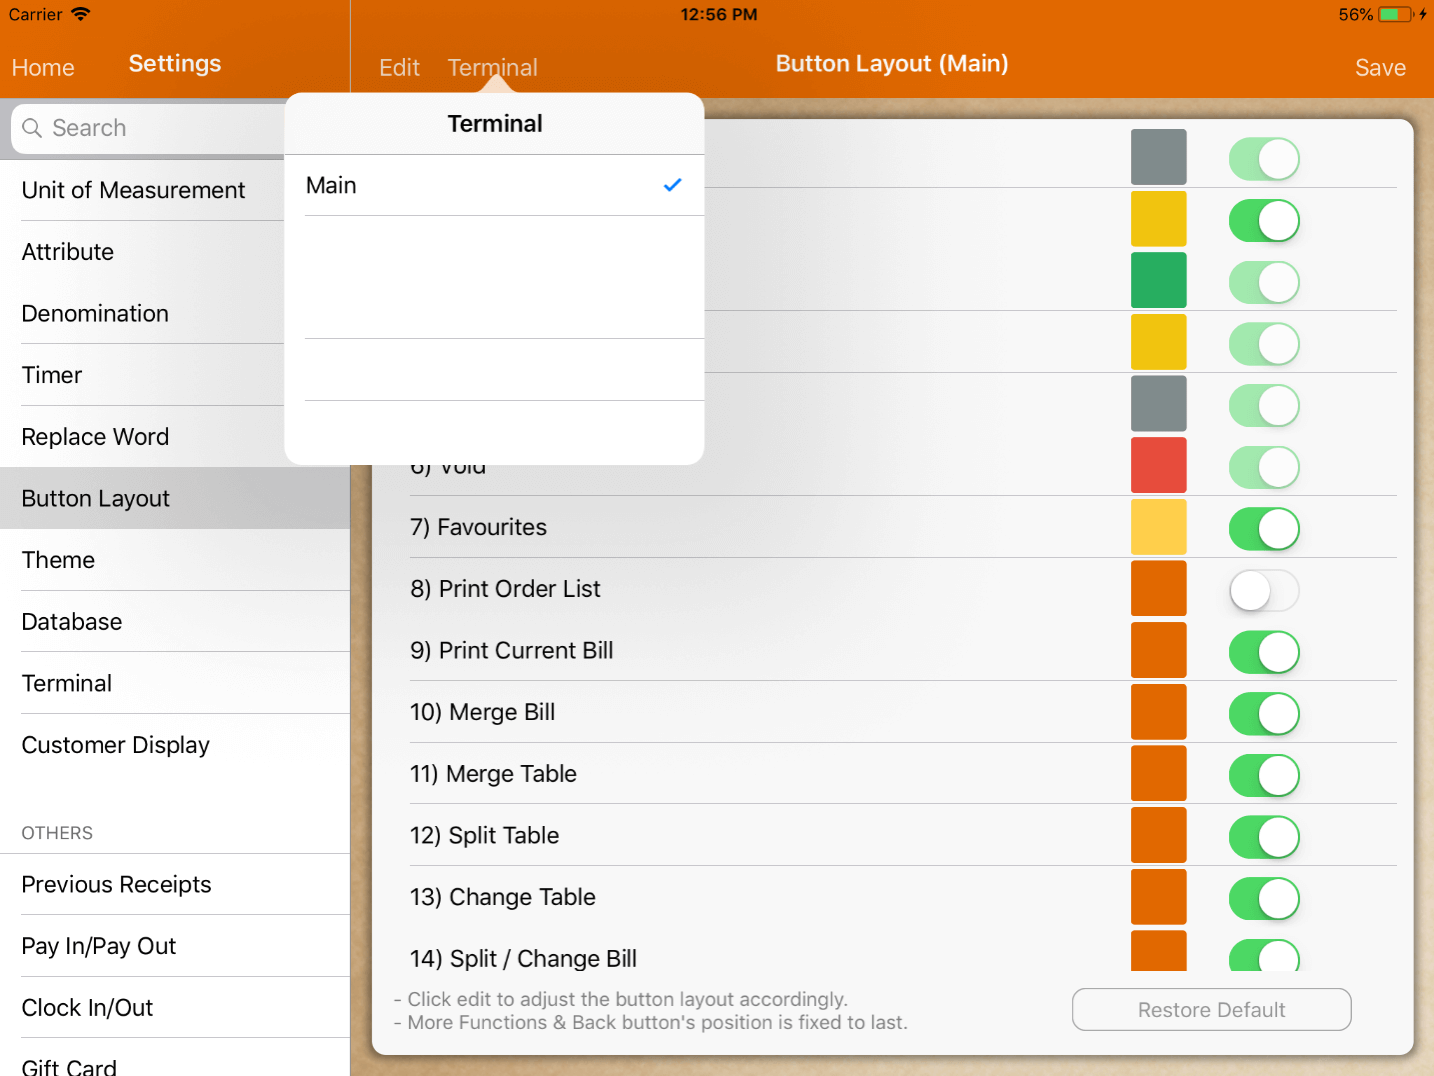
First, tap on "Terminal" and tap on the desired terminal as shown below.
Users can select which button to be displayed in the main menu.
Tap on the on/off switch located on the right as shown in the image below.
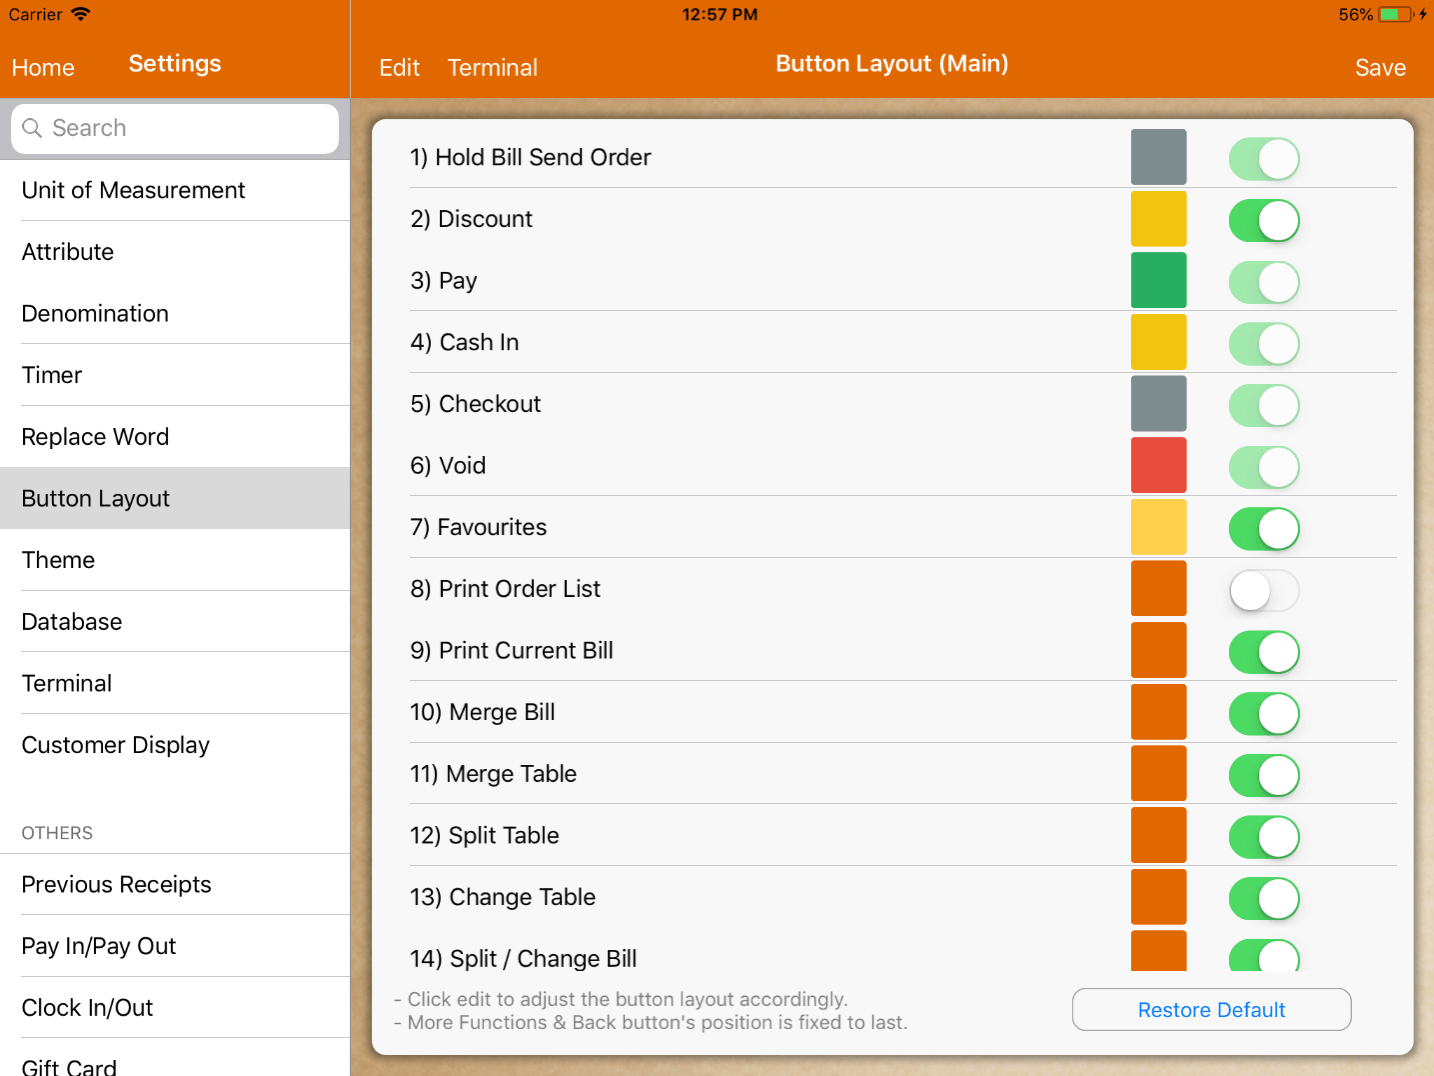
Do note that some of the buttons are switched on by default and can't be changed.
They are necessary for completing certain functions, hence not able to be turned off.
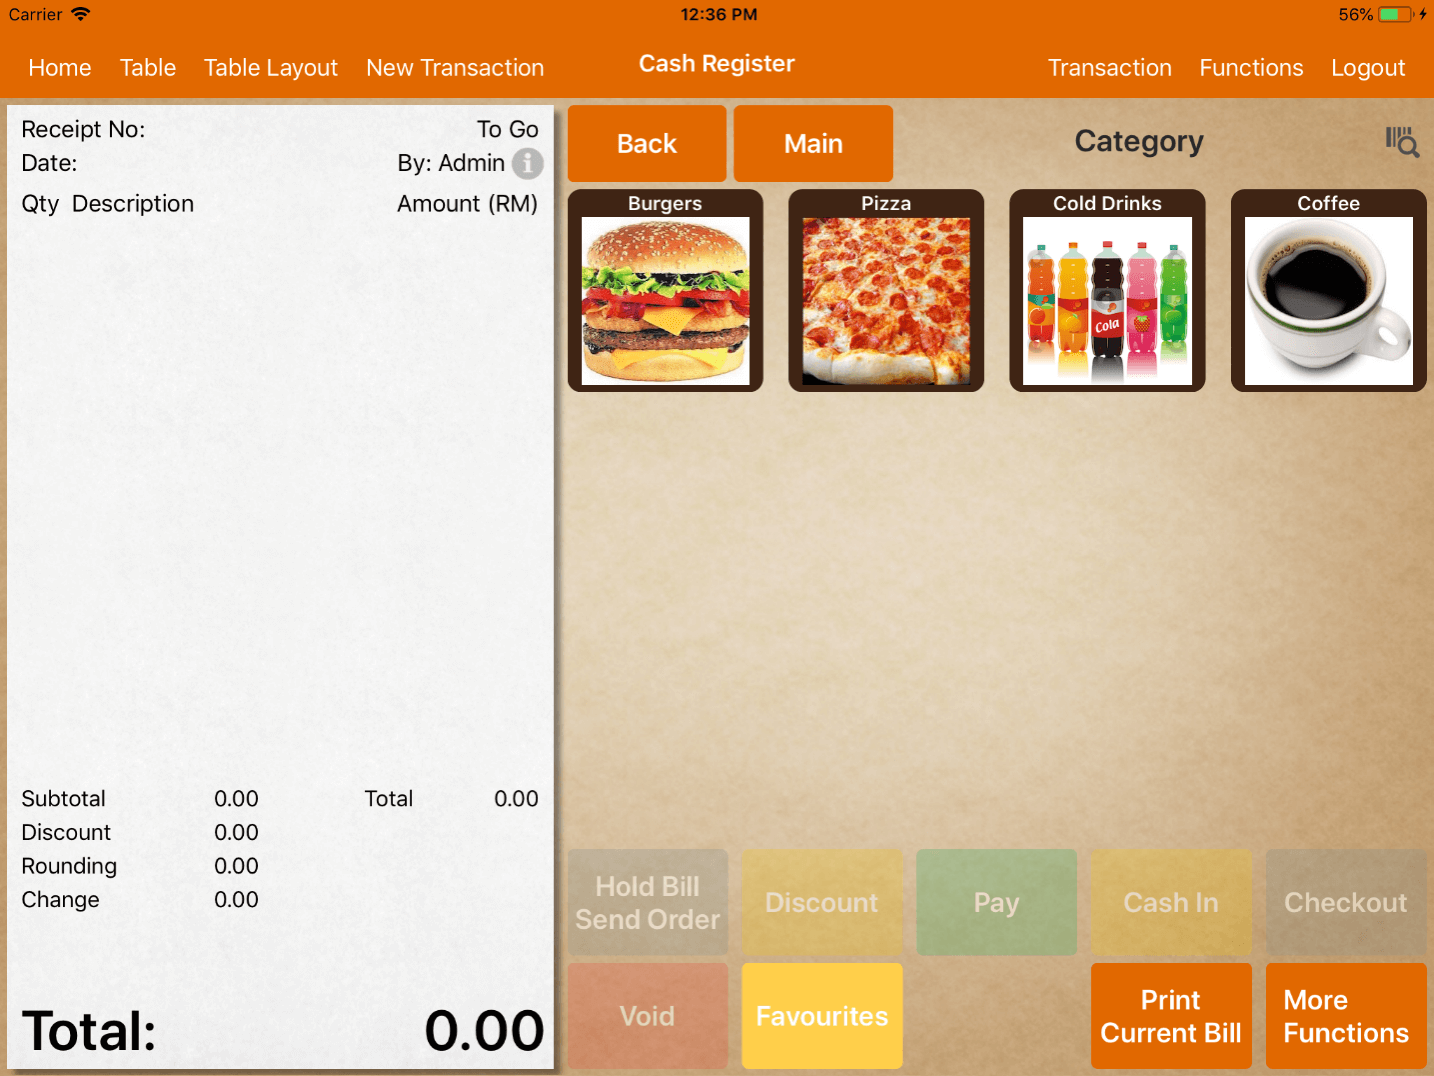
If the button is not needed and is switched off, the button will not be displayed in the main menu.
However, the respective button will still occupy a button layout space as shown below.
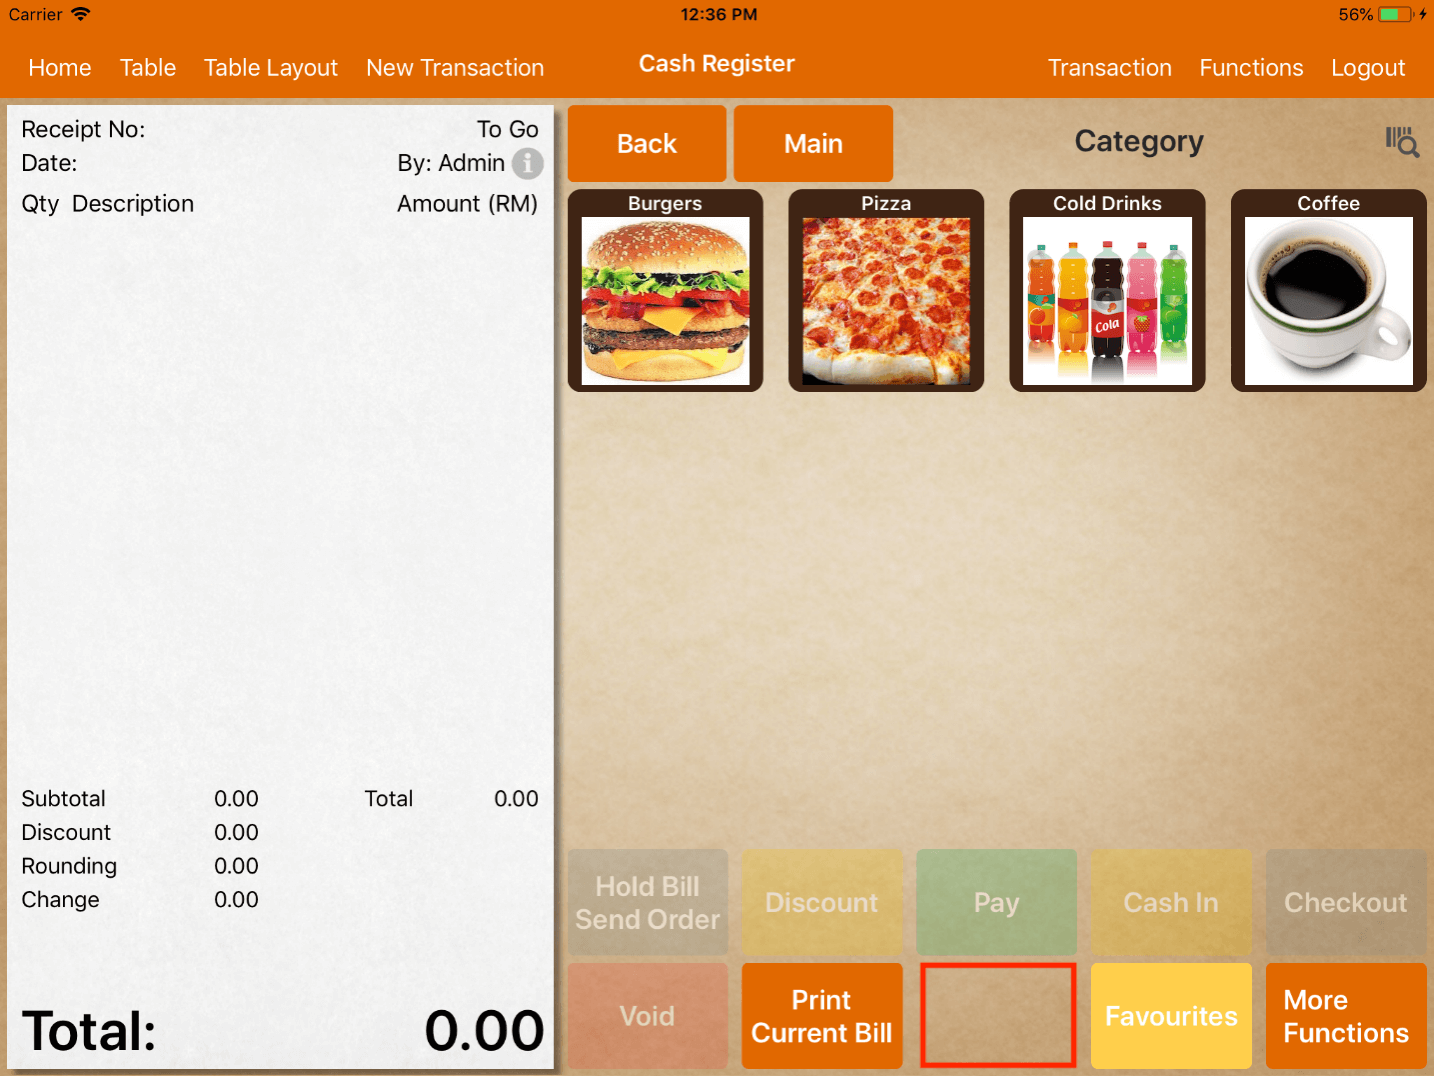
For example, the Print Order List button is switched off.
To edit the position of the button display, tap on "Edit" on the top left corner.
Then, click and hold on the three-bar icon located on the right of the button.
The three-bar icon will float and now you can drag that button to your preferred location.
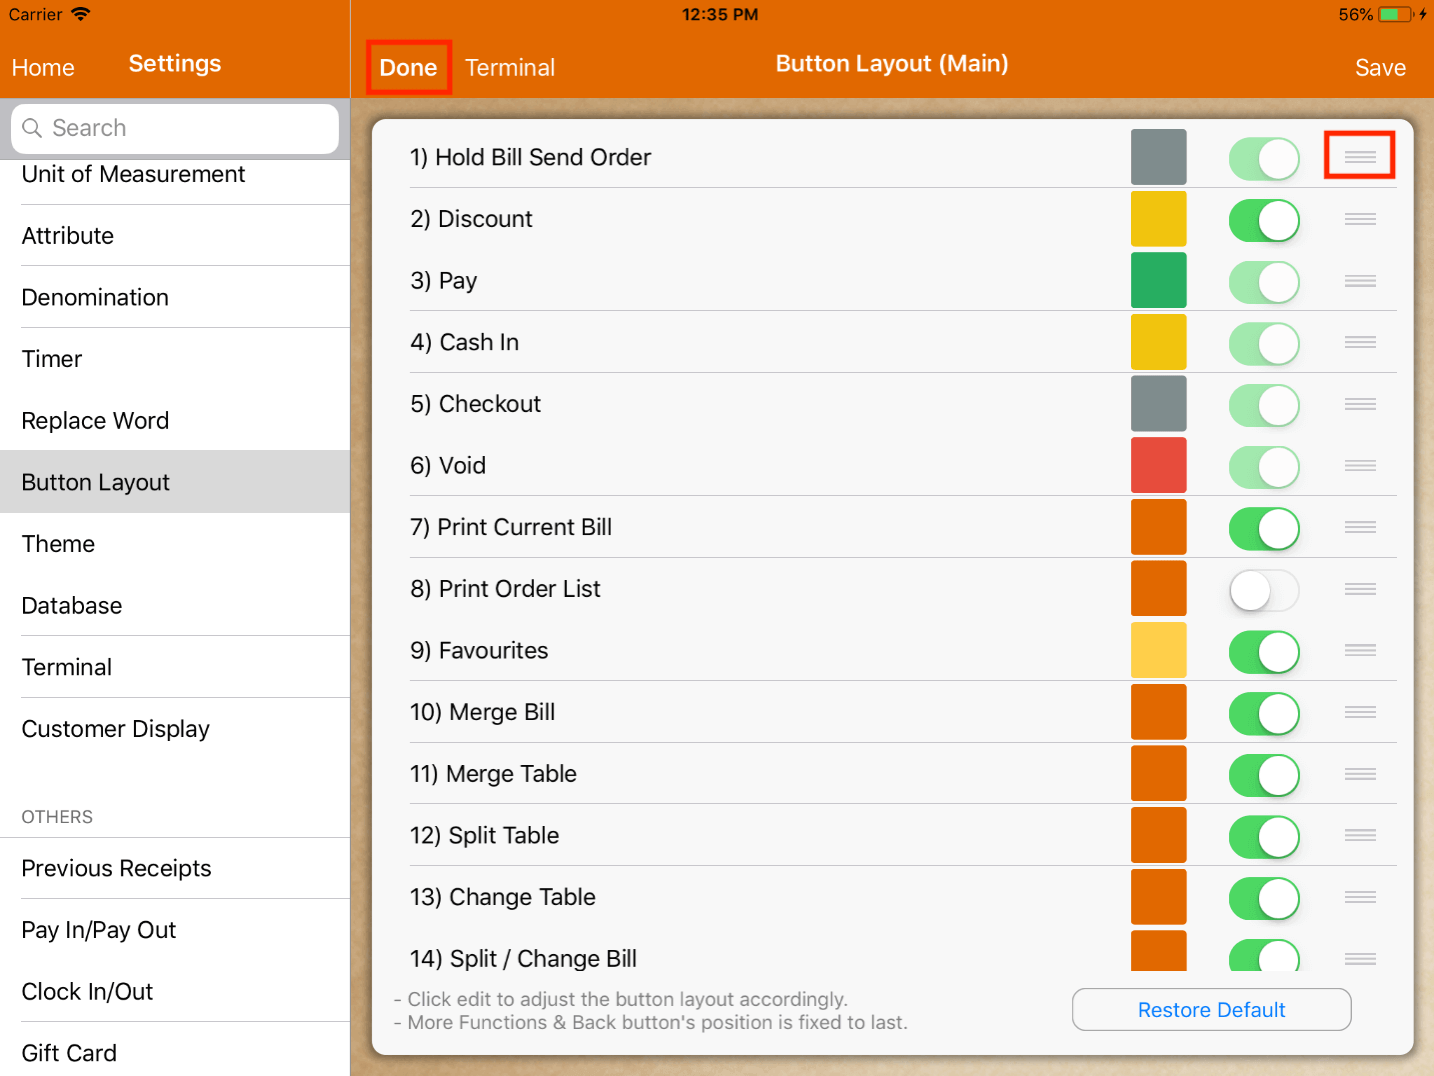
The sequence of the buttons are arranged fromtop to bottom during setup as shown in the image above.
However, it will be arranged from left to right in the menu, as shown below.
To change the color of the button, tap on the color button beside the switch.
The user can edit the color as shown in the image below.
Upon editing, click "Set" at the top right corner.
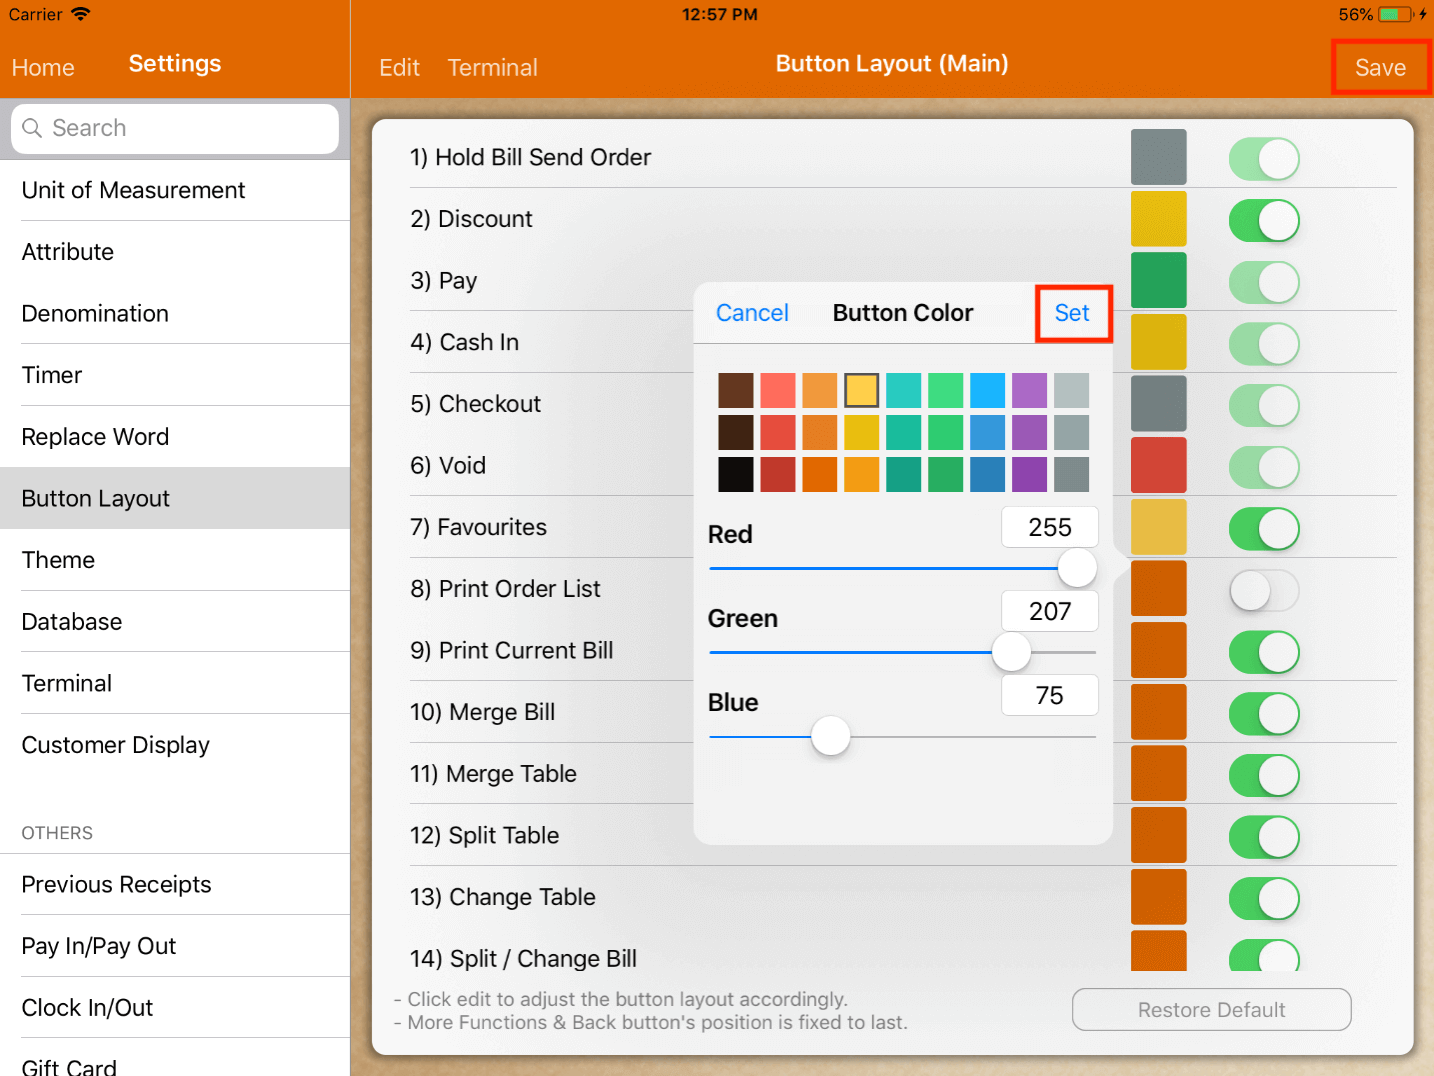
Do not forget to click "Save" located on the top right corner when all changes are done.
The position of the button "More Functions" and "Back" are always fixed, which will be at the bottom right corner regardless of the display size. Therefore, users have to customize the button layout accordingly.
