User Guide
MobiOrder is a web-based online ordering platform.
Assuming that you have set it up as instructed, you will be given a url.
Key in your own url and you will be directed to the ordering page.
A sample of a URL would be https://demo.mobi-order.com.
Now you should be promoting this URL to your users through Facebook, email marketing, or any other method of your own.
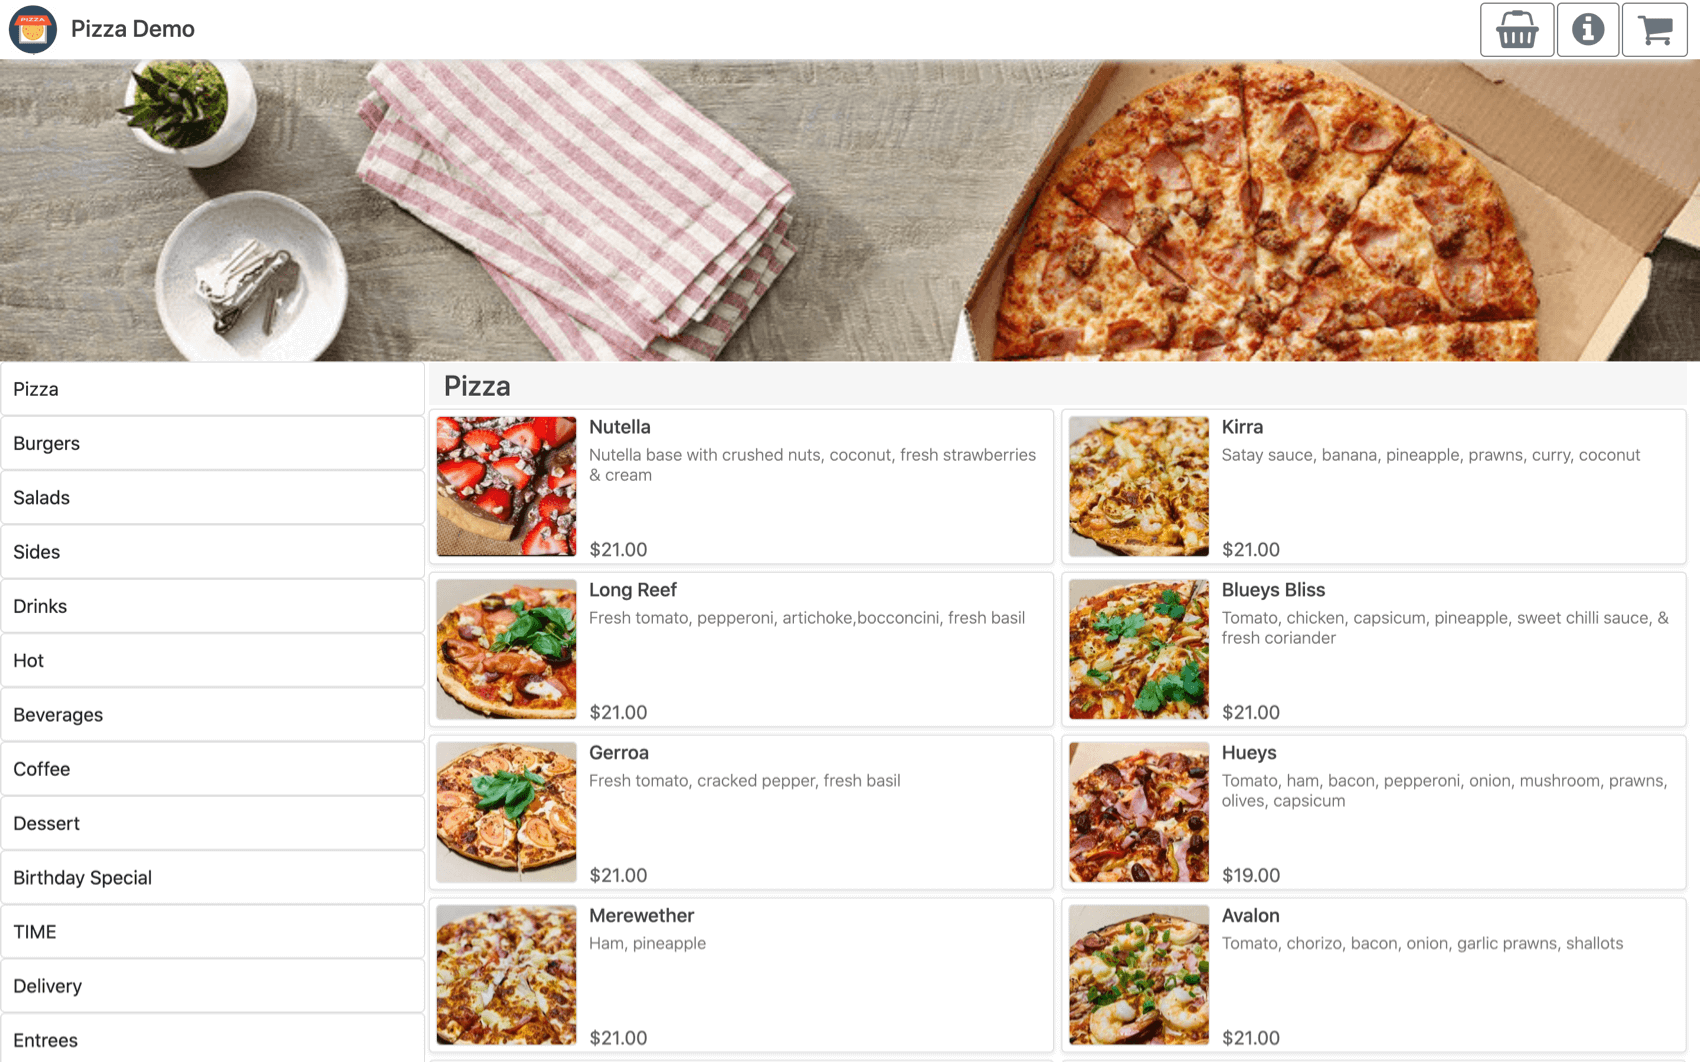
Category/Sub-category will be shown on the left, and your product item will be shown on the right.
Banner
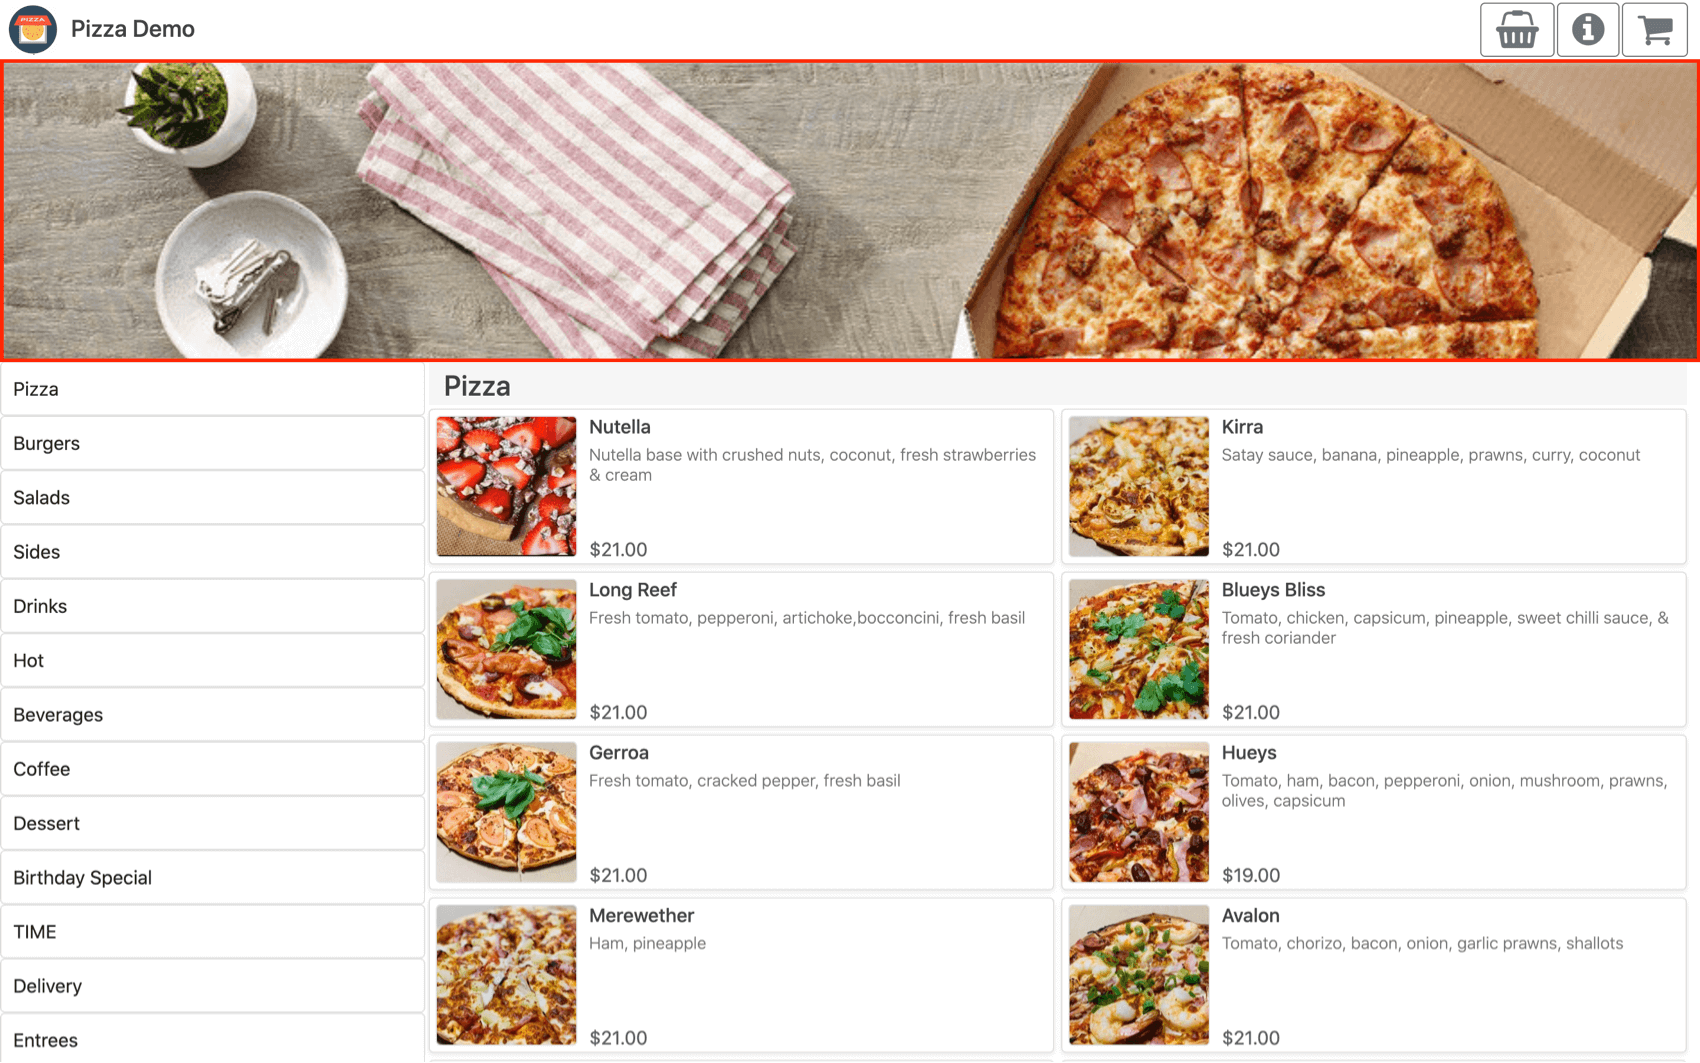
Upload a banner which will be displayed on top of the menu. Personalize the theme of the site to fit your store.
Category
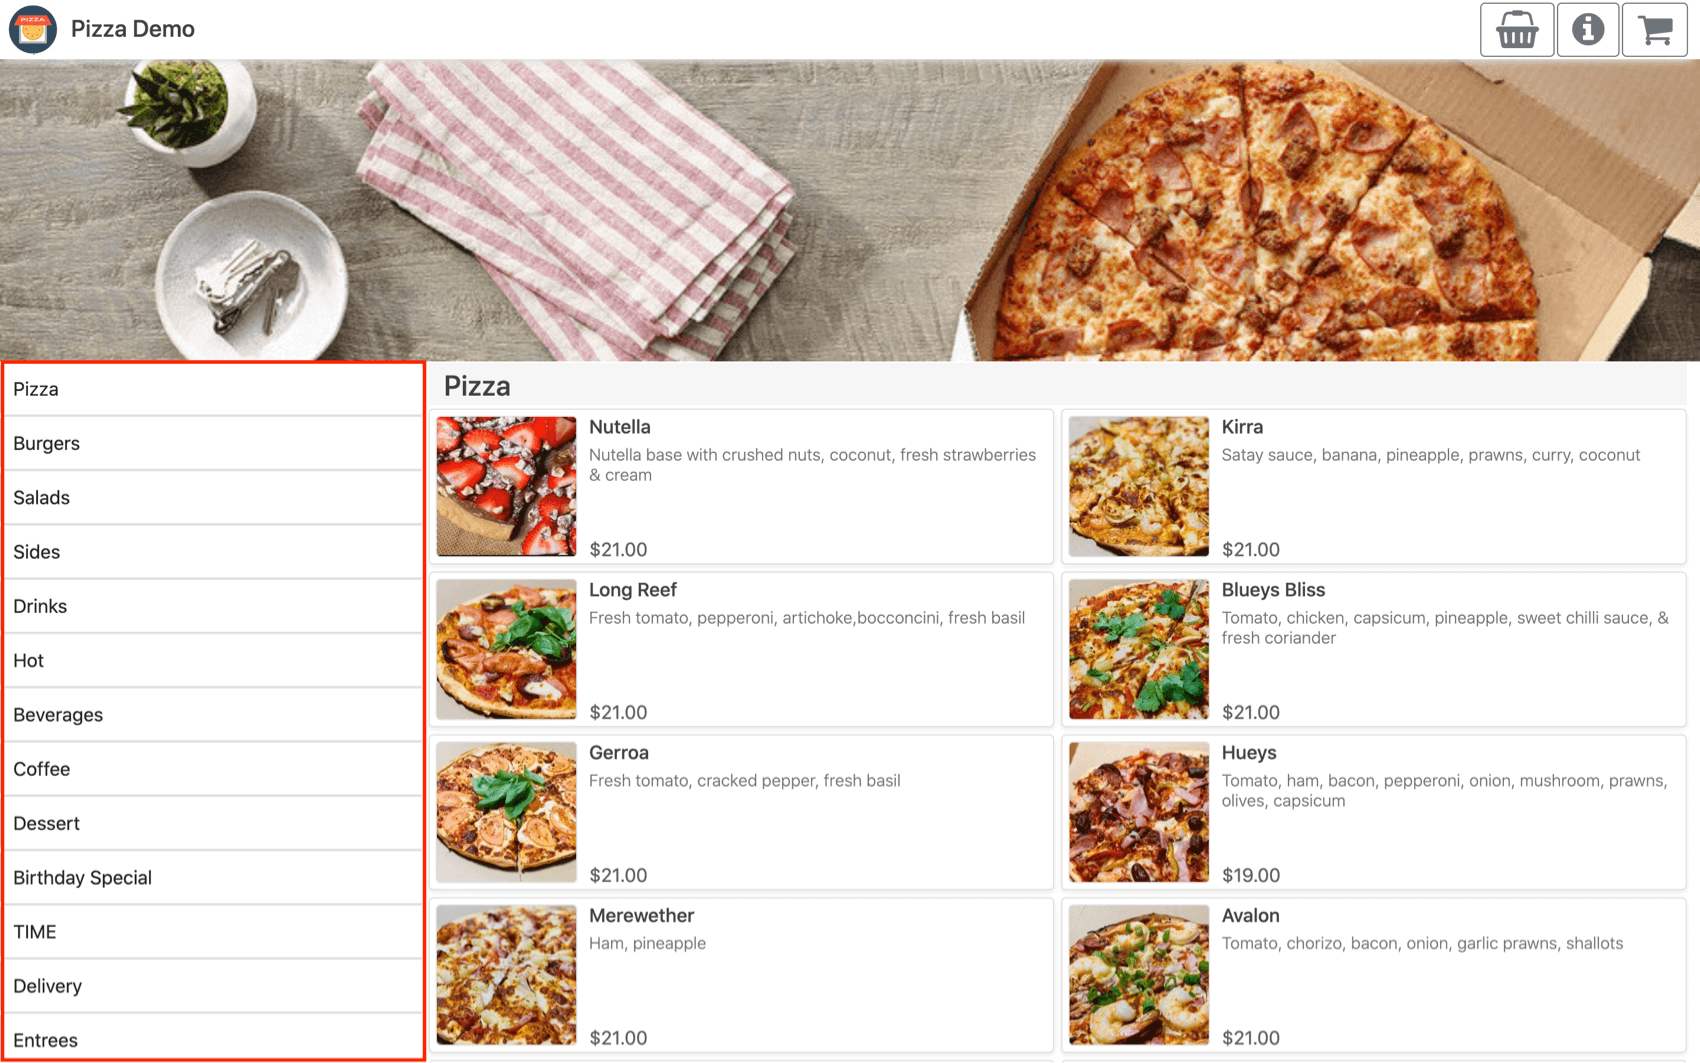
All categories and sub categories will be displayed on the left. Click on any of them and it will lead you to the menu under the category.
Product
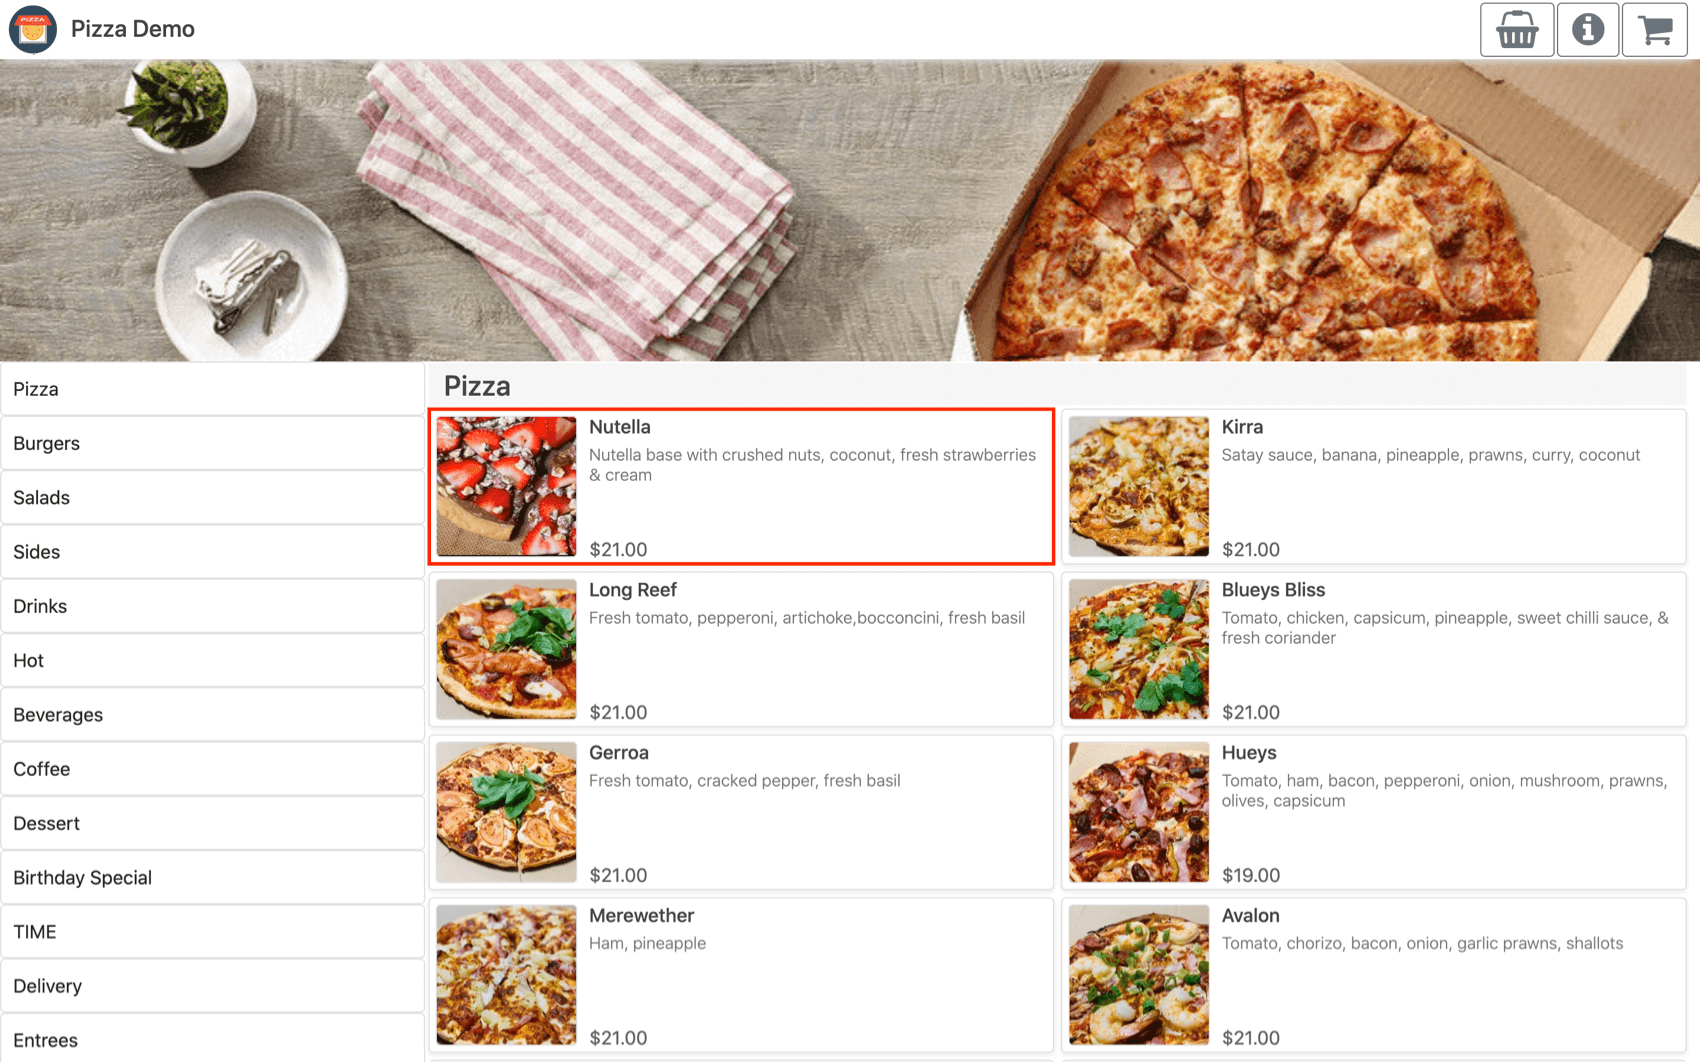
Product Picture
Product image can be uploaded from either the iPad Point of Sale or from CloudSync.
Look for Menu's Image in Online Ordering settings if you wish to not show the product image.
However, having an image would encourage customer's spending.
Product Name
The product name is in bold, it is coming from the product's Item Name that you have created.
Product Description
Give the product a short description, it can be changed at Settings -> Item, look for the product item's Item Notes right below the product's icon.
This can also be done from CloudSync, in Stocks -> Item -> Item Notes located at the bottom.
Product Price
Display based on the current order type or pricing level that is configured.
If you wish to have different pricing in the online store as compared to in-store, configure the Pricing Level in Online Ordering settings.
Pricing Level has to be configured in the iPad application before it could be chosen.
Look for Settings -> Pricing Level in the iPad application.
Product Details
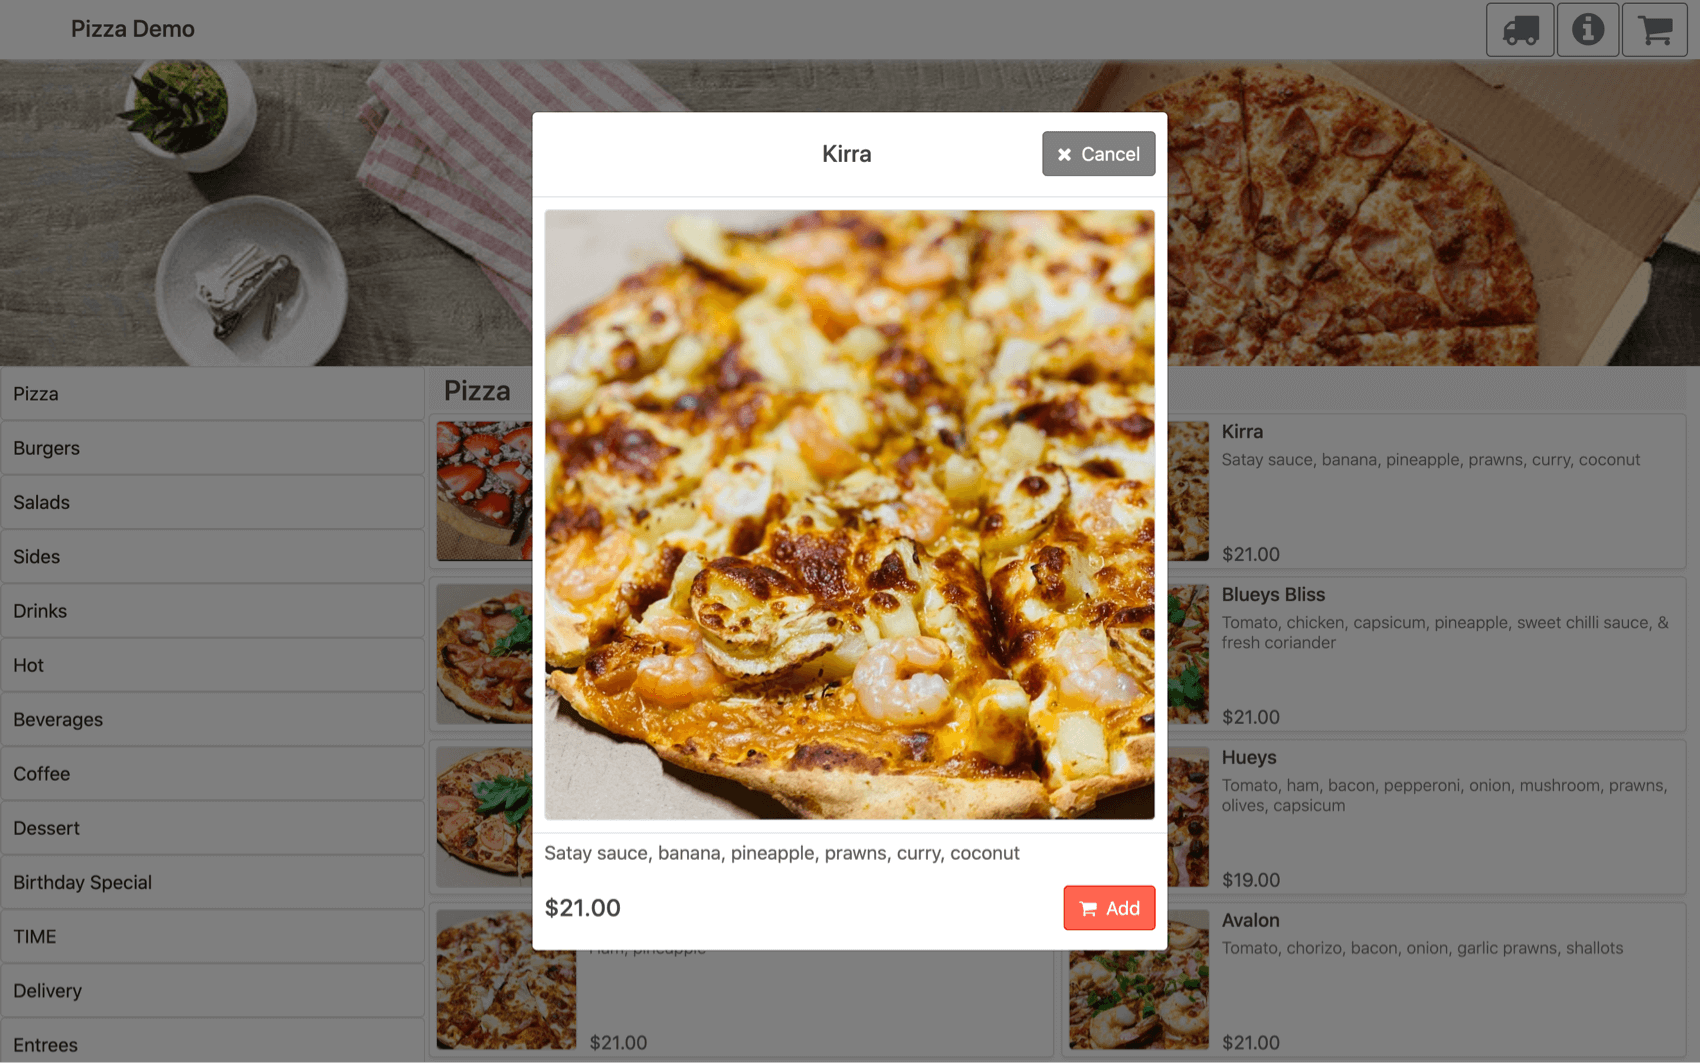
Clicking on the product's photo will give you an enlarged photo with the description and price at the bottom.
Image uploaded is encouraged to have a dimension of 1080px x 1080px to cater for all devices' screen type.
Modifier Group/Variant
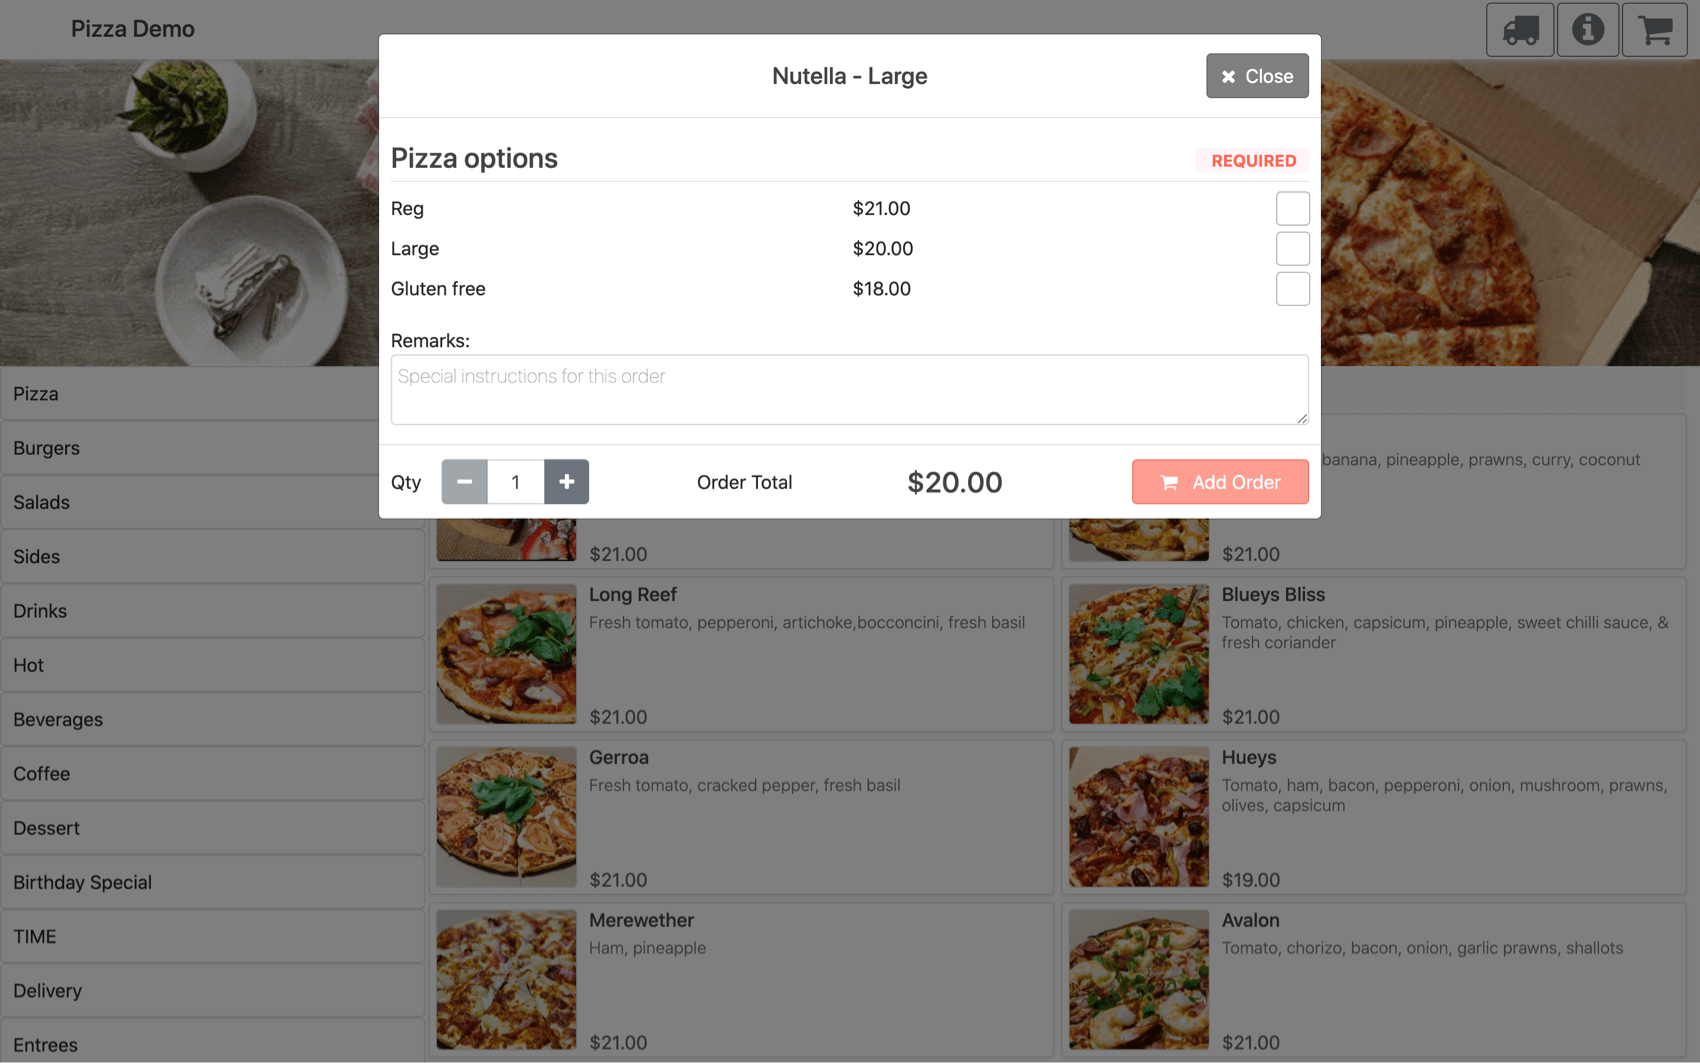
For products with modifier groups or variants, a pop-up will be shown with the choices.
Optional or Required will be shown on the right top of each group.
Users can also change the quantity of each modifier upon selecting if its allowed.
Configure Max Choice to be 1 or turn on Unique Selection if only 1 option for each is allowed.
Ordering Method
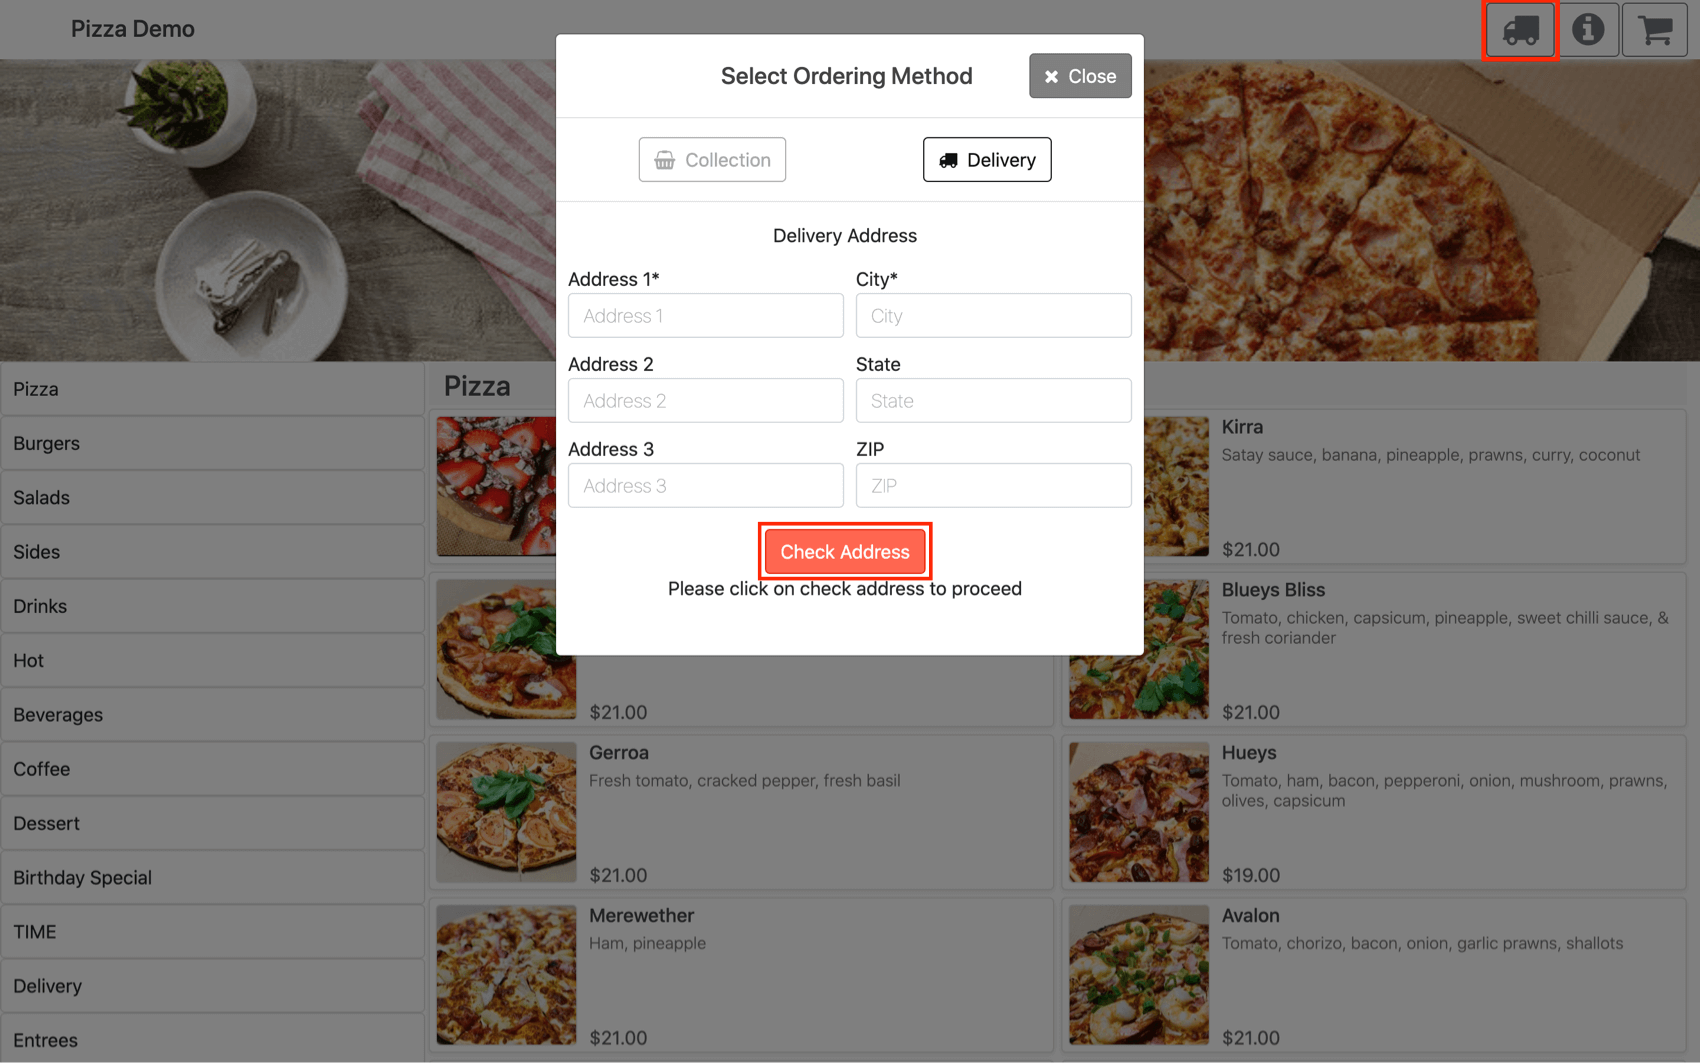
Click on the button located at the right top to change the ordering method, it can be either collection or delivery.
With delivery, an address has to be filled in.
It will be auto-filled if the user did allow the location access when they were first prompted by the browser.
Click on Check Address and drag the pin accurately to the location if it is incorrect.
Having the pin dropped accurately will help the riders to reach them, as they could scan the QR code printed at the bottom of the receipt and bring up Google Maps.
Delivery distance and fees will be calculated based on the input of the customer.
Click Save to proceed to order.
General Info
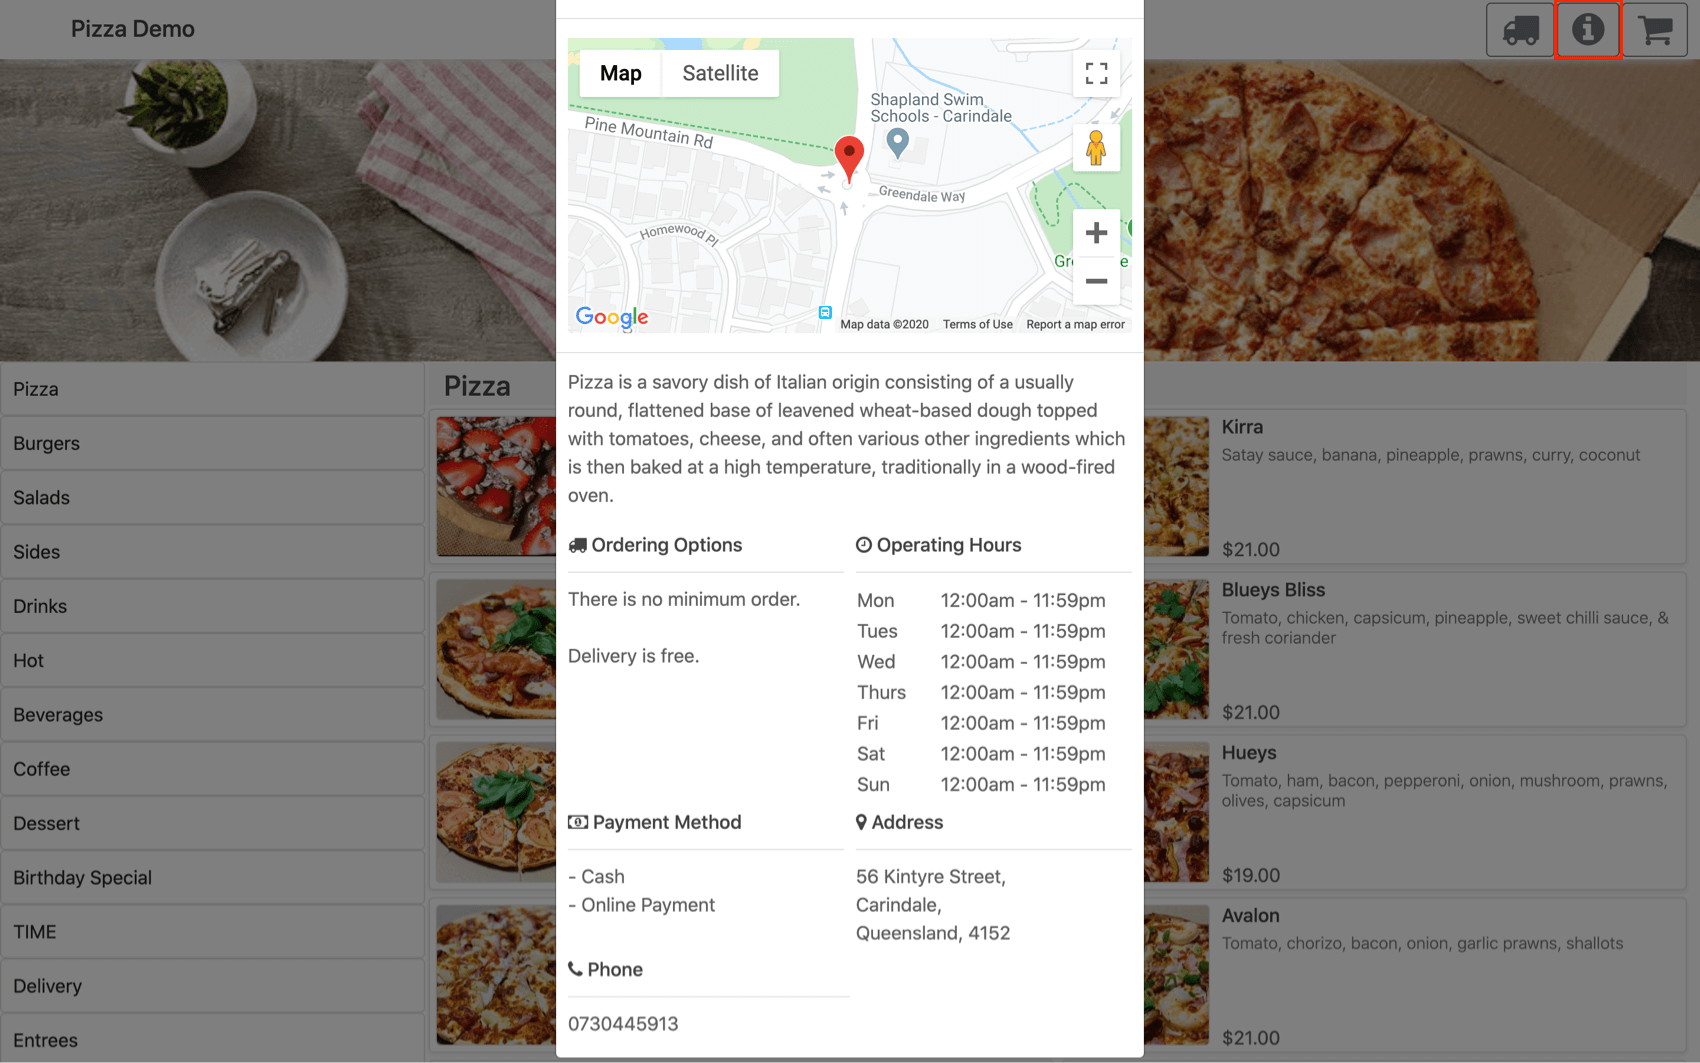
Address
The address displayed on top is the address that was keyed in the Outlet Address in Online Ordering settings.
During the setup, drag the pin accurately to your store so your customer could locate your store easier.
General Information
Look for General Info in Online Ordering settings to change this section of text.
An introduction to your store will be great.
Ordering Options
Automatically generated by the system based on the setup that is done.
Delivery fee, range, and ordering method that is available will be displayed.
Operation Hours
Generated automatically by the system based on the setup keyed in at Operating Hours.
Payment Method
Generated automatically by the system based on the supported payment method setup.
Cart
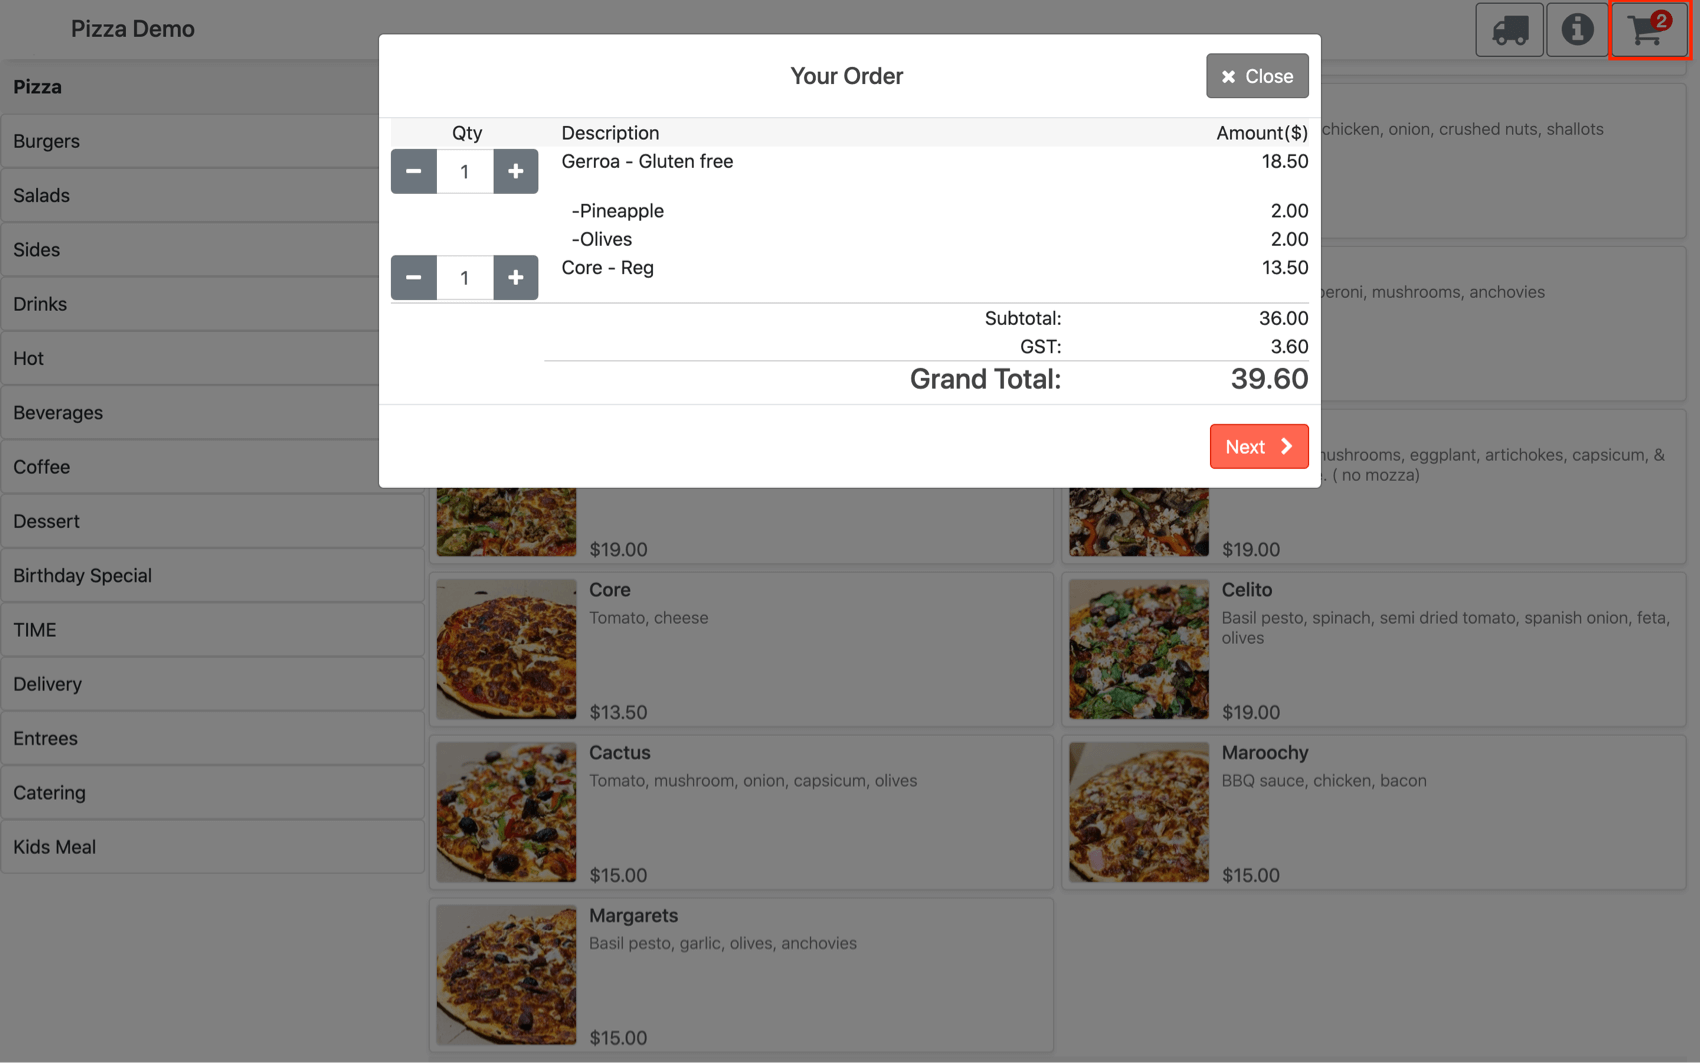
On the right top, the cart gives a summary of all orders with its tax and grand total.
Grand total might change later if the ordering/payment method is changed later on.
Click on Next to proceed.
Ordering Method
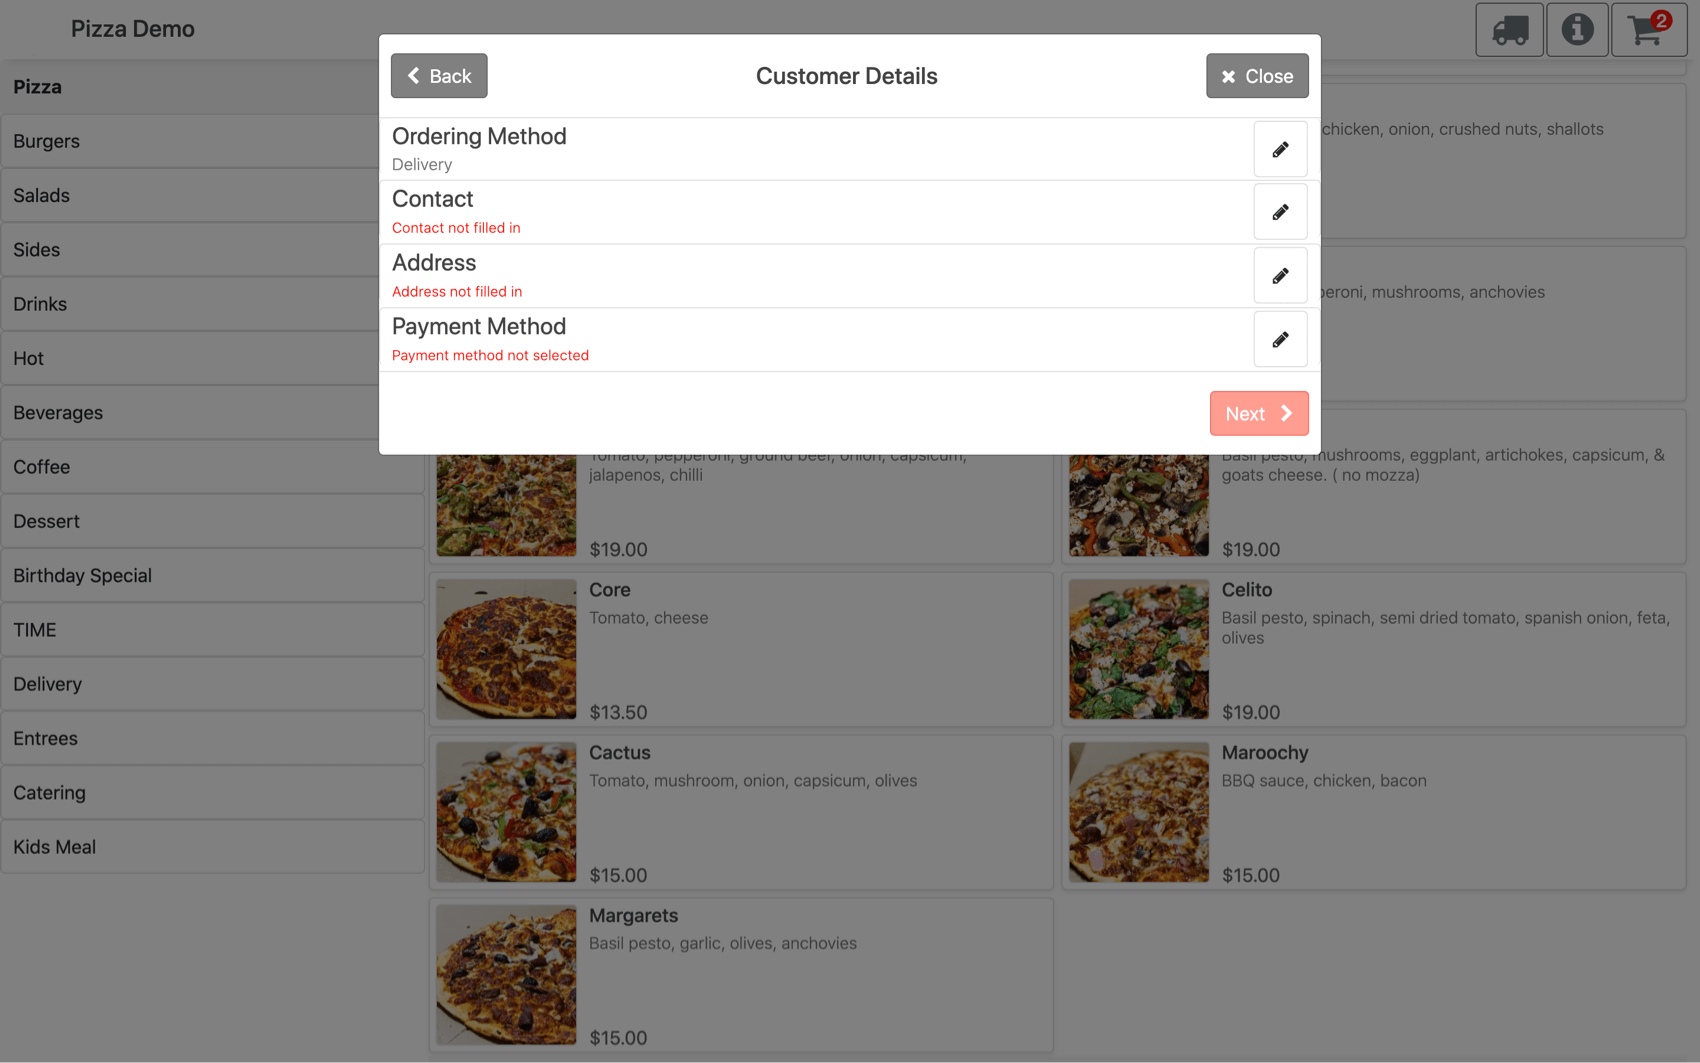
Ordering method can still be changed here if they did not specify which mode they preferred in the beginning.
Different ordering method will update the cart's product pricing and delivery fees.
Customer Details
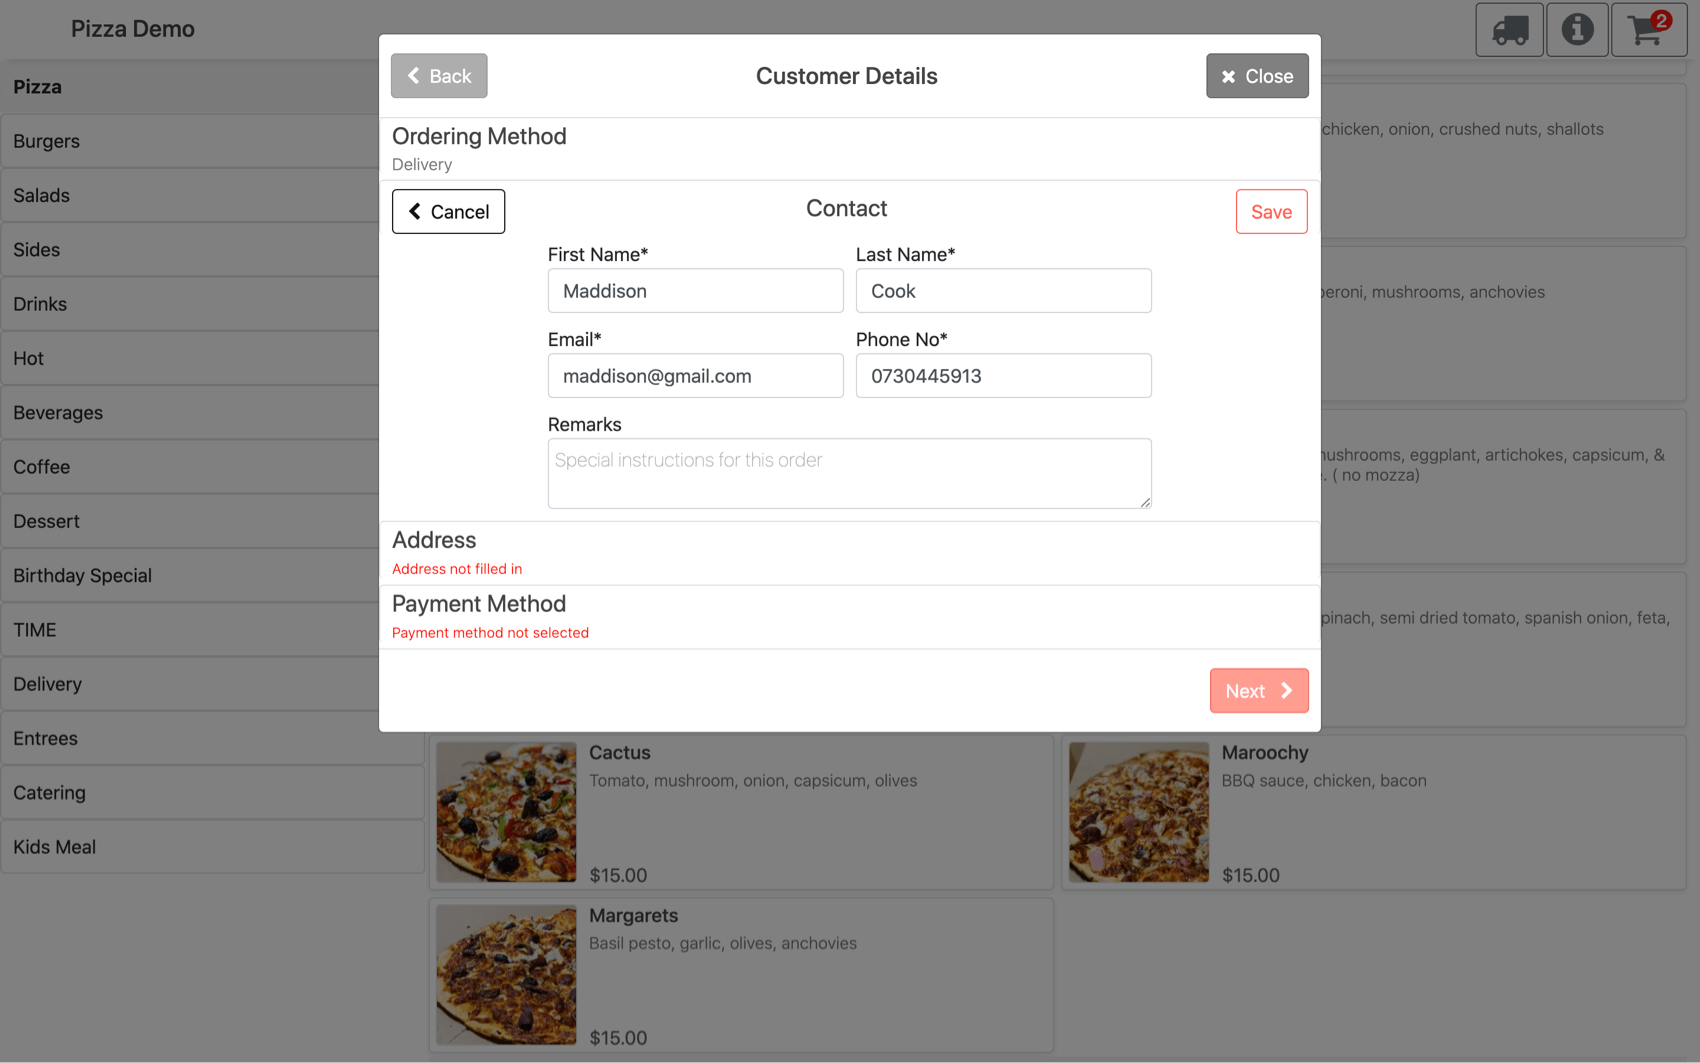
Contacts under Customer Details. Email and phone number will be the most important as that will be used to contact the customer if there's an error.
Any change of events to the order, an email will be sent to them.
Address
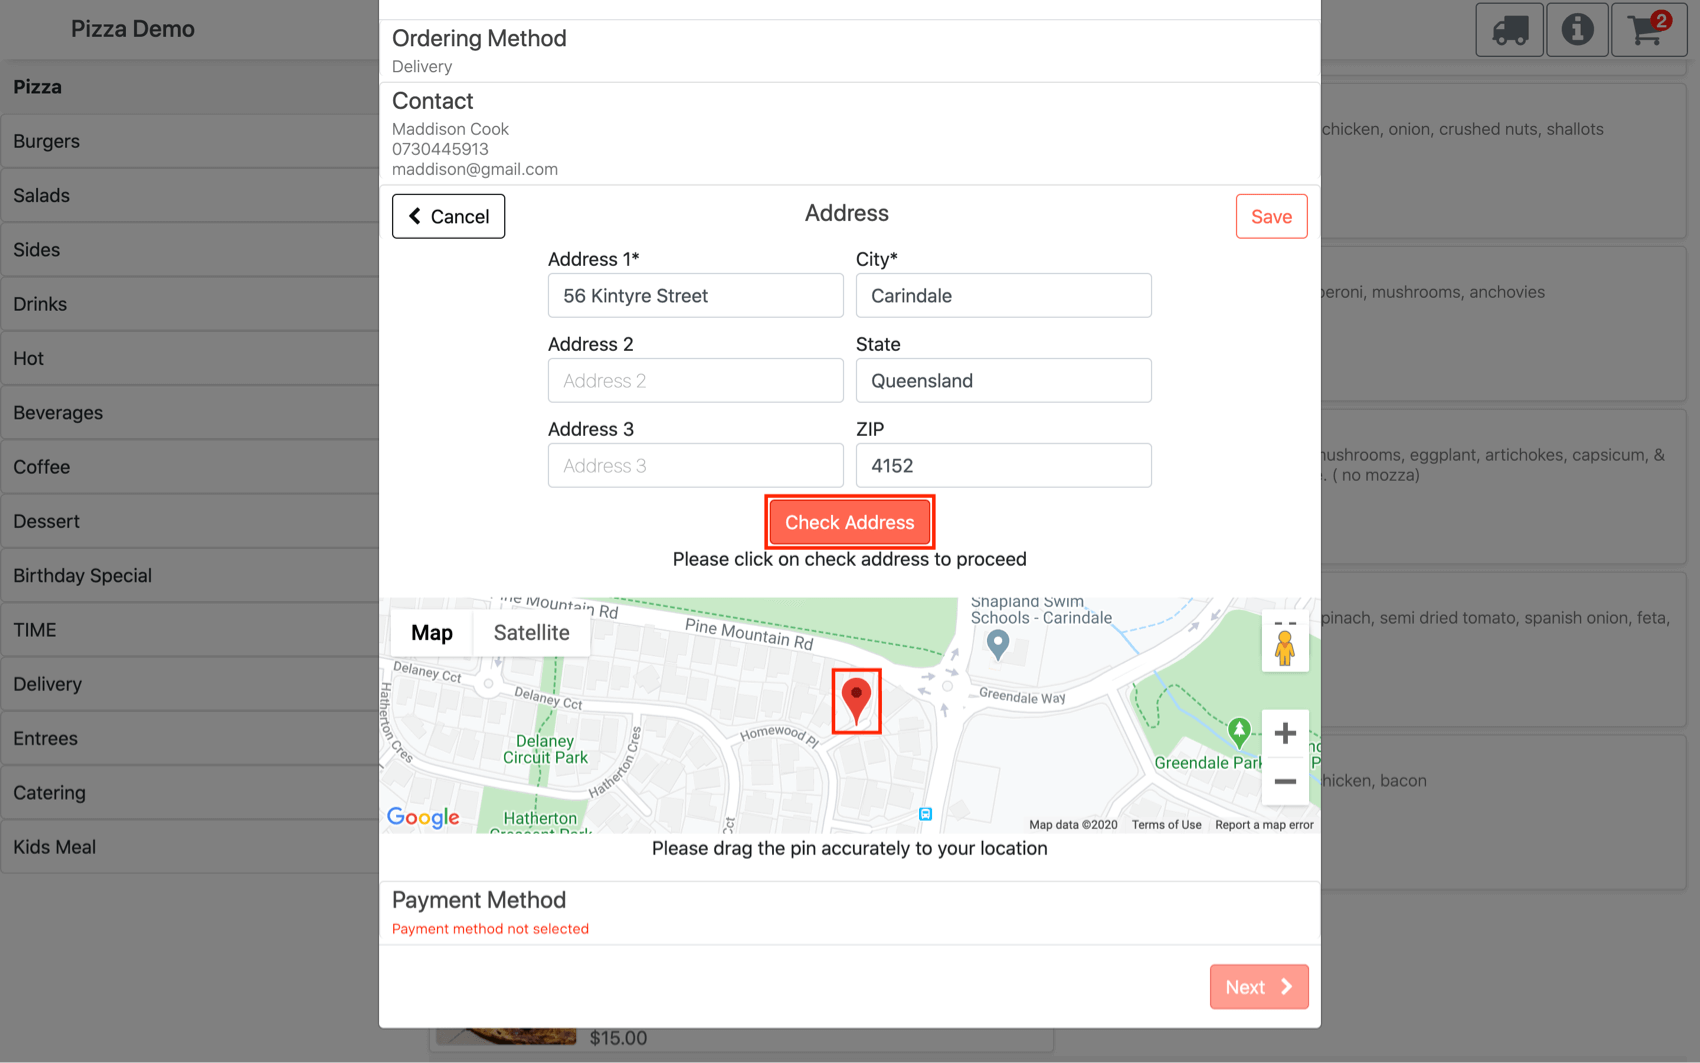
Customer's address to be filled if the delivery ordering method is chosen.
The user has to click on "Check Address" and make sure the dropped PIN location is accurate.
Payment Method
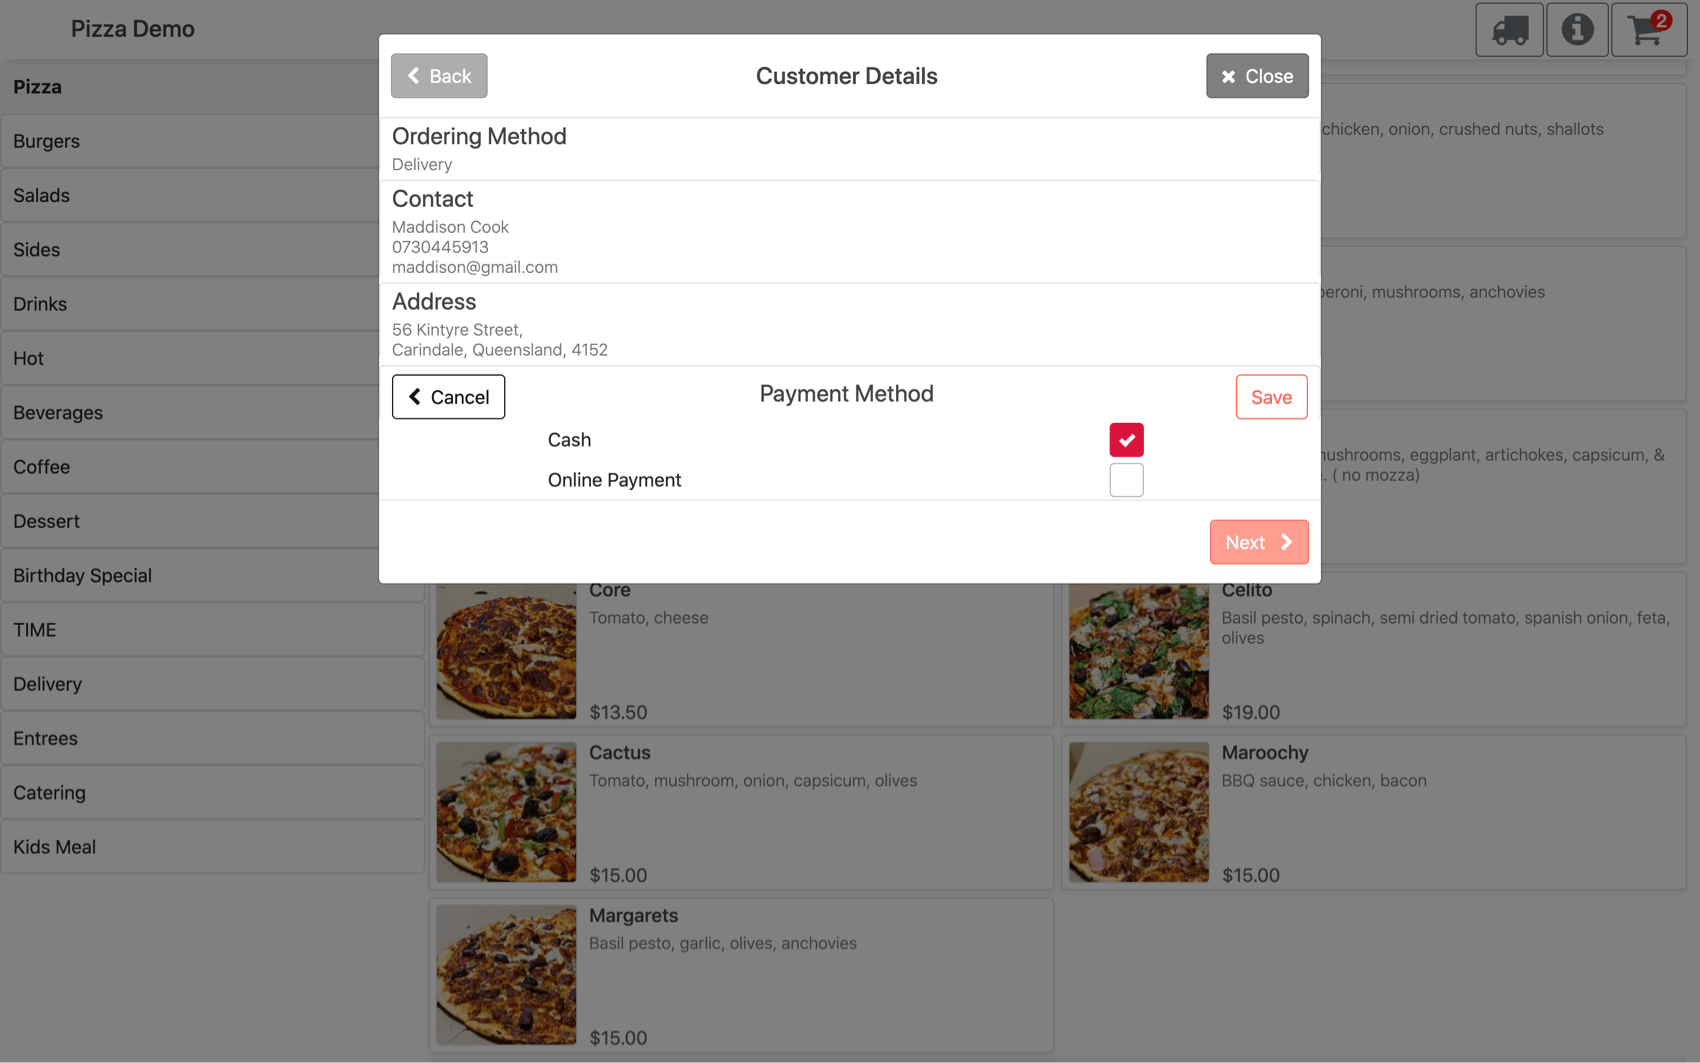
Choose the preferred payment method.
Order Summary
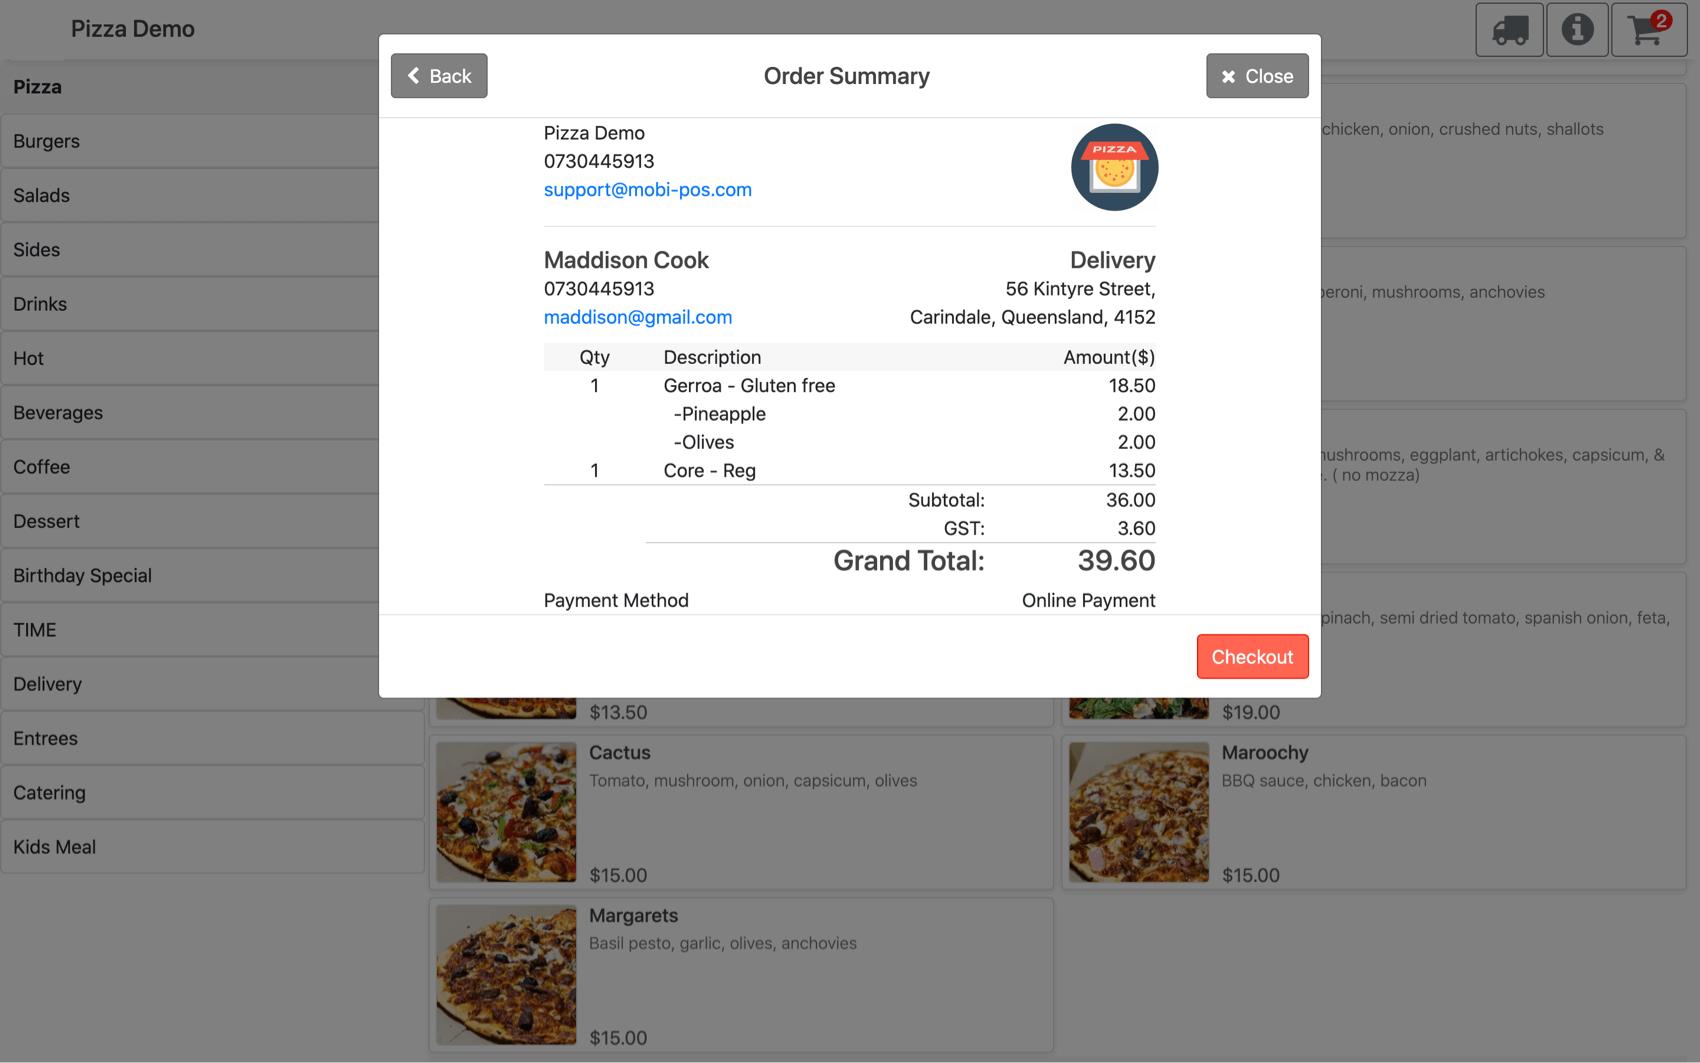
The summary of all orders, including their details.
Clicking on "Checkout" will either proceed to online payment or send the order to the POS immediately if cash is selected.
Order Pending
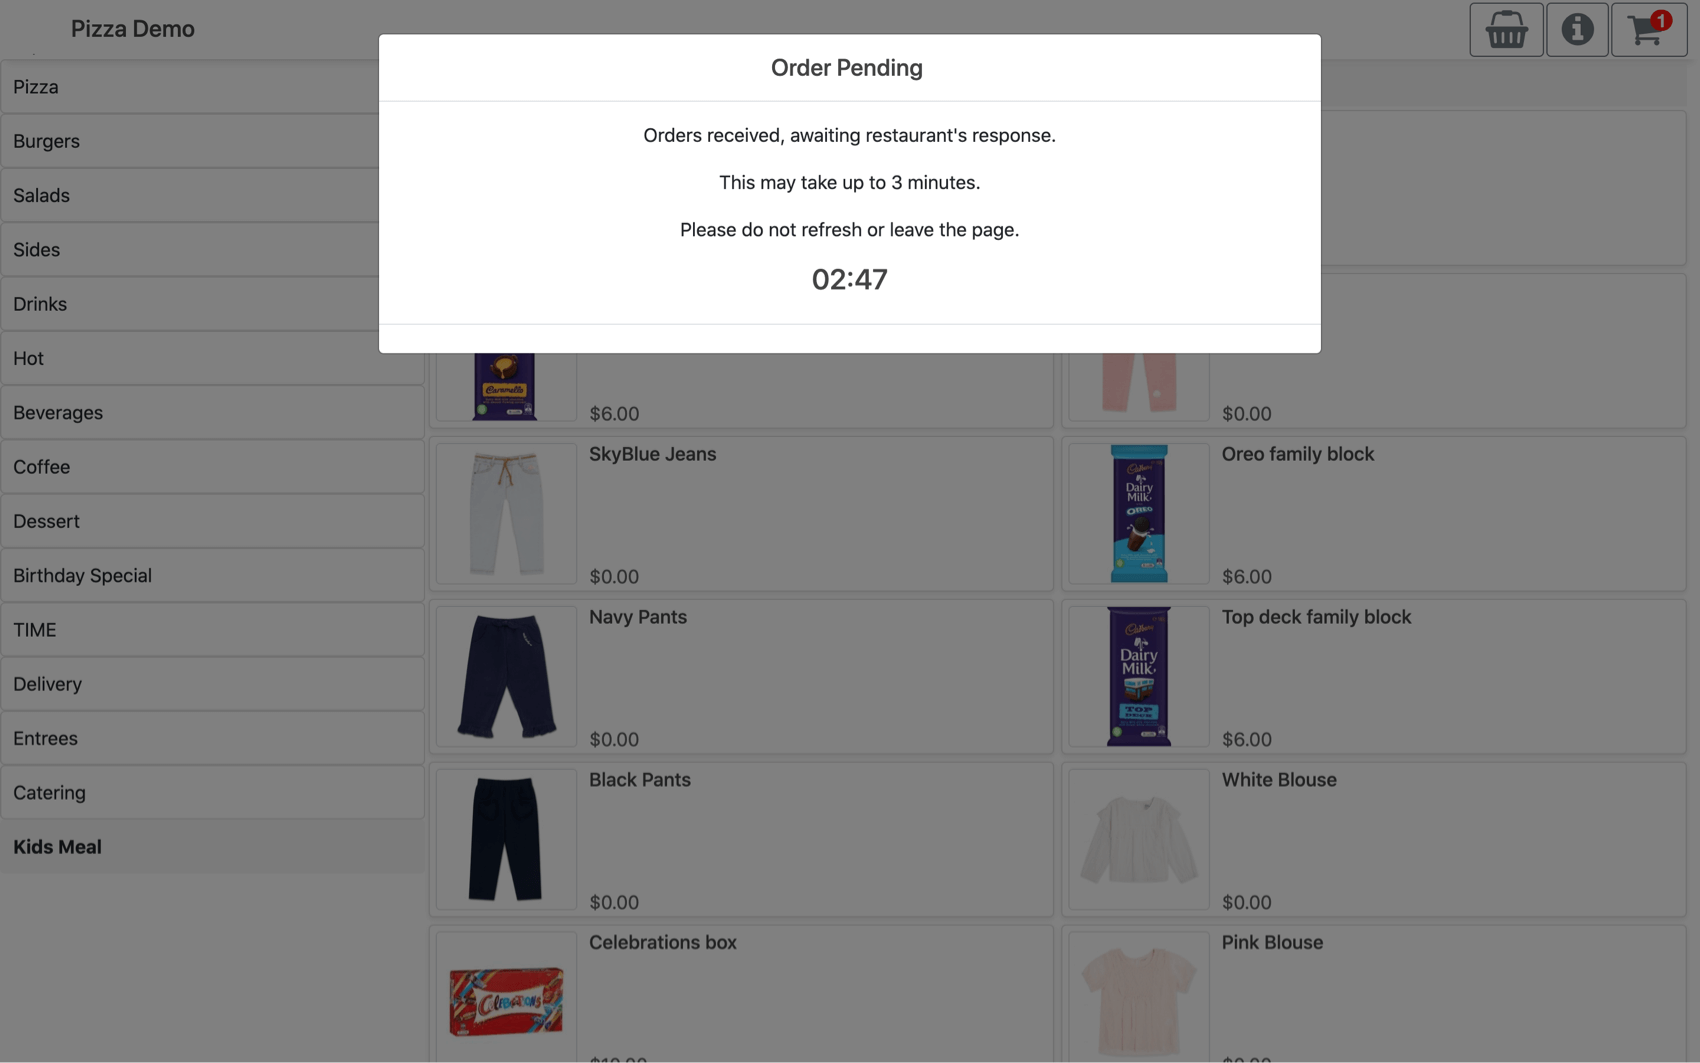
If POS receives the order, an order pending message will show, and it will wait for the store's response for 3 minutes.
Someone in the store should respond to the order by either accepting or rejecting it.
If the order is accepted, confirmation with the Order Number will be shown on the screen.
Separately, this information will be sent to the store and their email.
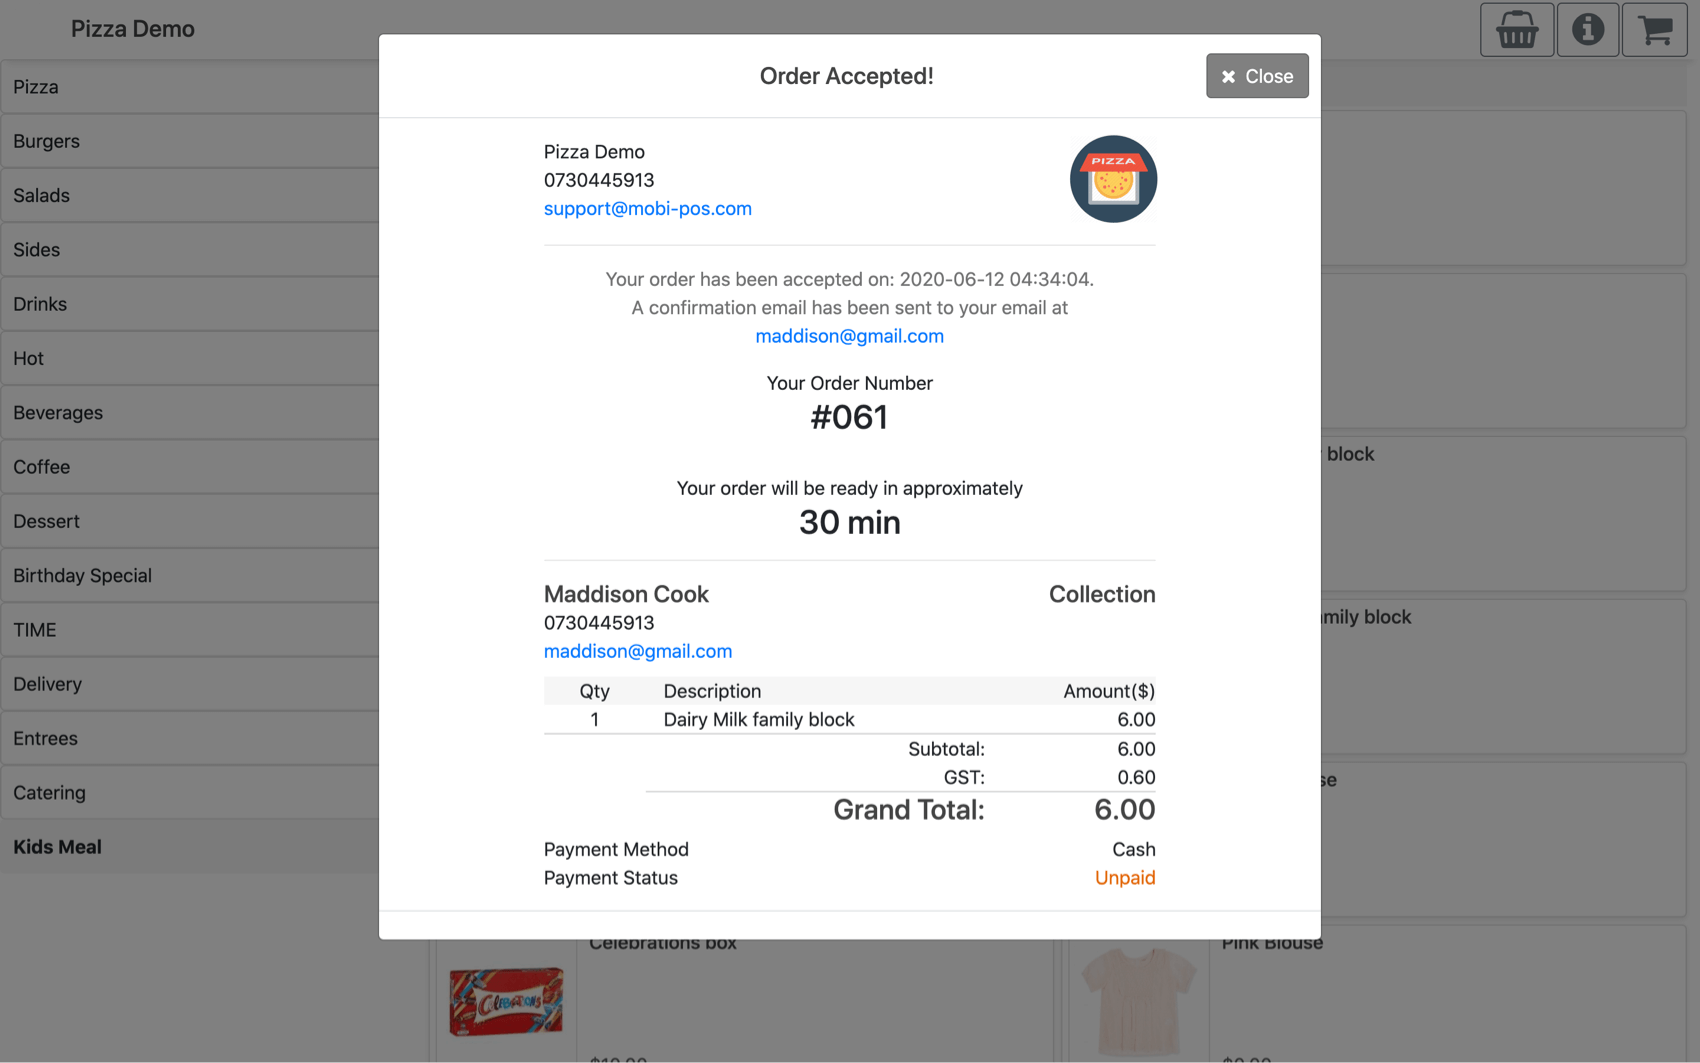
If the order is rejected, the system will display an error message that the order is returned by the store.
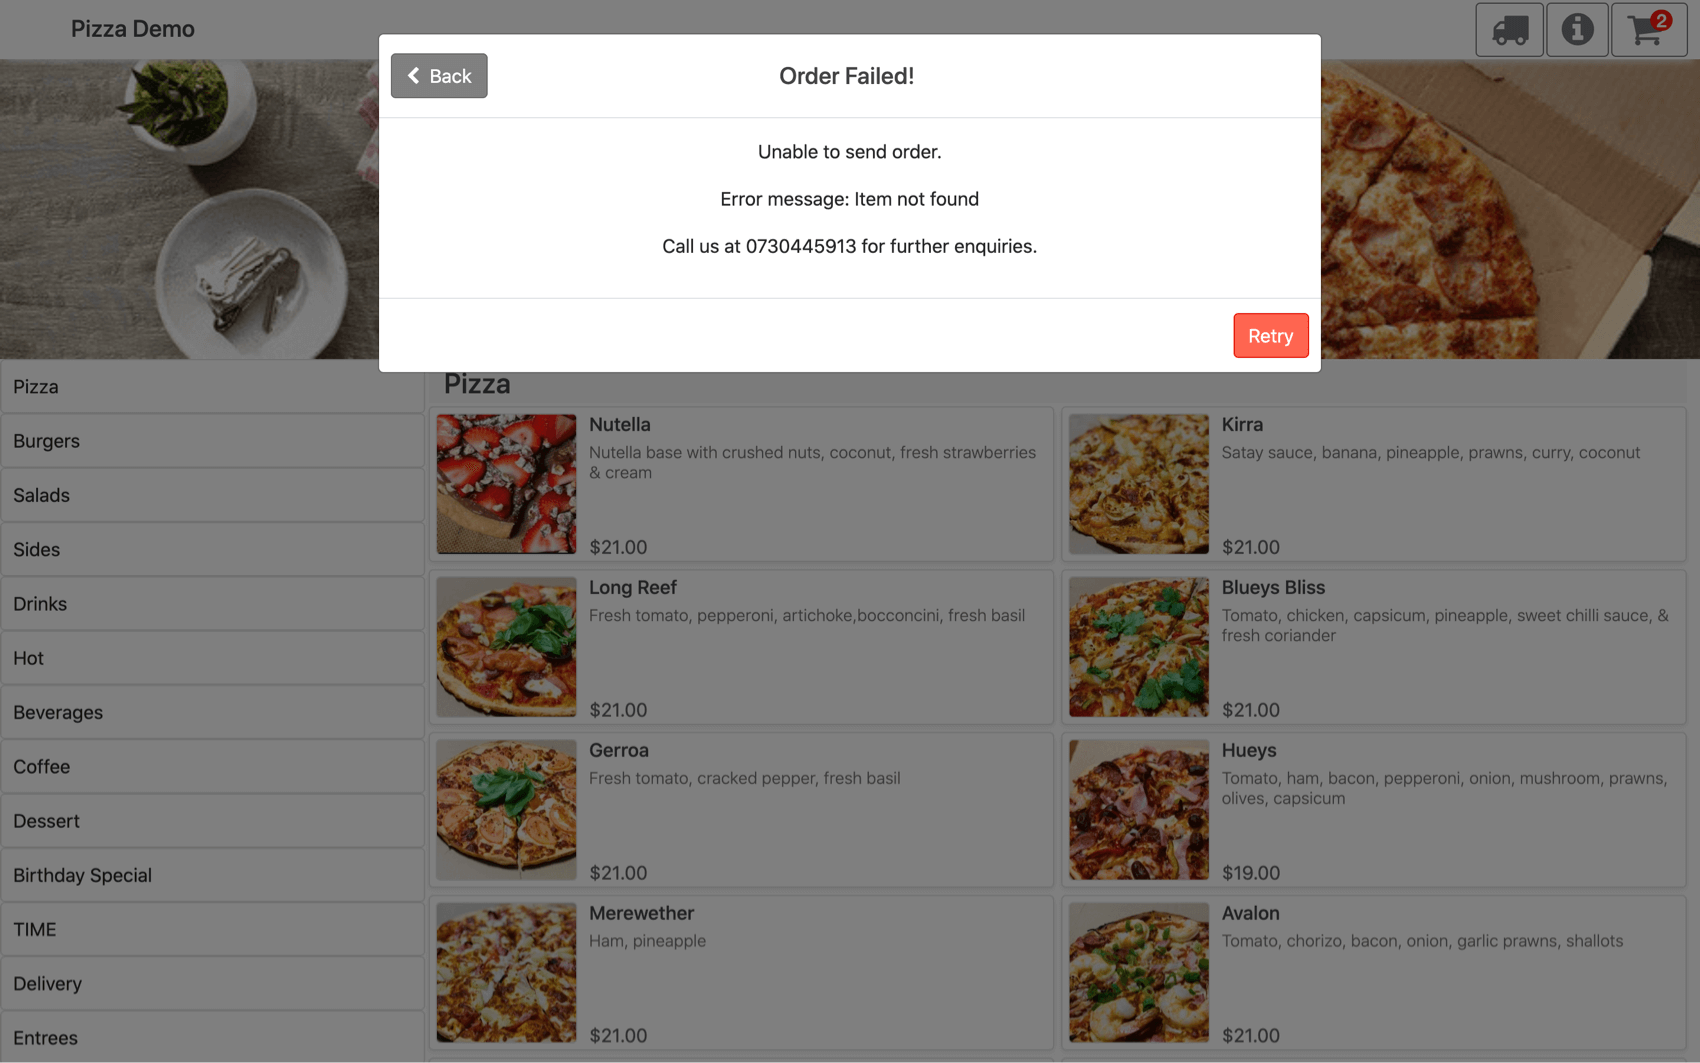
If the POS is offline or not reachable, the system will display the necessary error message.
An email specifying the reasons will be sent to the store but not the customer and representative from the store should rectify it as soon as possible.