Transferring iPad
This will guide users on the steps to transfer all data from one iPad to another.
The transfer includes all the menu data entries, images, and archive. Other than transferring data, we will guide you on how to transfer your purchased license to the new iPad.
For example, if the user wishes to transfer all the data from iPad A (existing iPad) to iPad B (new iPad), the user will first need to download a backup from iPad A, then restore it in iPad B.
The easiest way will be through CMS via Web.
Transferring App Data
Users may proceed to read this written guide or watch the video below regarding the process to backup and restore via CMS.
Upon restoring, the user should check all data is transferred successfully.
The best way is to check if the latest transaction is available in the new iPad.
Transferring App License
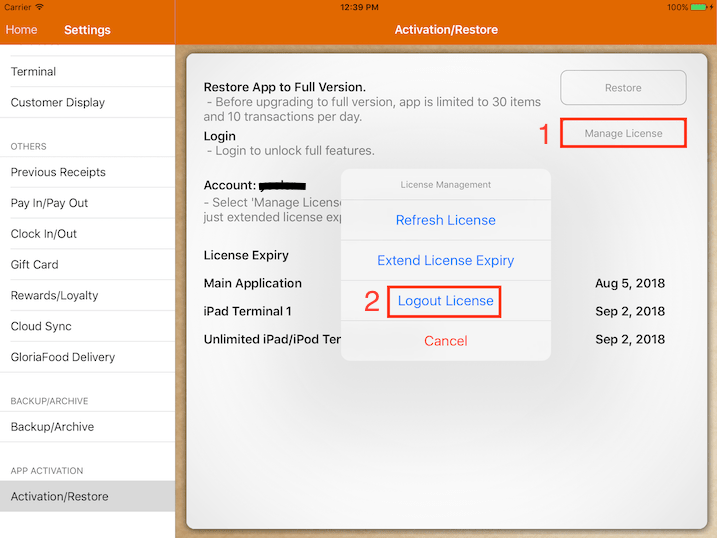
After restoring, users will need to log out the purchased license from the existing iPad to the new iPad.
To manage the license, in the old iPad, go to Settings -> Activation/Restore -> Manage License -> Logout License .

Then, on the new iPad, go under Settings -> Activation/Restore to login with the same credentials.
If you did not log out from the old iPad, you will get an error message saying "License is being used by another device".
Transferring Cloud Sync
After transferring all the data, users can start activating the Cloud Sync feature.
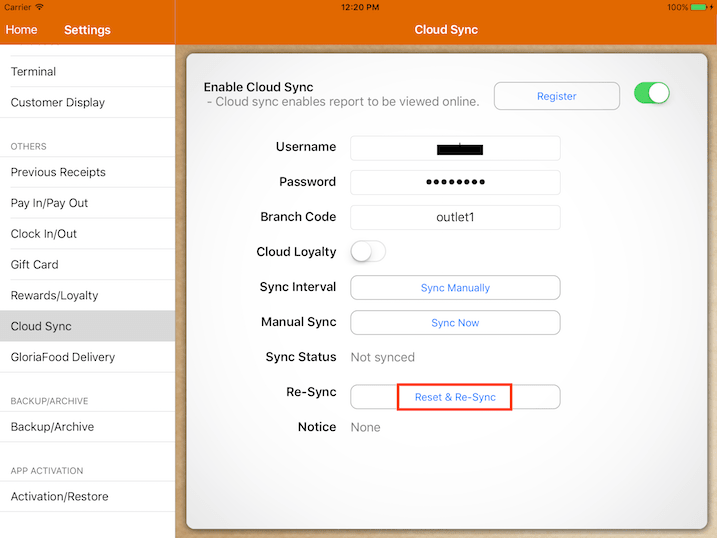
To enable Cloud Sync, go to Settings -> Cloud Sync.
First, turn off the Cloud Sync switch in the old iPad.
Then at the new iPad, fill in all the related information and turn on Cloud Sync.

Make sure the data restoration is successful before enabling Cloud Sync.
If Cloud Sync fails to enable, users can choose to reset and re-sync.
The Reset & Re-Sync feature will delete all the information online and re-upload all the data from this new iPad.